
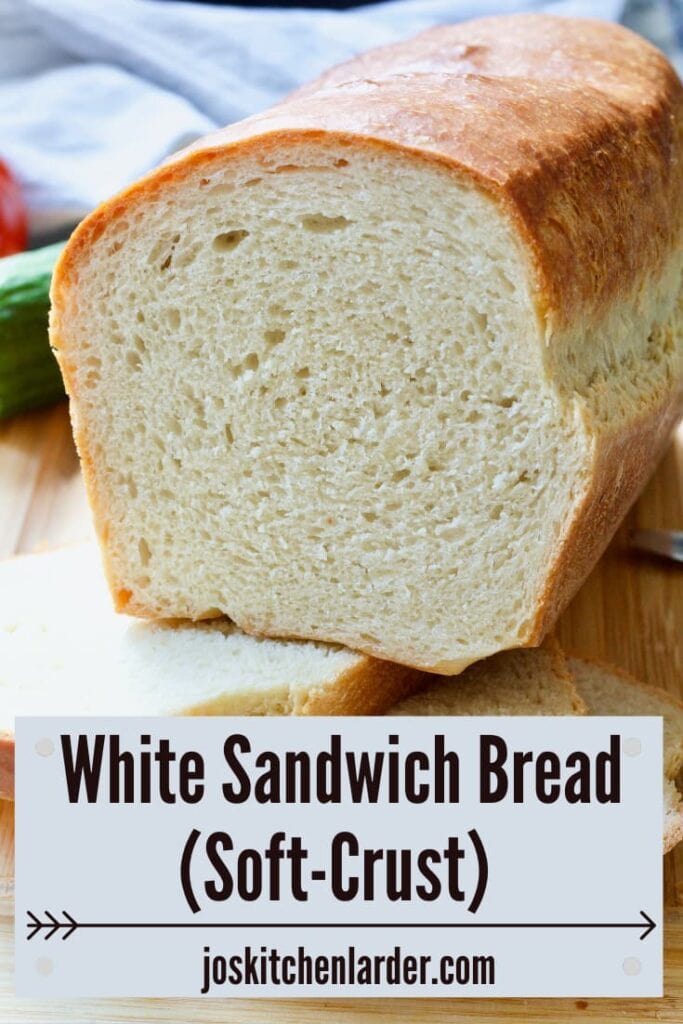
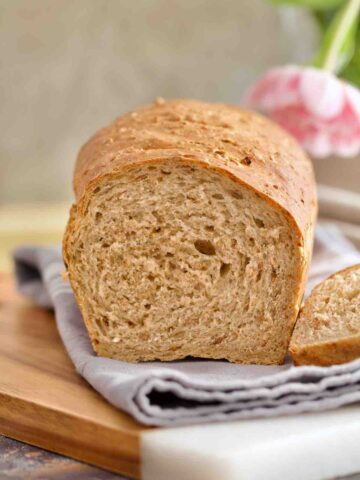
This easy white sandwich bread with soft crust makes perfect farmhouse style, everyday loaf your family will love. Best white bread recipe!
White bread has a bit of bad press but it really shouldn't, not the homemade white bread anyway.
I have a confession to make... We don't eat white bread very often. But as I am a bit of a self confessed bread addict (and to please my children) sometimes I simply can't resist.
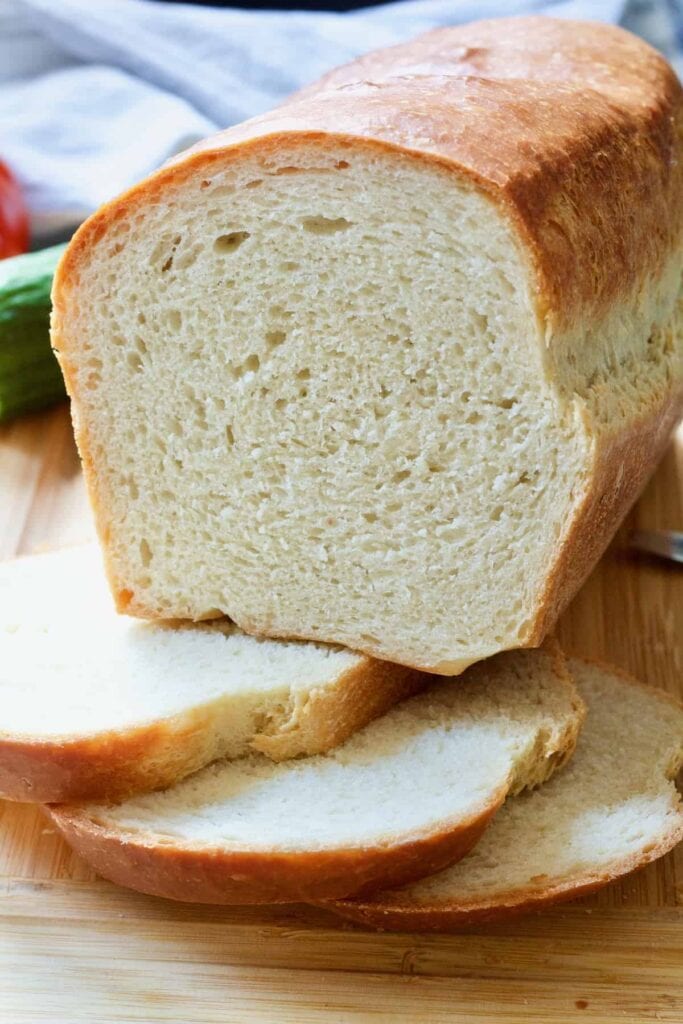
This basic, easy to make white bread recipe has become my go to when only white, farmhouse style bread will do.
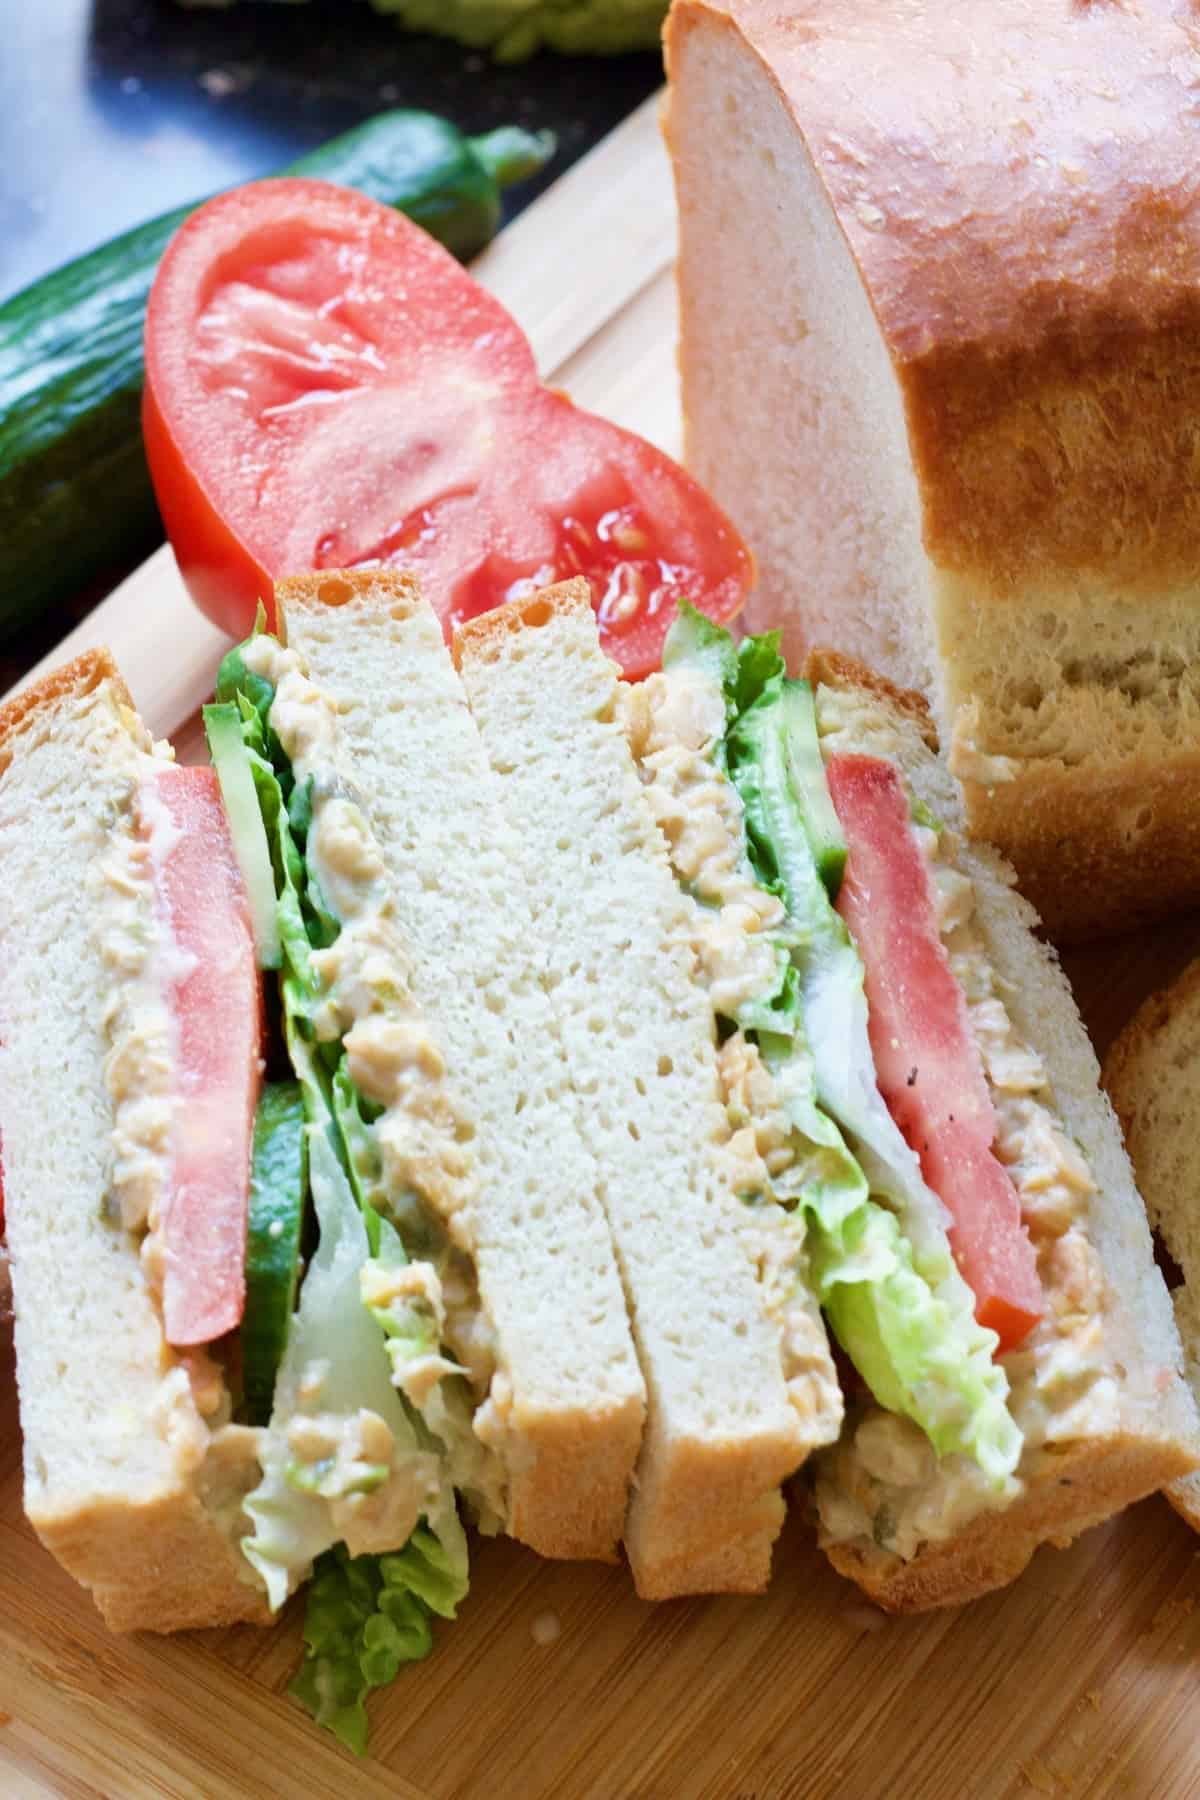
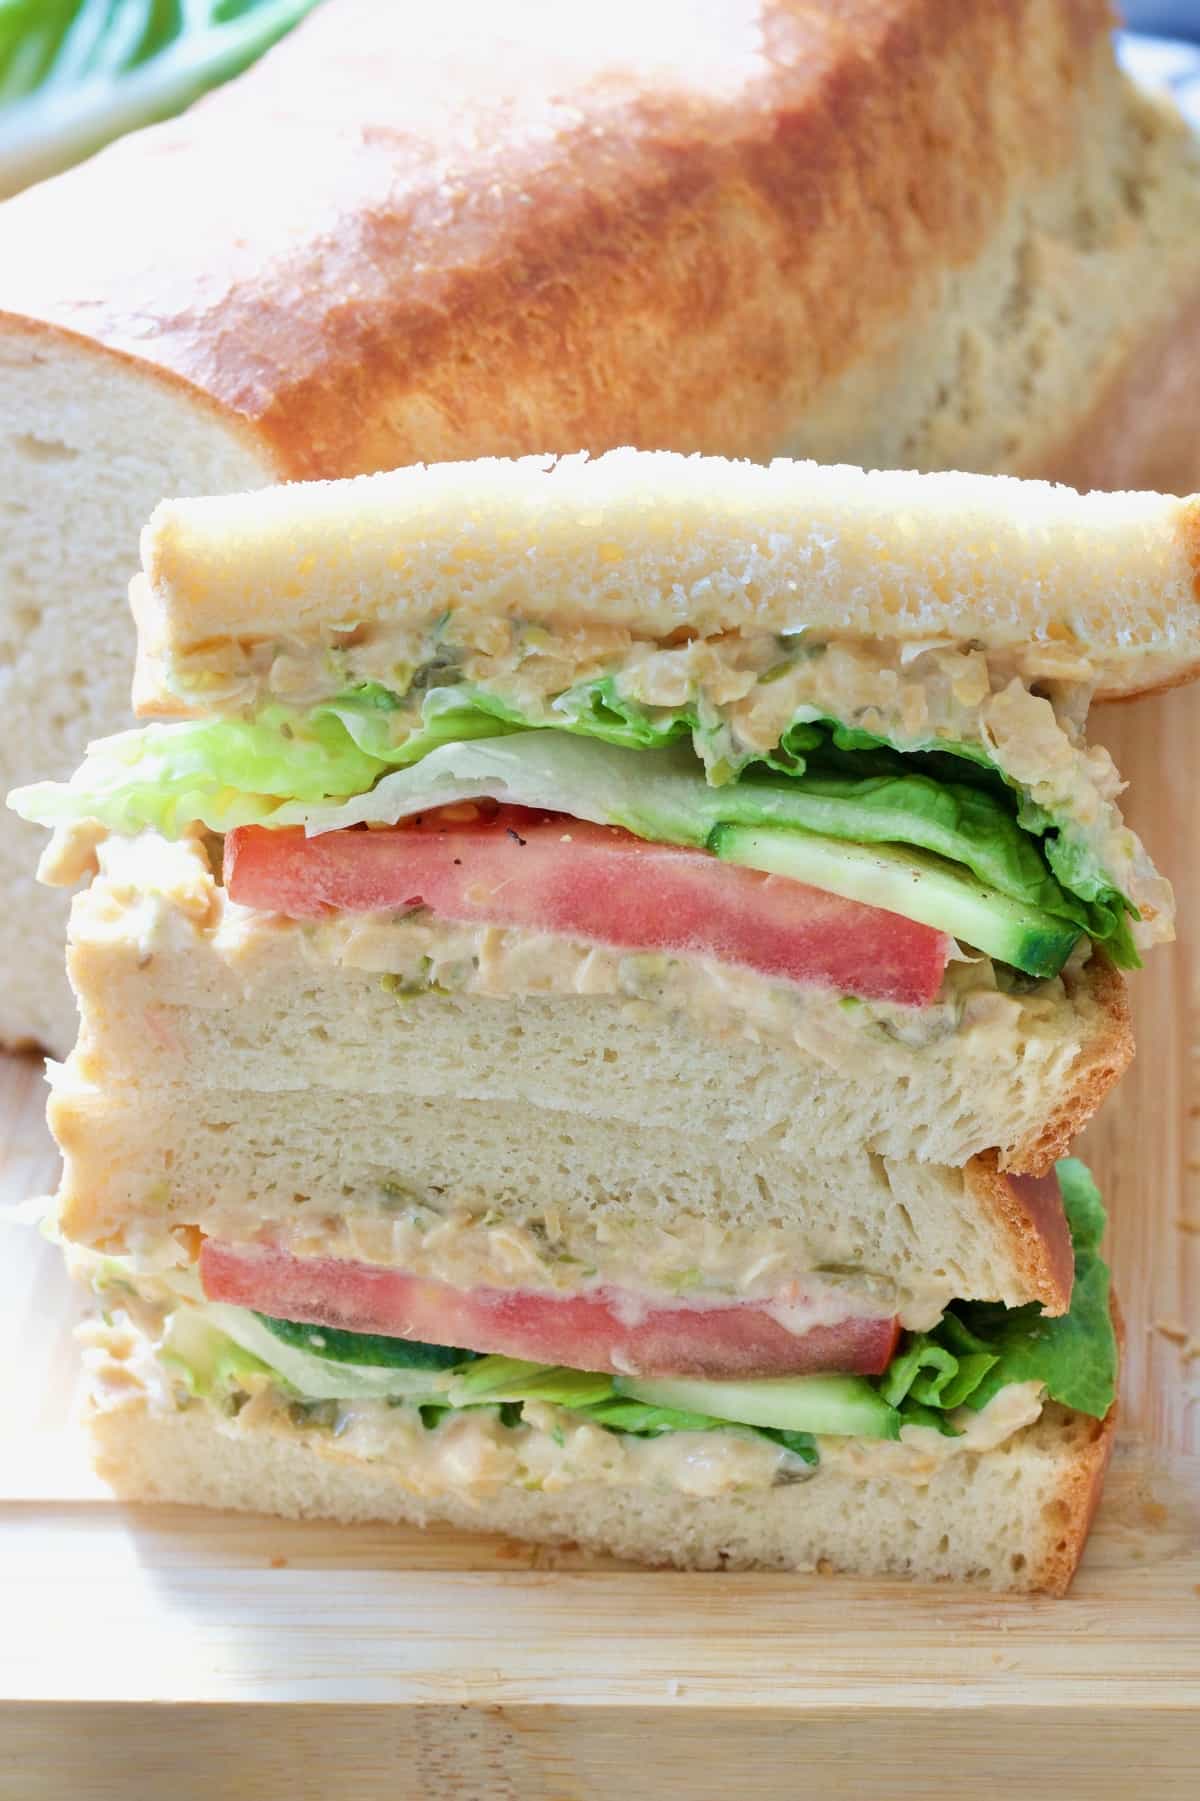
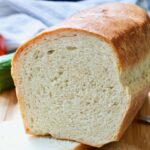
With its soft crust it makes delicious sandwiches as well as cracking toast. It really is the best white bread since sliced bread!
I based my recipe on the one by Linda Collister from her book "Bake It Better - Bread" and of course made it vegan friendly.
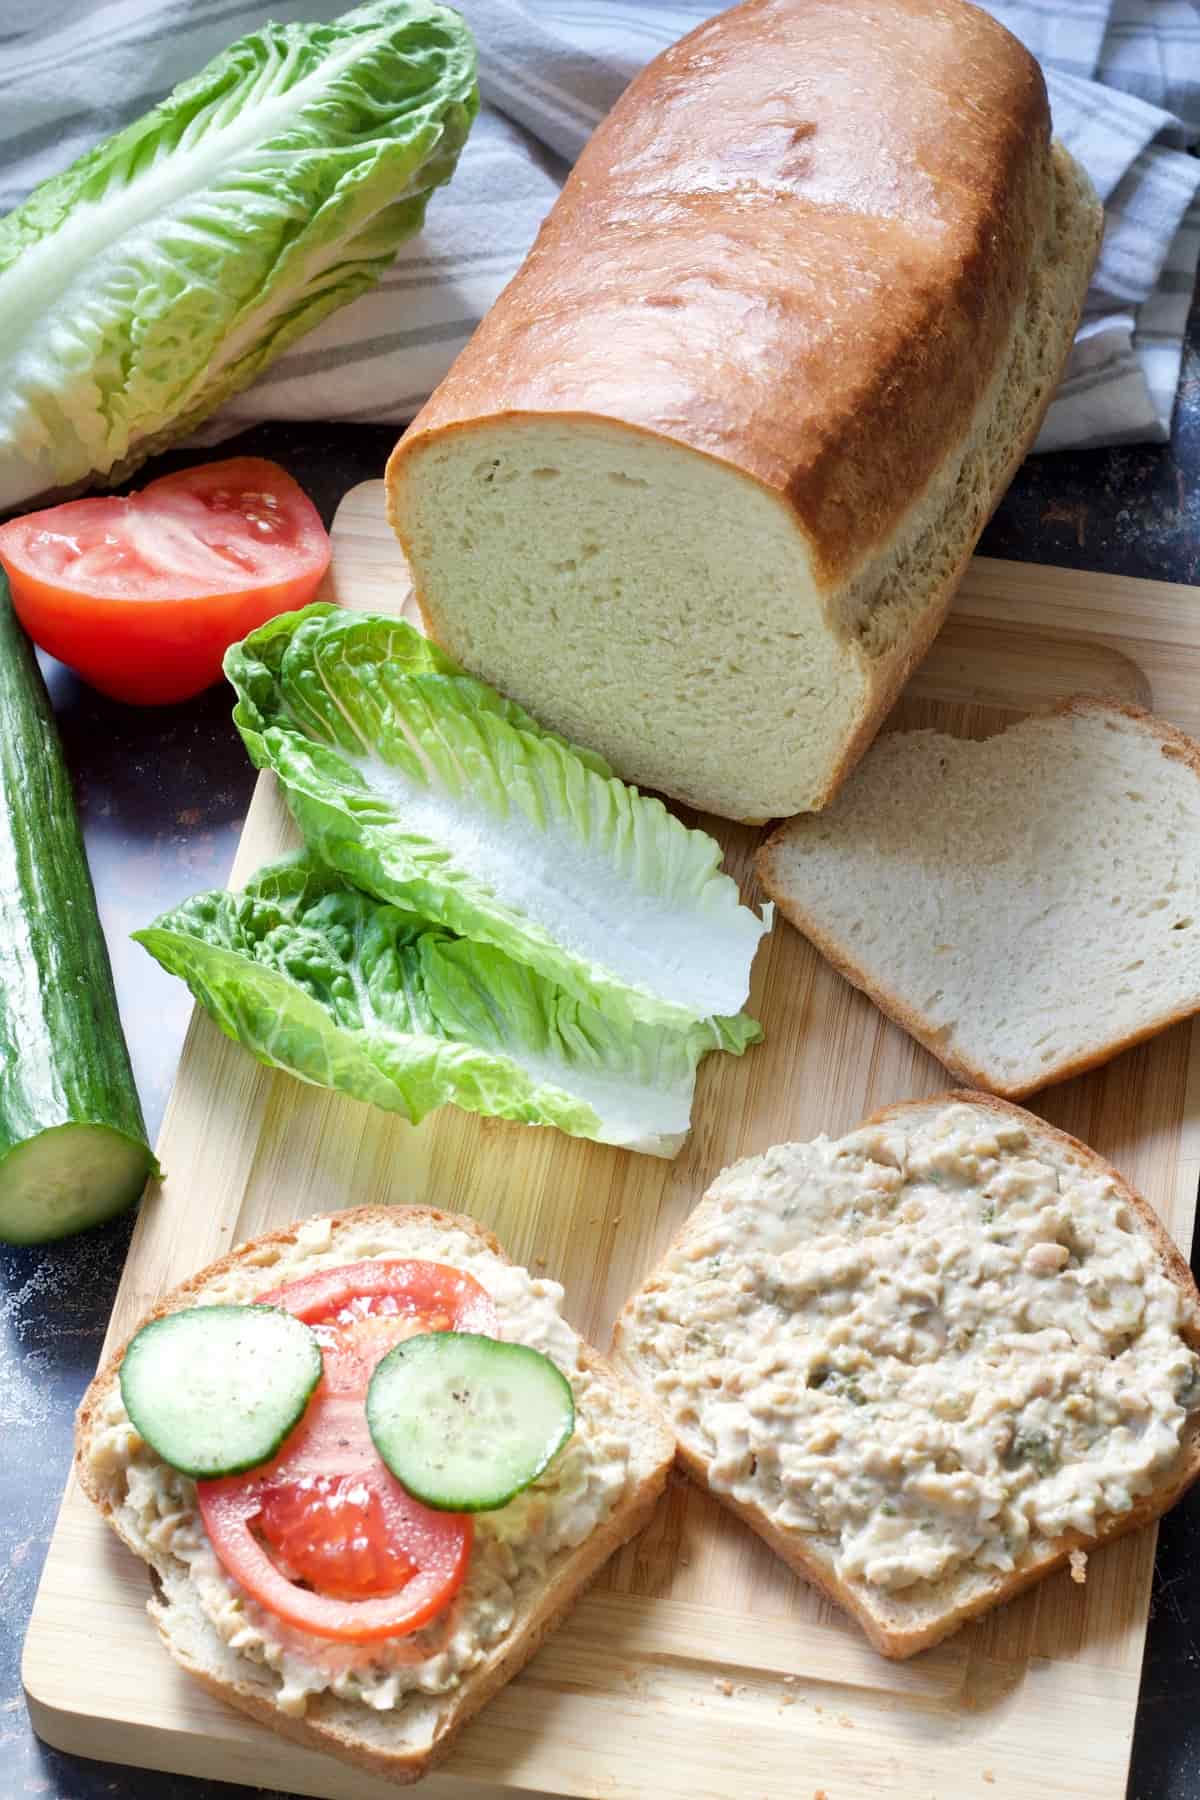
Try making a fabulous sandwich using this gorgeous white bread and my vegan egg salad with cress. Simply the best!
Jump to:
🥘 Ingredients
Strong White Bread Flour - This particular white bread recipe calls for strong bread flour. This particular type of flour contains more gluten than your standard plain (all-purpose) flour. The result is softer crumb, better rise and chewier crust. I wouldn't recommend any substitutions.
Salt - I use fine pink Himalayan salt but any fine sea salt will be nice too. I generally avoid using table salt due to added chemicals.
Dried Yeast - Fast action, quick, easy bake ones are all fine here. Ideally and to keep things easy, you want yeast that can be added directly into the flour.
Soya Milk - I find soya milk works best in baked goods although you could also use oat milk.
Vegan block butter (unsalted) - I use Flora Plant.
Golden or Maple Syrup - It acts as a binder and makes bread loaf less crumbly.
🍽 Equipment
To make a loaf of homemade bread you really don't knead any fancy equipment. There are, however, few must pieces you simply cannot do without:
Kitchen Scales - An absolute must for any home baker.
Large mixing bowl - I would recommend stainless steel bowl at least 22cm/8.5in in diameter. That will ensure plenty of room for expansion when proving your bread dough.
Bowl cover for proving - Yes you can absolutely use damp, clean kitchen towel here but I swear by my plastic elasticated shower cap I have now had for years and which I use purely for covering my bread dough when proving it.
Cooling wire rack - Another must for any keen home baker.
Non-stick 2lb (900g) loaf tin - It's a standard size loaf tin which is perfect for all types of bakes. I also have this silicone version which you don't even need to oil.
Rolling Pin - Super basic piece of equipment and again a must for home baker.
There is one piece of equipment that is completely optional and makes for quite an investment. I found it to be a game changer though especially if you bake a lot. Personally, I can't imagine being without it - stand mixer.
I've got this kMix Stand Mixer (not sponsored) bought in 2010 and have been using on weekly basis ever since. Having dough hook as one of the attachments makes kneading bread dough a breeze and I love it.

💭 Top tips
- Keep salt and yeast separate when adding them to flour as salt "kills" the yeast. Either put them on two sides of the bowl or mix flour and salt first and add dried yeast afterwards.
- When heating up milk make sure you heat it up to lukewarm temperature of roughly 35C/95F (digital food thermometer comes handy here). You should be able to dip your little finger in the liquid and just feel warmth. Warm liquid will help to activate the yeast. If you get it too hot, wait until it cools down as hot milk will have an opposite effect on the yeast.
- I find the amount of liquid to be pretty spot on. However, we all use different flours therefore you might need to add either drop more milk or flour when kneading.
- Prove your bread dough somewhere warm and draught free. In the heat of summer you should be fine leaving it covered on the kitchen counter but as temperatures cool down, I find my airing cupboard works a treat.
- Don't skip the butter on top of your loaf as it helps keeping it nice and soft. However, if you really don't want to use it, try covering the loaf with a clean tea towel instead. Do it as soon as your bread is out of the oven. This will create humidity that will soften the crust.
🥡 Storing and Freezing
This lovely white bread loaf lasts pretty well if kept well covered (even up to 5 days).
I found we don't even need to toast it until about day 3. No harm in doing so though as it does make a wonderful breakfast toast!
As with most breads it is freezer friendly (for up to 1 month). You can either freeze the entire loaf or individual slices. Simply pop them into freezer safe bag to take out as and when you need it.
Top Tip: You don't even need to defrost your sliced bread if all you want is a toast. Simply pop it into the toaster straight from the freezer!
🍴 Serving suggestions
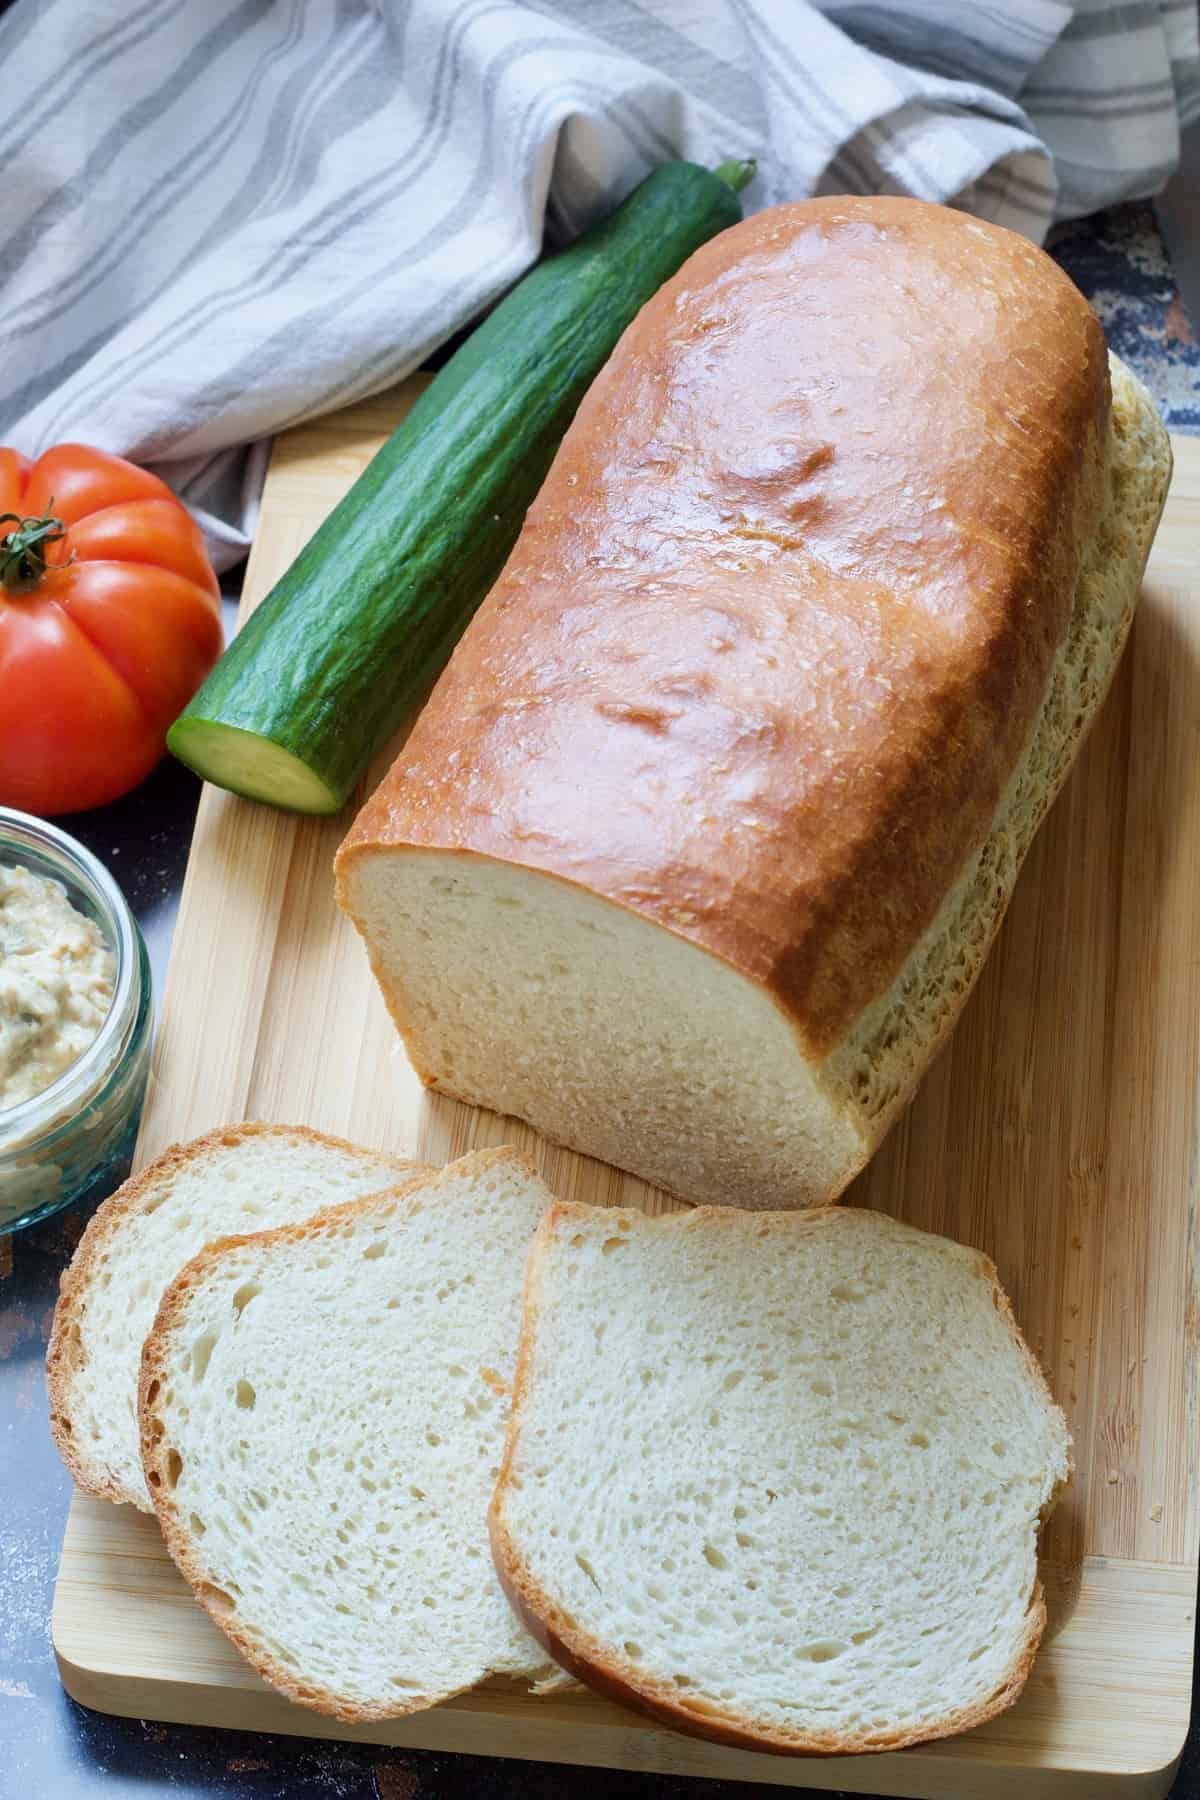
From breakfast to lunch and even dinner (if you prefer soft rather than crusty loaves), this easy white sandwich bread couldn't be more versatile.
Try it with my easy blackberry jam or tangy orange marmalade at breakfast, your favourite sandwich filling at lunch and as a side for dinner.
It will pair nicely with a bowl of your favourite soup (try my Leek and Potato Soup with Celeriac or summery Roasted Tomato and Fennel) and as an accompaniment to a hearty salad (check out this Buckwheat & Beetroot Salad with Chickpeas or Warm Potato Asparagus Salad with Lentils).
📖 Variations
Even though it's an easy white sandwich bread recipe, I want to let you in on a little insider tip!
I often use this very recipe to make a wholemeal bread by simply substituting half the amount of strong white bread flour with strong wholemeal flour.
Stick to equal amounts of both flours to ensure you not only get some extra fibre but also keep the loaf light and fluffy.
If wholemeal loaves are you go to then check out my Easy Wholemeal Bread (No-Knead) recipe which has already been tried and tested by so many of you.
🔪 How to make Easy White Sandwich Bread - Step-By-Step Instructions
Ingredient quantities & detailed instructions to be found in recipe card at the bottom of the post.
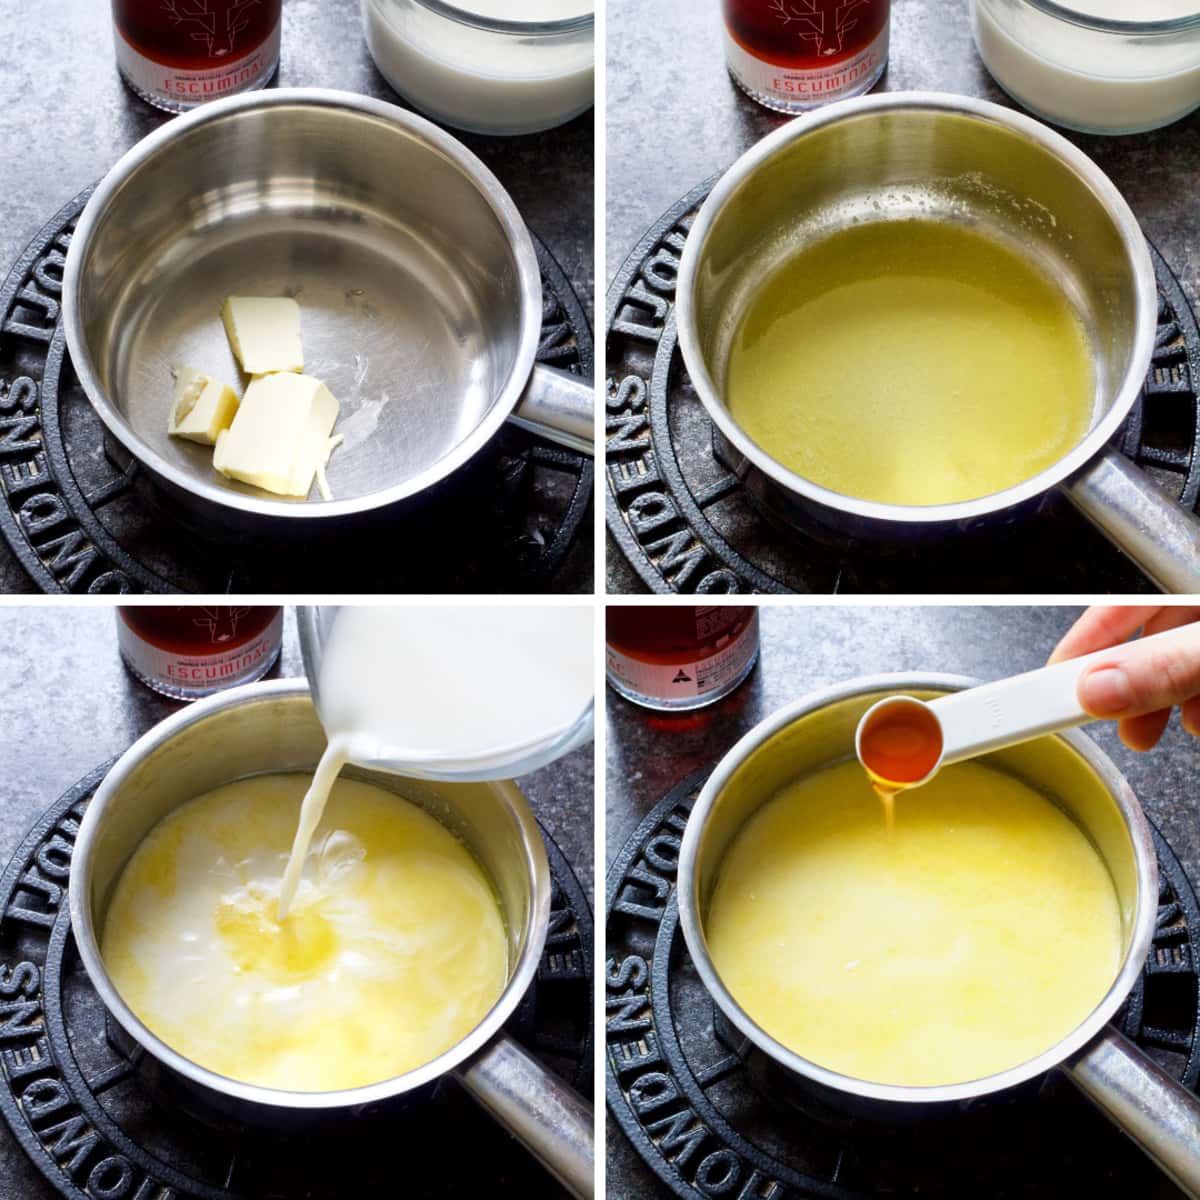
One: Put vegan butter in a small saucepan and melt it over low heat.
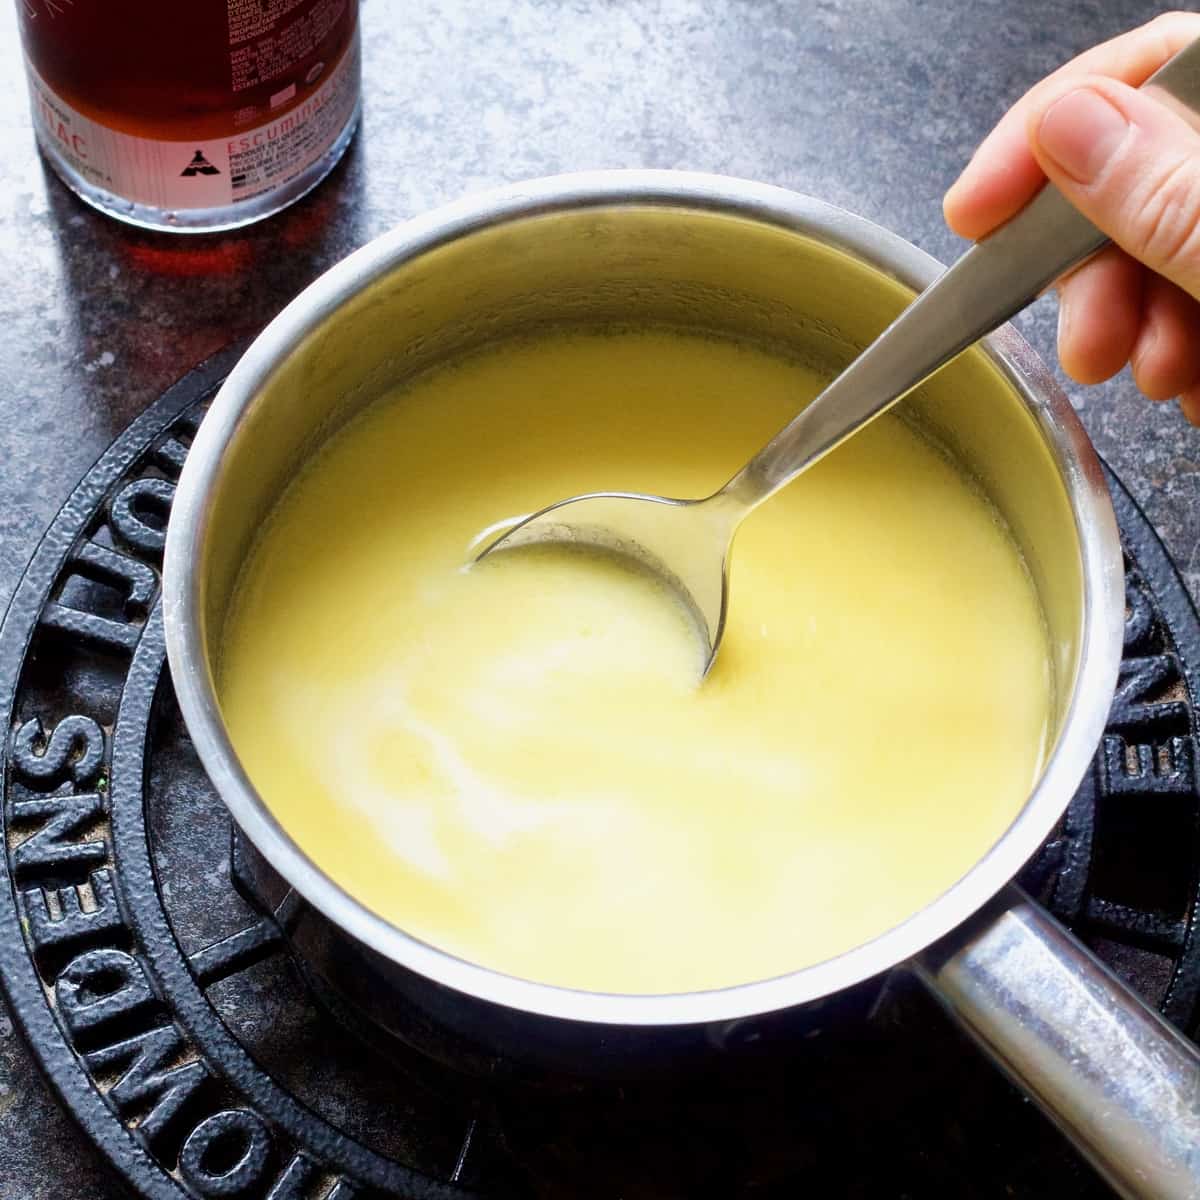
Two: Add soya milk followed by maple (golden) syrup and give it a quick stir over a low heat to ensure that milk warms up a little (becomes lukewarm to touch). Set aside.
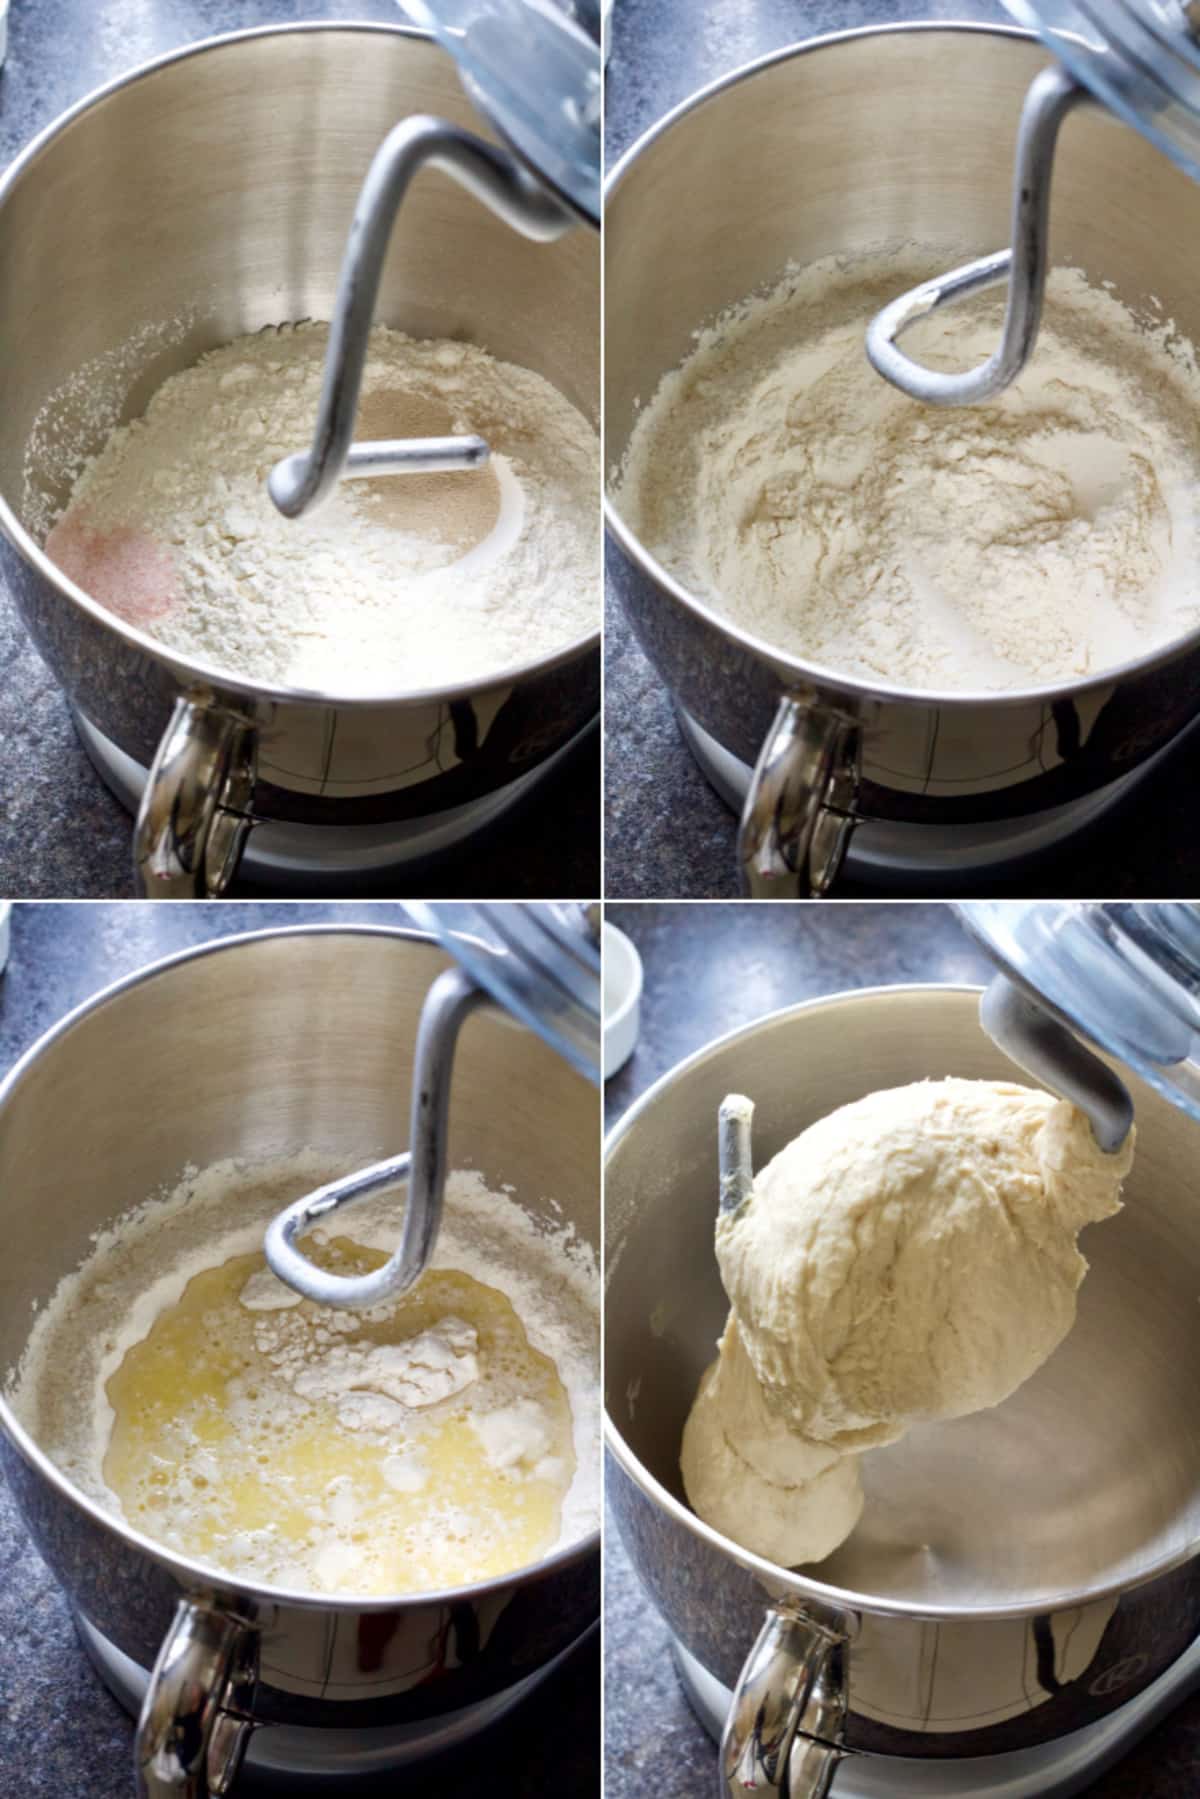
Three: Put the flour, salt and yeast in a large mixing bowl or bowl of your stand mixer and give it gentle mix to incorporate the two into the flour. Ensure that when you add both salt and yeast into the bowl you keep them on separate sides.
Four: Make a well in the centre of the bowl and add lukewarm milk mixture.
Five: Using your hand or dough hook (if using mixer) start incorporating milk into the flour until dough starts coming together (you might need to stop your mixer couple of times initially to help and move the flour sitting on the walls of the bowl into the wet mixture).
Six: If kneading by hand, tip the dough out onto lightly floured counter and knead for approximately 10 minutes. If using dough hook and stand mixer knead the dough on the low speed for approximately 5 minutes until dough feels smooth and elastic.
If dough feels dry and you've still got lots of loose crumbs at the bottom of the bowl then add tiny bit more milk, drop at a time. For wet and sticky dough add a sprinkle of flour instead.
Seven: To check whether your dough has been kneaded enough and is ready for proving press it gently with your finger. If it springs back slightly it's ready, if it doesn't knead for a bit longer.
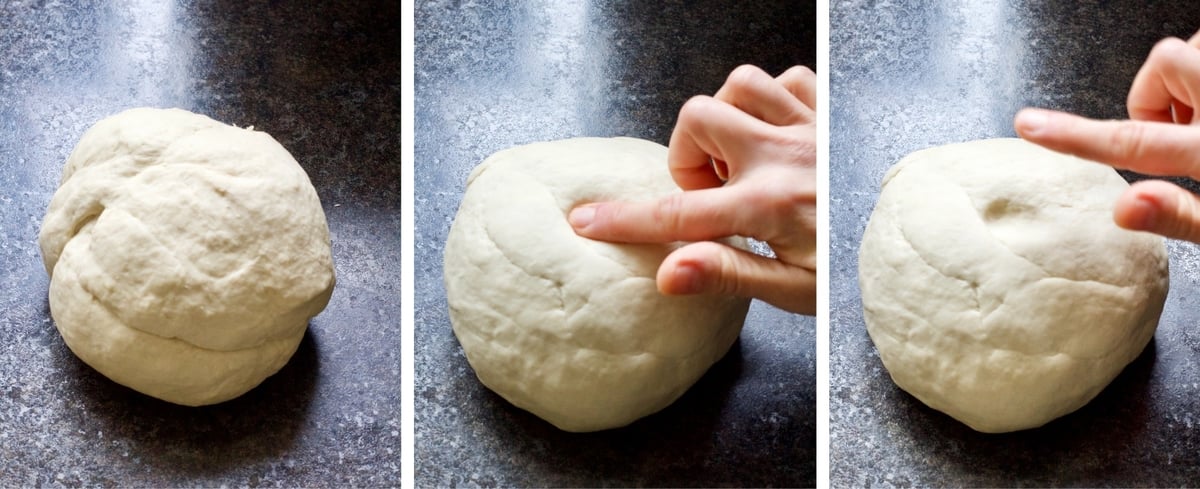
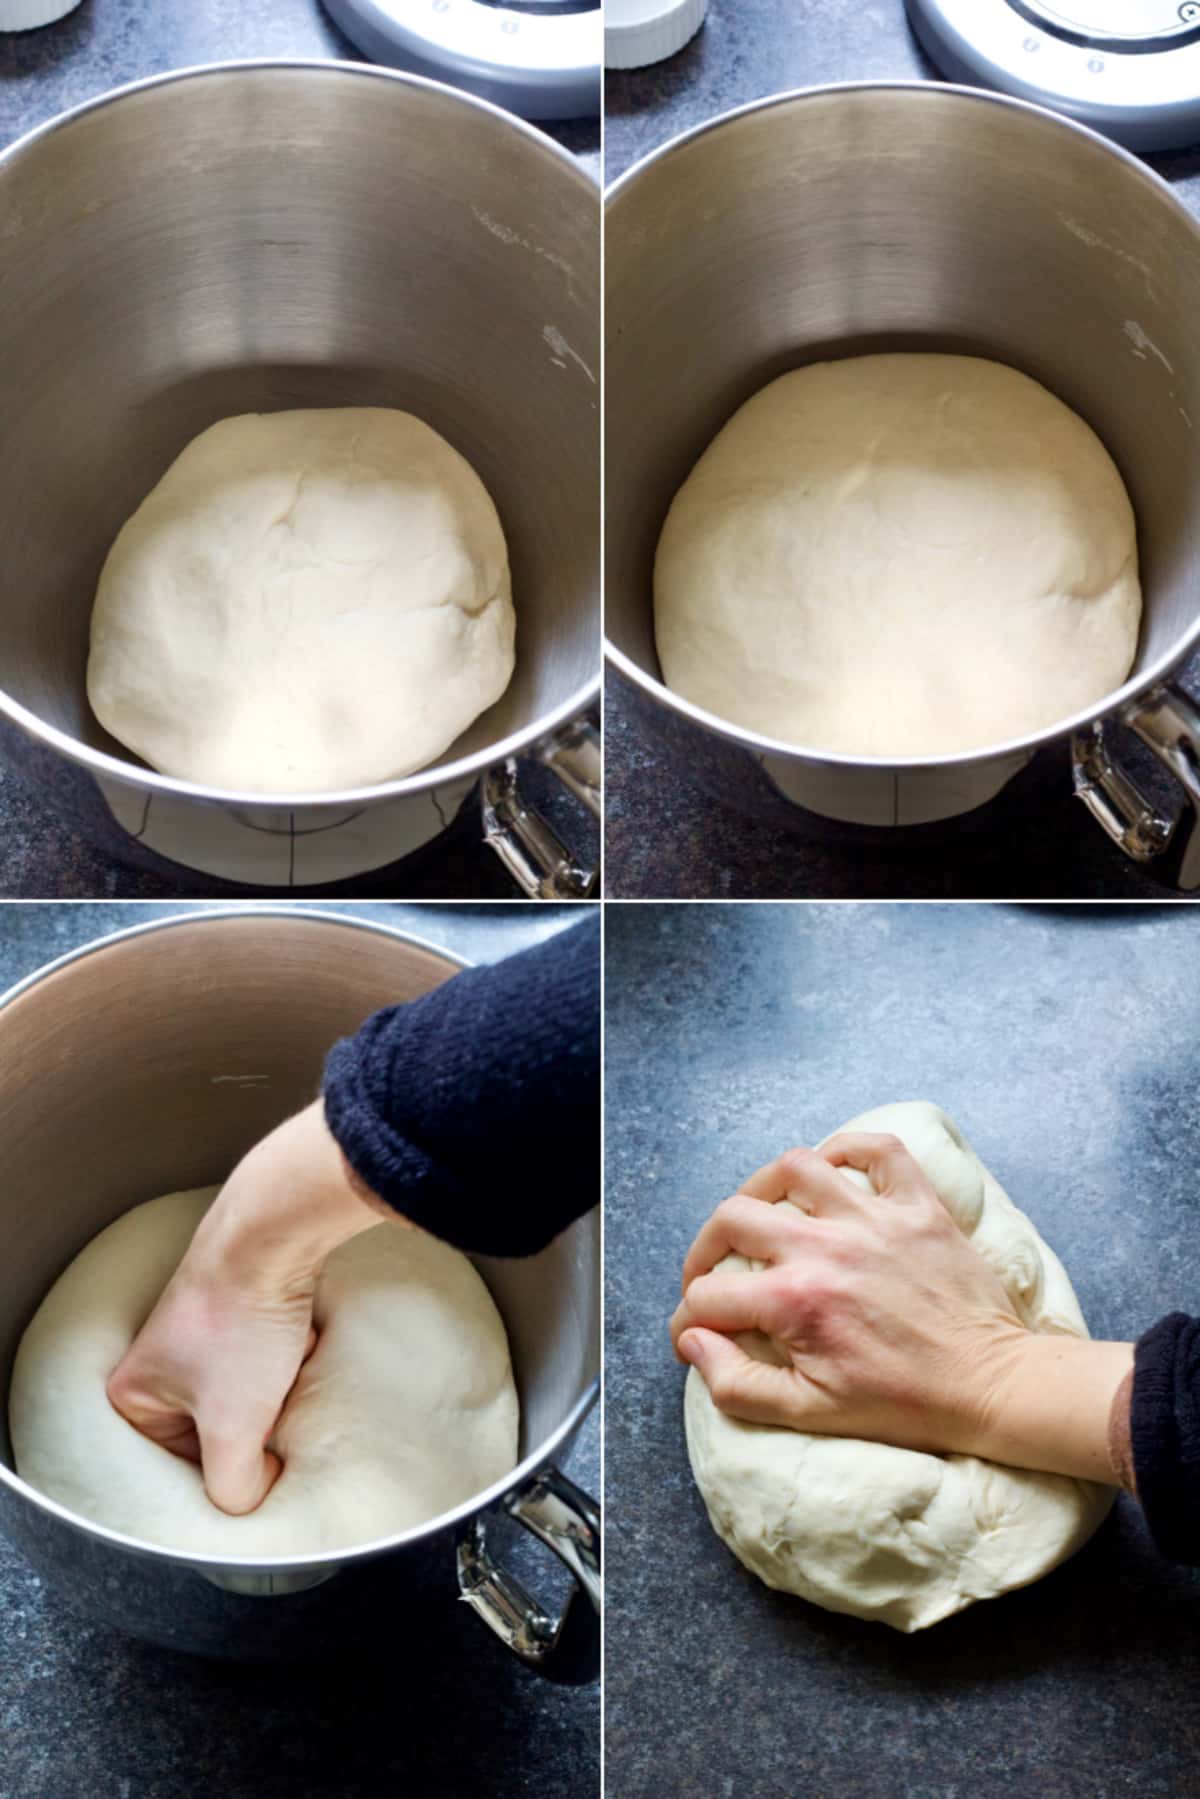
Eight: Once your dough is ready, put it back in lightly oiled bowl, cover and place in a warm and draught free place until doubled in size (1-2 hrs).
Nine: When ready, knock back the dough with a punch to deflate it, turn it out onto the counter and give it a very quick knead.
Ten: Prepare 2 lb loaf tin by greasing it very lightly with some oil, set aside.
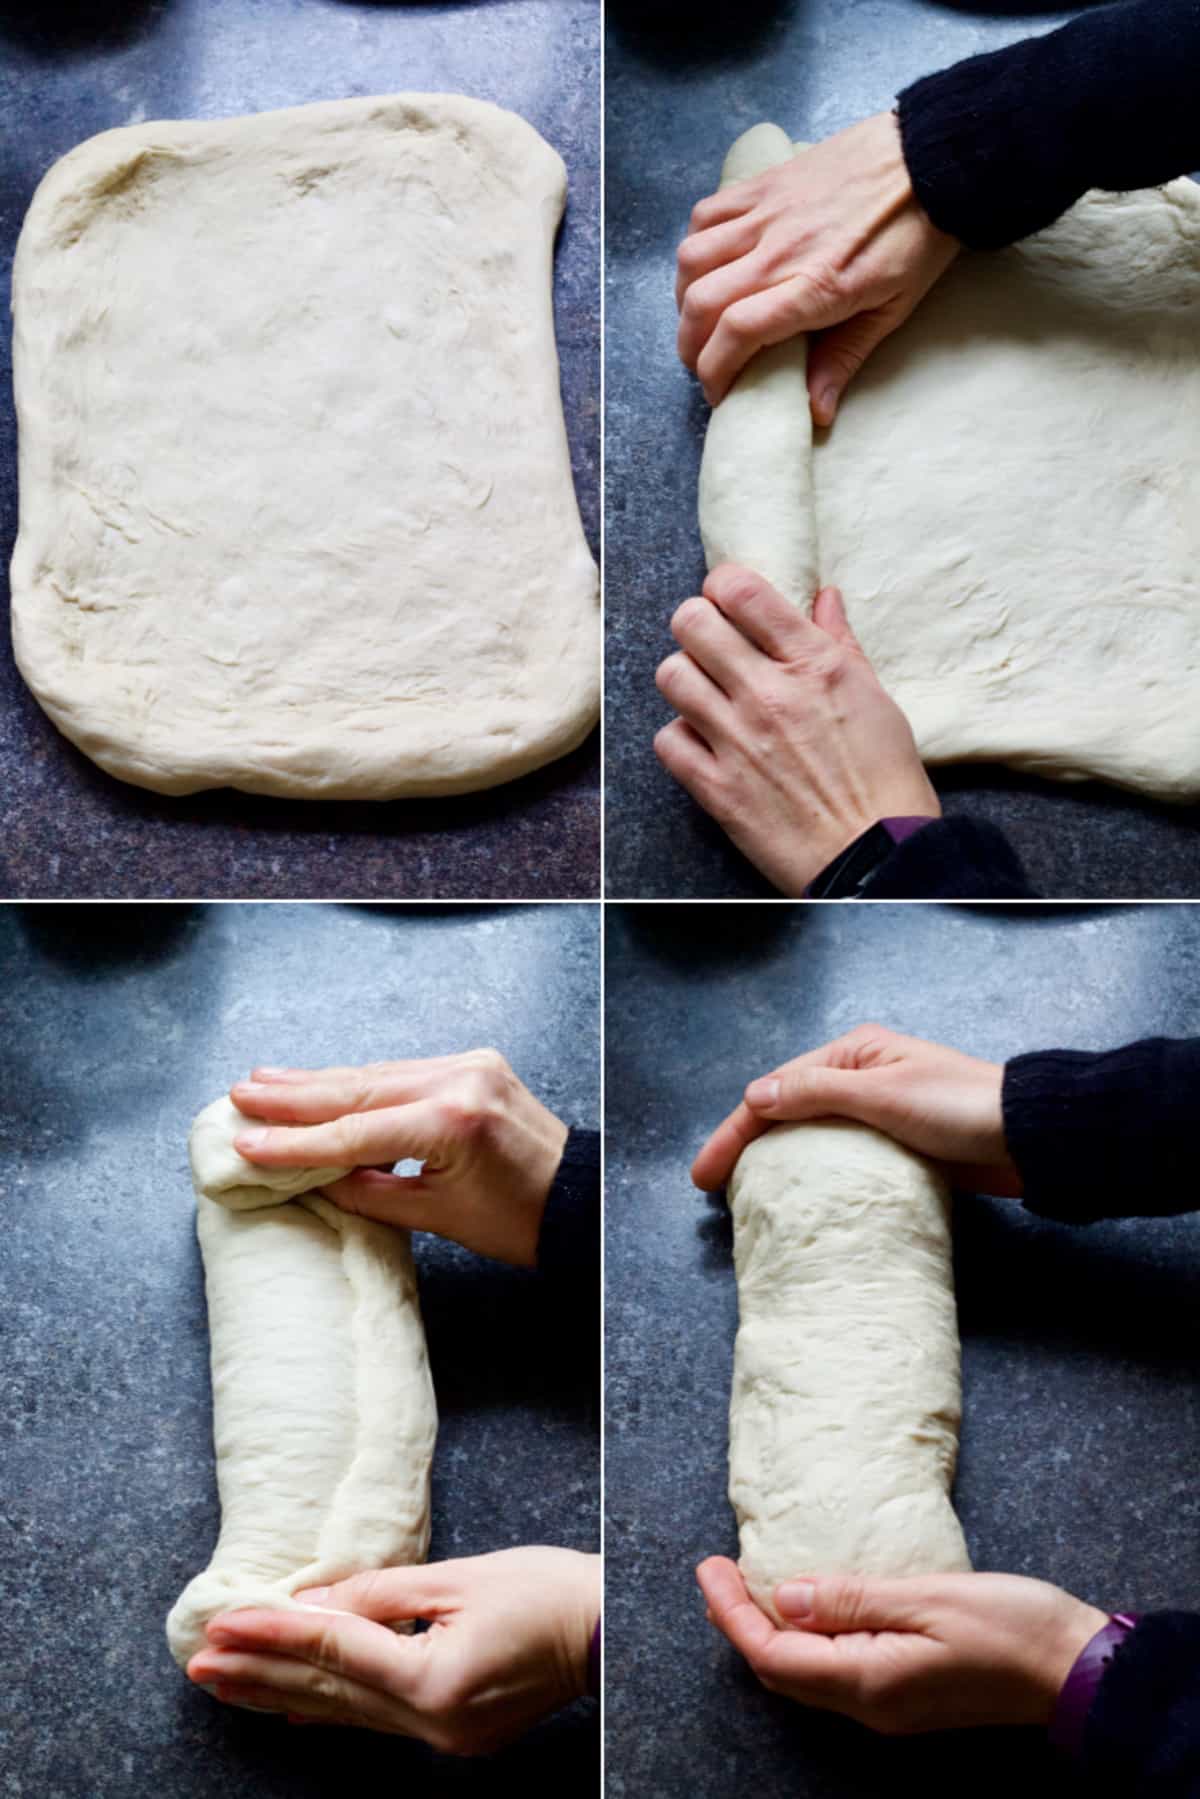
Eleven: Next, roll the dough out into a rectangle (roughly 26x30cm/ 10x12in).
Twelve: Start rolling up the dough from the short side ensuring it is pretty tight.
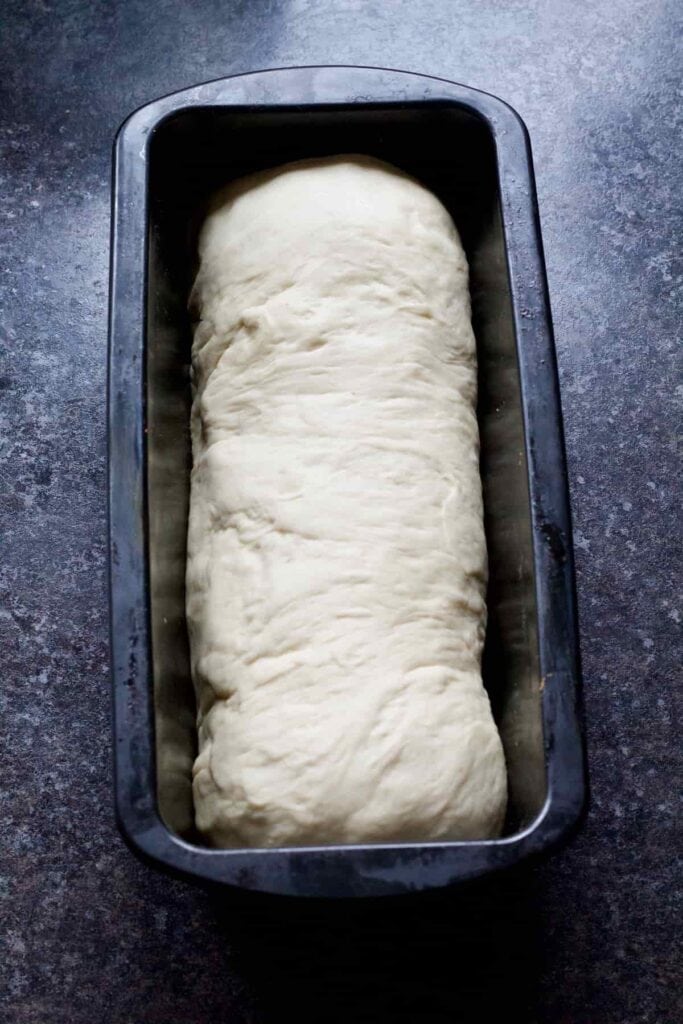
Thirteen: Once the dough is rolled, gently fold the ends underneath (where the seam is) and put into prepared loaf tin.
Fourteen: Once in the tin, cover the loaf and put somewhere warm for its second prove and to double in size.
Fifteen: Towards the end of proving time preheat the oven to 200C/400F/Gas Mark 6.
Sixteen: When your loaf looks like it's doubled in size put it in preheated oven and bake for approximately 35 minutes until golden brown on top and sounds hollow when you tap it underneath.

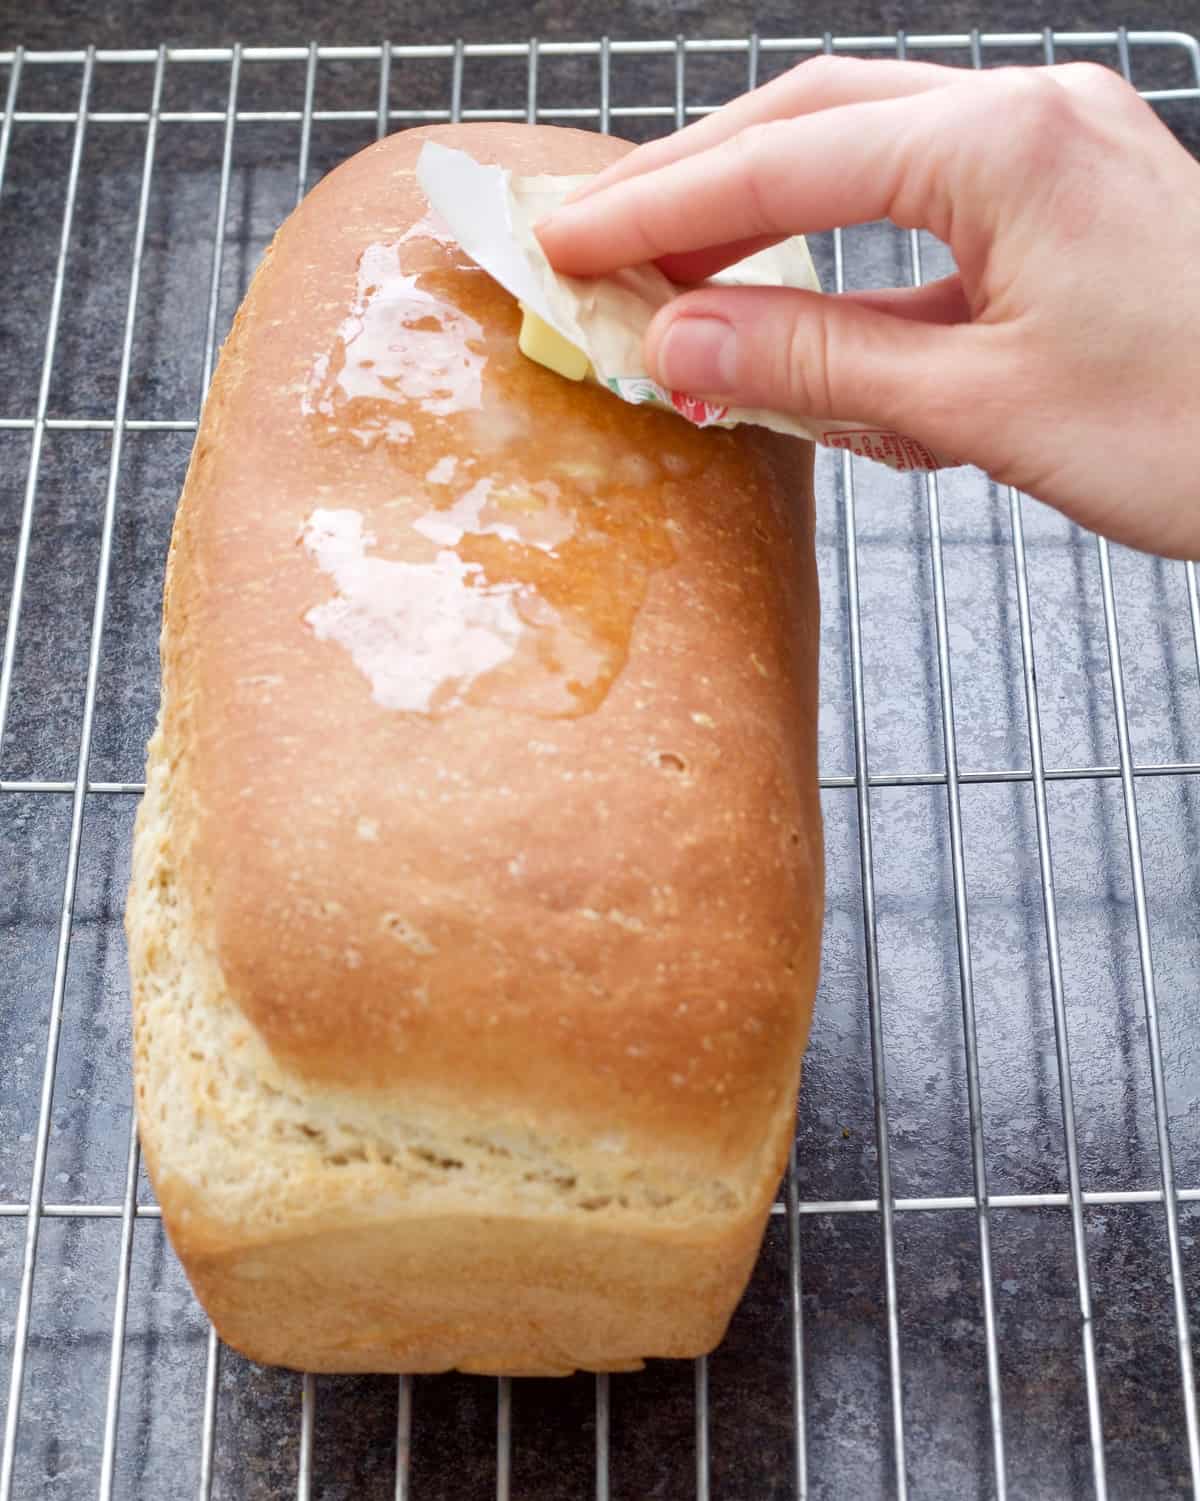
Seventeen: Once on the cooling rack and still hot, rub a small piece of unsalted vegan butter (I use Flora Plant) over the top of the loaf and leave it to cool.
Have you tried my Easy White Sandwich Bread recipe?
Please consider giving it ⭐️⭐️⭐️⭐️⭐️ rating in recipe card below.
🍞 More bread recipes
Easy Wholemeal Bread Recipe (No-Knead)
Easy Granary Bread
Cinnamon and Raisin Bagels
Irish Soda Bread with Yogurt
Easy Breadsticks
Easy Bread Rolls
Vegan Soda Bread (No Buttermilk)
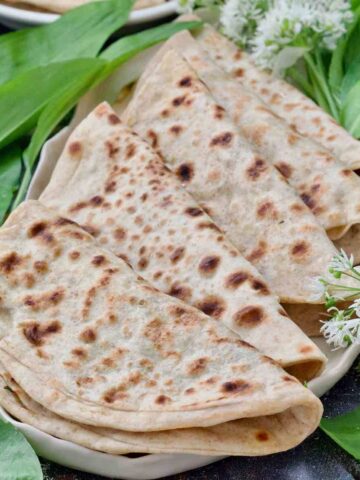
Easy Flatbread (No Yeast)
Easy Naan Bread without Yeast
📋 Recipe
Easy White Sandwich Bread (Soft-Crust)
Equipment
Ingredients
- 500 g white strong bread flour
- 325 ml soya milk see notes
- 25 g unsalted vegan block butter I use Flora Plant
- 1 teaspoon golden/maple syrup
- 1 teaspoon fine salt see notes
- 2 teaspoon dried yeast see notes
- some rapeseed/olive oil for greasing
Instructions
- Put vegan butter in a small saucepan and melt it over low heat.
- Add soya milk followed by maple (golden) syrup and give it a quick stir over a low heat to ensure that milk warms up a little (becomes lukewarm to touch). Set aside.
- Put the flour, salt and yeast in a large mixing bowl or bowl of your stand mixer and give it a gentle mix to incorporate the two into the flour. Ensure that when you add both salt and yeast into the bowl you keep them on separate sides.
- Make a well in the centre of the bowl and add lukewarm milk mixture.
- Using your hand or dough hook (if using mixer) start incorporating milk into the flour until the dough starts coming together (you might need to stop your mixer couple of times initially to help and move the flour sitting on the walls of the bowl into the wet mixture).
- If kneading by hand, tip the dough out onto lightly floured counter and knead for approximately 10 minutes. If using dough hook and stand mixer knead the dough on the low speed for approximately 5 minutes until dough feels smooth and elastic.If dough feels dry and you've still got lots of loose crumbs at the bottom of the bowl then add tiny bit more milk, drop at a time. If it feels wet and sticky add a sprinkle of flour.
- To check whether dough has been kneaded enough and is ready for proving press it gently with your finger. If it springs back slightly it's ready, if it doesn't knead for a bit longer.
- Once dough is ready, put it in lightly oiled bowl, cover and place in a warm and draught free place until doubled in size (1-2 hrs).
- When ready, knock back the dough with a punch to deflate it, turn it out onto the counter and give it a very quick knead.
- Prepare 2 lb loaf tin by greasing it very lightly with some oil, set aside.
- Next, roll the dough out into a rectangle (roughly 26x30cm/ 10x12in).
- Start rolling up the dough from the short side ensuring it is pretty tight.
- Once the dough is rolled, gently fold the ends underneath (where the seam is) and put into prepared loaf tin.
- Once in the tin, cover the loaf and put somewhere warm for its second prove and to double in size.
- Towards the end of proving time preheat the oven to 200C/400F/Gas Mark 6.
- Once the loaf looks like it's doubled in size put it in preheated oven and bake for approximately 35 minutes until golden brown on top and sounds hollow when you tap it underneath.
- Once on the cooling rack and still hot, rub a small piece of unsalted vegan butter (I use Flora Plant) over the top of the loaf and leave it to cool.
- Enjoy!
Video
Notes
- Nutritional information is approximate, based on one slice (if you cut your loaf into 16 slices) and should be treated as a rough guideline only.
- Soya milk works best in vegan baked goods but you could use oat milk as well.
- Make sure to use fine salt and not flakes (sea salt or pink Himalayan salt are my preferred ones).
- Best yeast to use are fast action, quick or easy bake ones which you can mix in directly into the flour.
- This loaf keeps really well if kept well covered (even up to 5 days) and I find it doesn't really need toasting until day 3.
- Freezer friendly for up to 1 month.
- For wholewheat variation substitute half the amount of strong white bread flour with strong wholewheat flour. Keep to 50:50 ratio.
- Keep salt and yeast separate when adding them to flour as salt "kills" the yeast.
- When heating up milk make sure you heat it up to lukewarm temperature (35C/95F) as warmth will help to activate the yeast.
- I find the amount of liquid to be pretty spot on. However, we all use different flours therefore you might need to add either drop more milk or flour when kneading.
- Prove your bread dough somewhere warm and draught free.
- Don't skip butter on top of your loaf as it helps keeping it nice and soft. However, if you really don't want to use it, try covering the loaf with a clean tea towel when still hot. This will create humidity that will soften the crust.

Rosie says
Hi Jo
I'm about to try this white loaf recipe after the easy no knead wholemeal has been such a hit in our house! We've totally stopped buying bread! Just wondering if I could substitute warm water for the soya milk in the recipe as the liquid? Would it still work? Also would a tsp of honey work instead of maple or golden syrup? I don't want it to be too sweet and we like bread to be light. Many thanks
Rosie
joskitchenlarder says
Hi Rosie, If you were to use water in this recipe it would completely change the finished product I'm afraid. Milk in this bread (whether soya, oat or you could also use dairy milk) gives it tender and soft crumb farmhouse style loaves are known for. This bread is still very light. As for honey, yes you can use it instead of maple syrup no probs. Hope that helps. 🙂
Rowena says
Will give this one a try. From Australia!
Wondering if this recipe will be good for a break machine?
Thanks,
Rowena
joskitchenlarder says
Hi Rowena, Great to have you here! I'm afraid I don't use bread maker so can't really advise, sorry!