
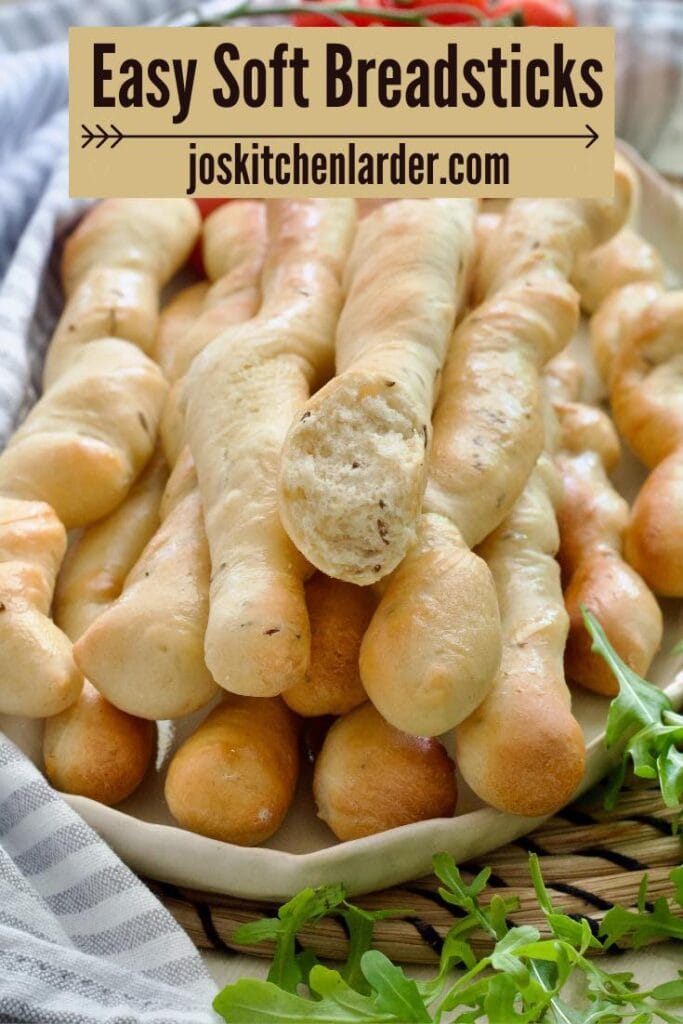
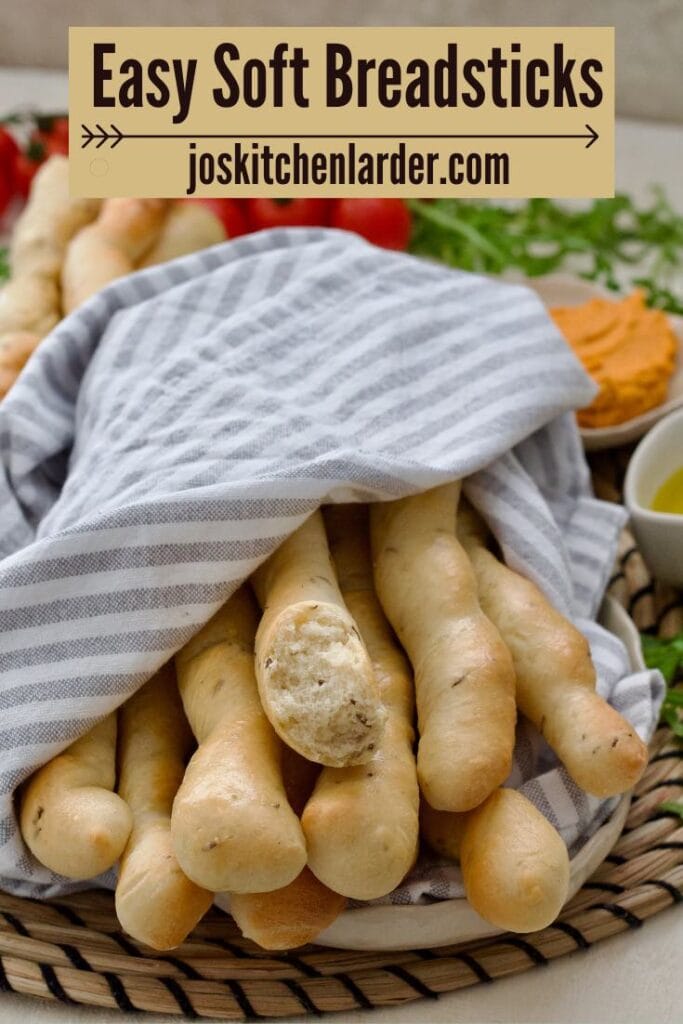
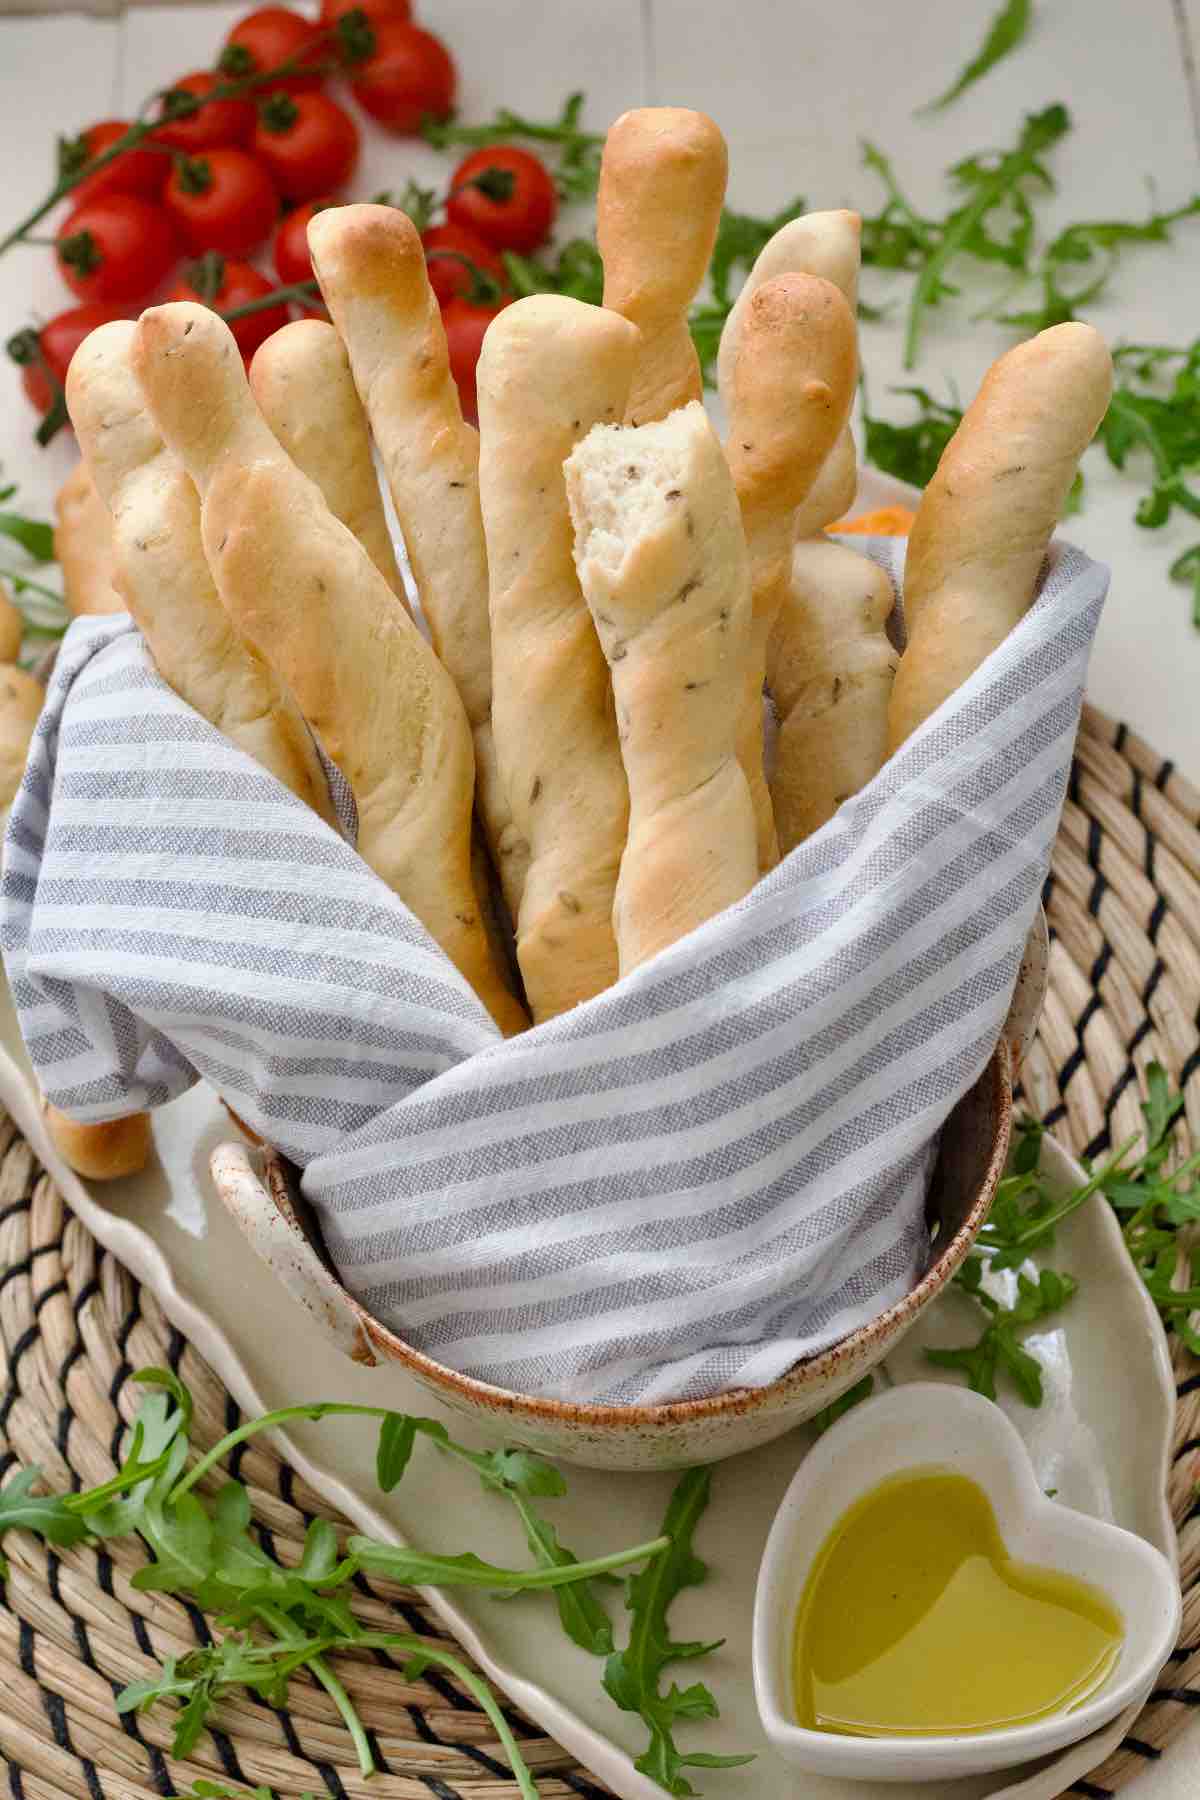
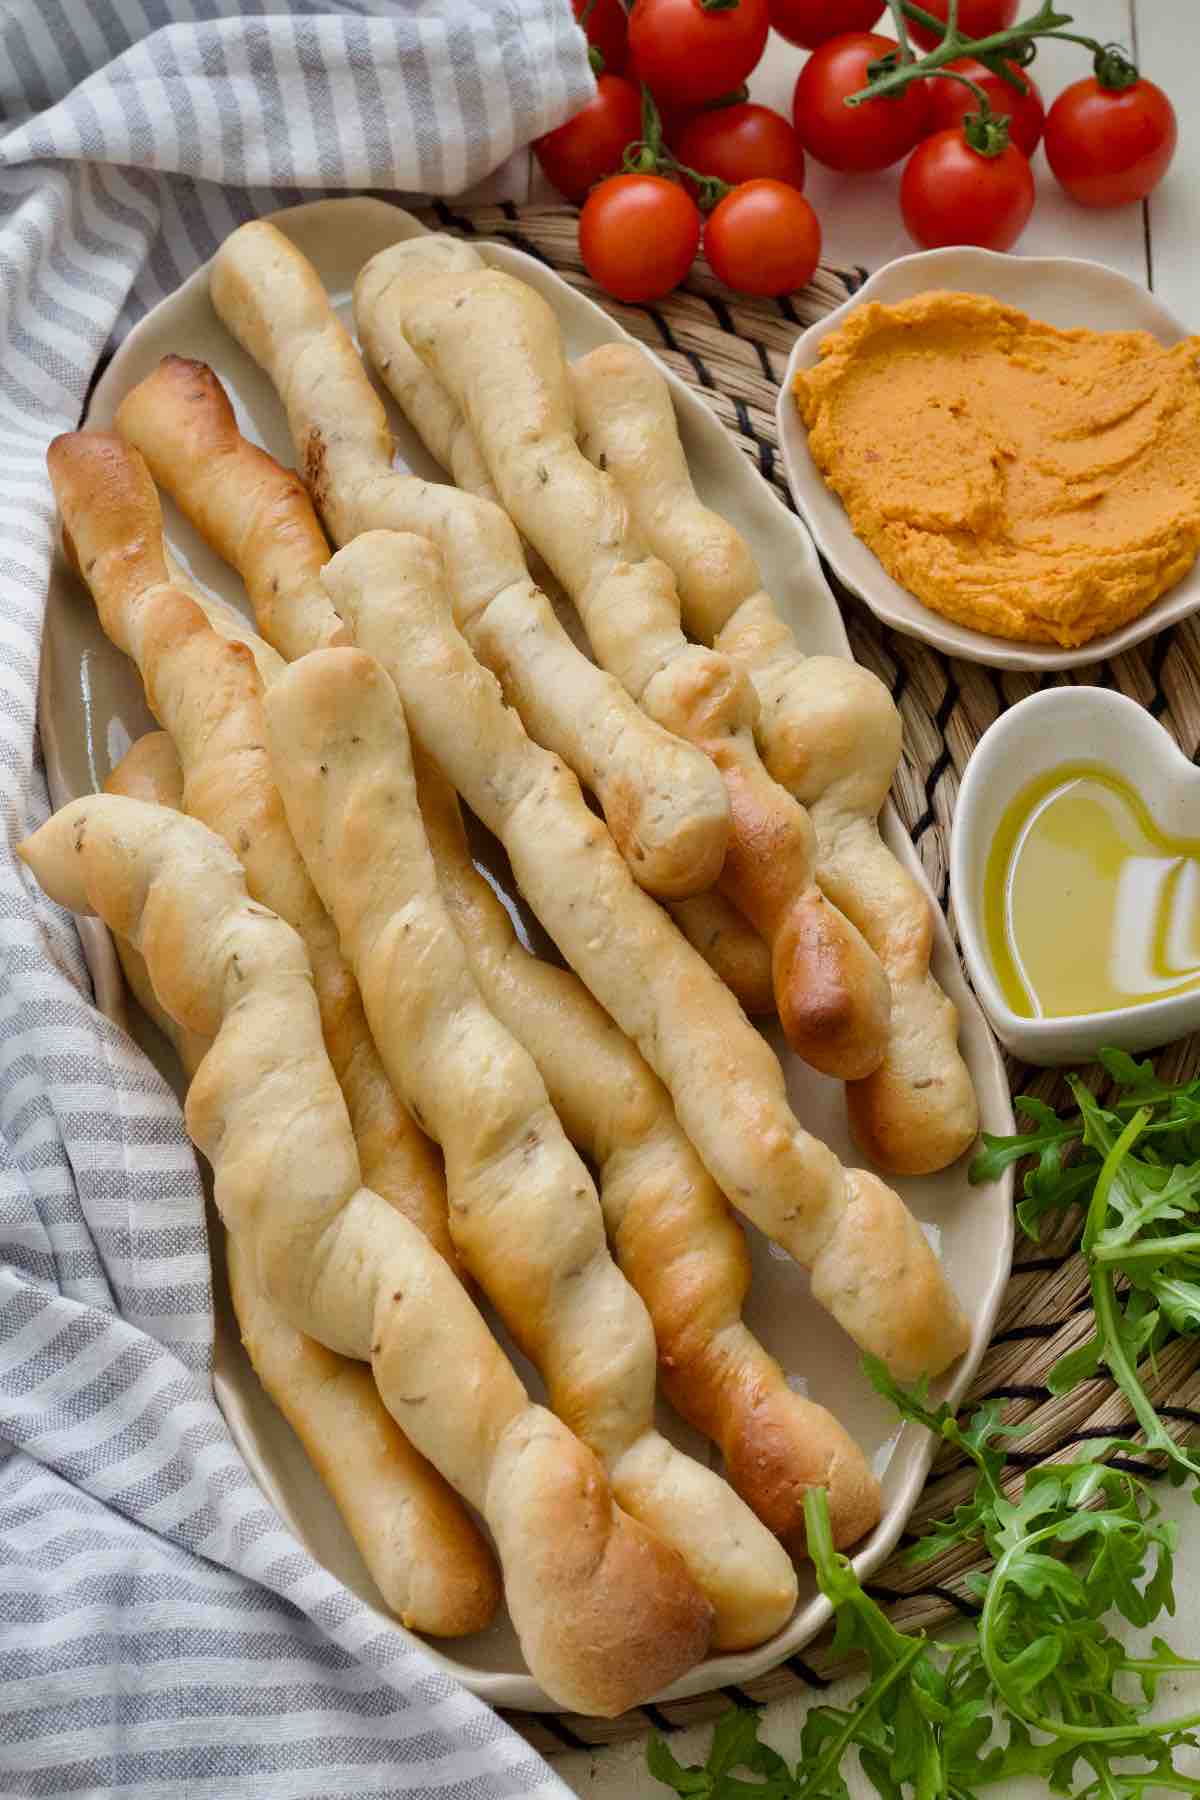
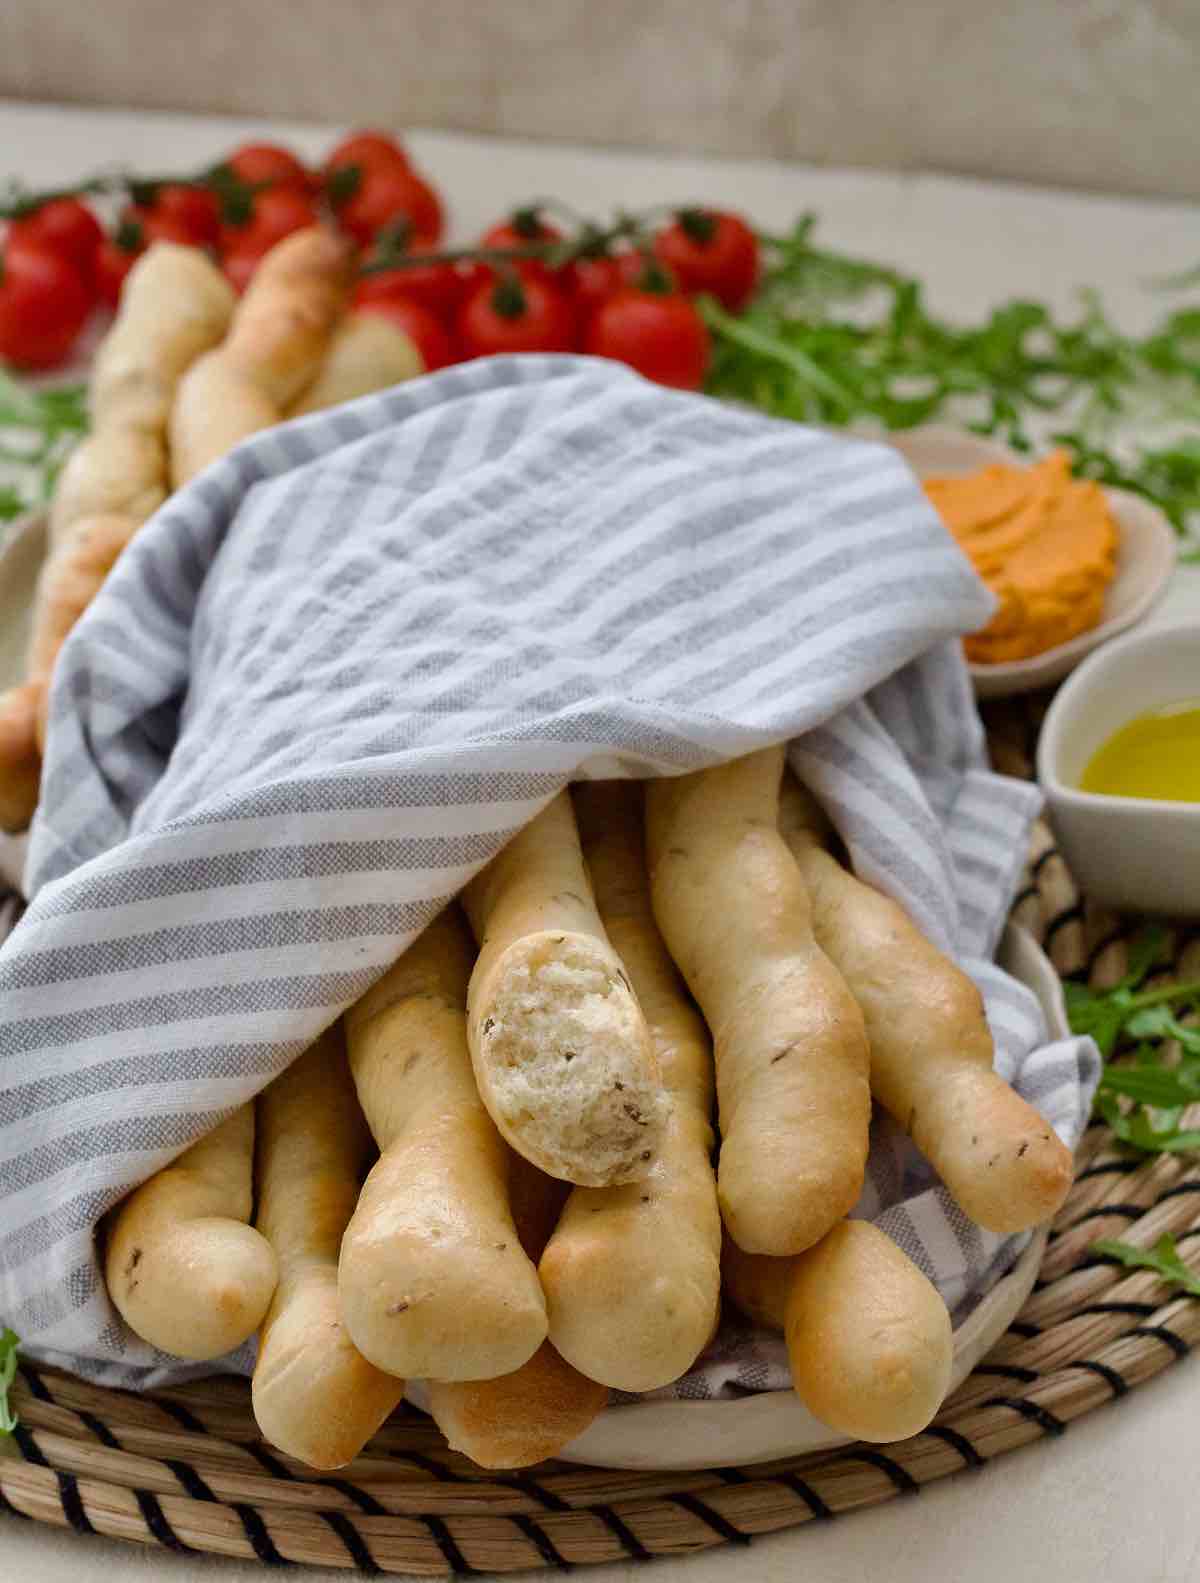
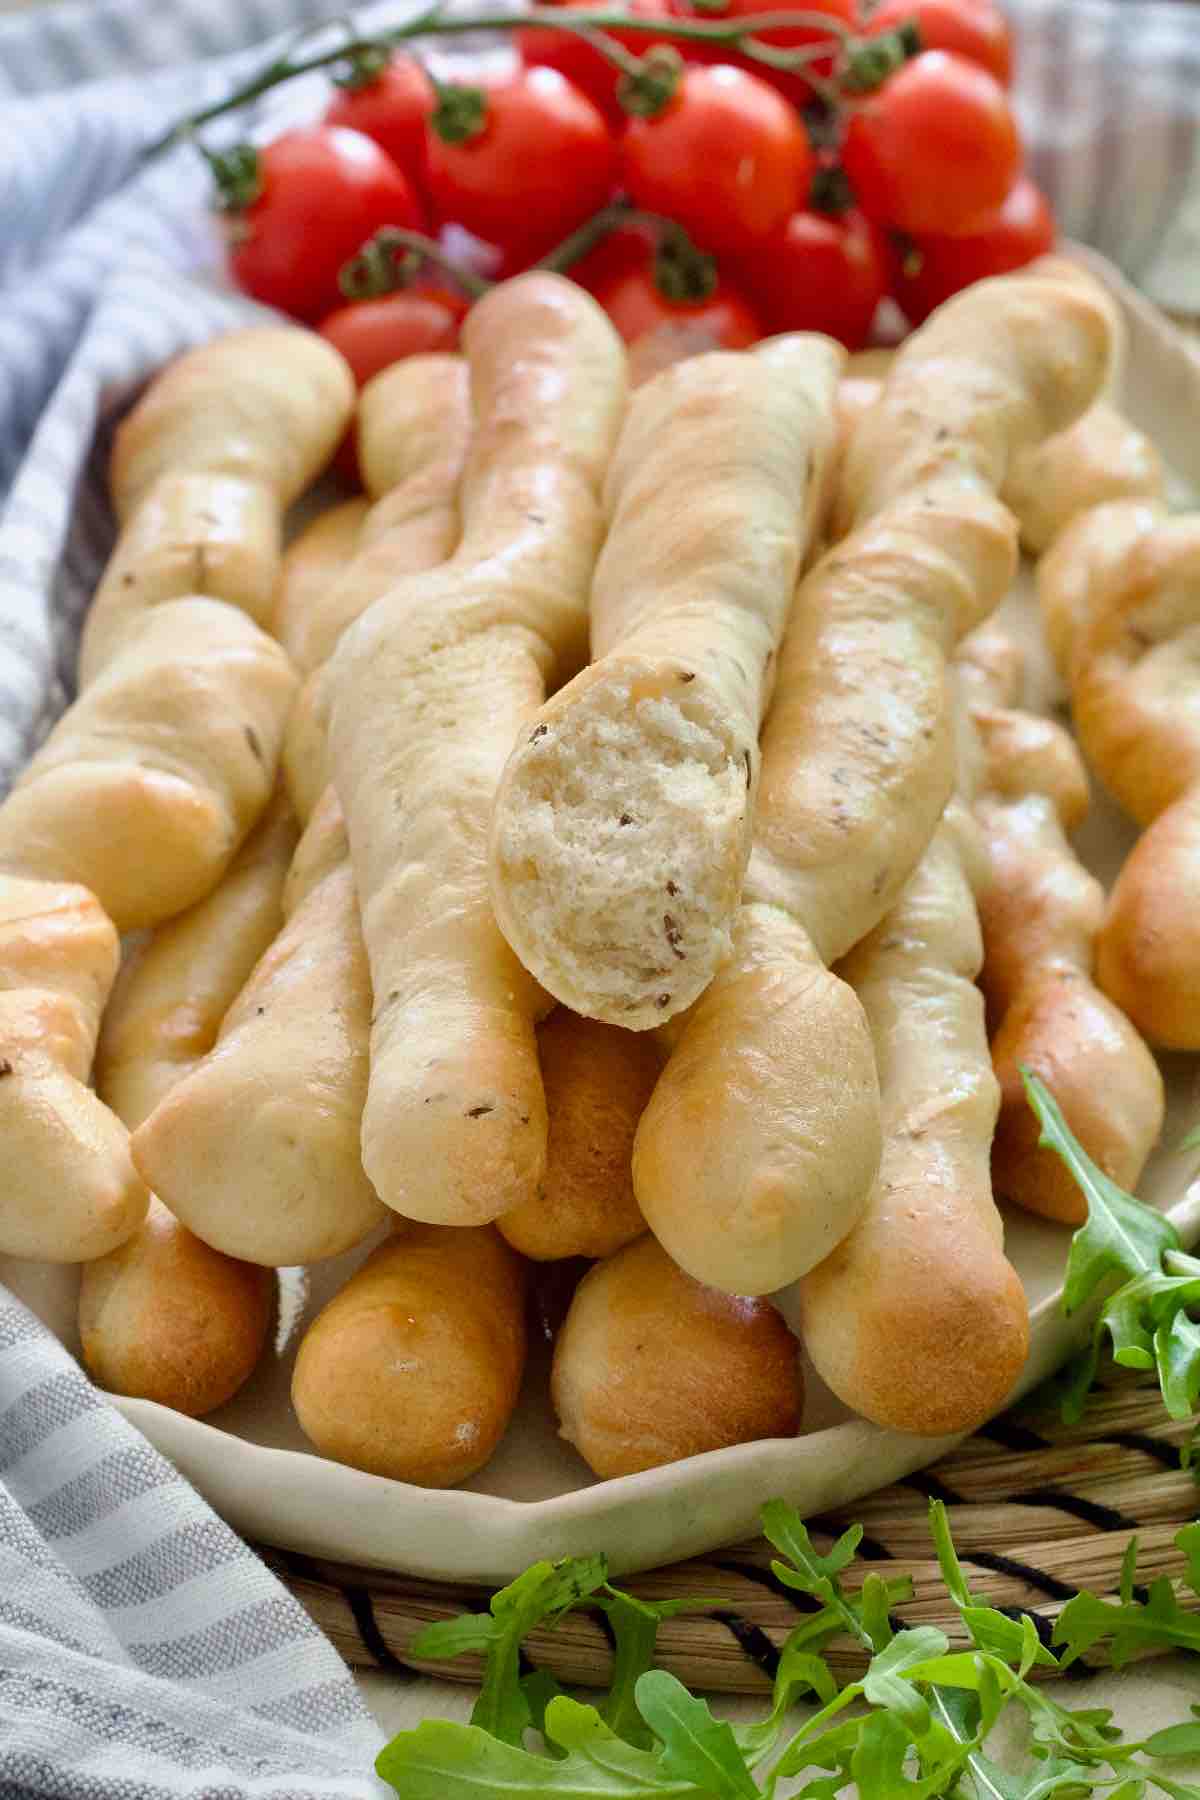
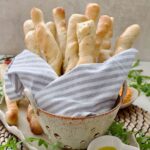
These homemade breadsticks are so easy to make and super versatile too. Soft and fluffy, they're extremely moreish so you'll be making them on repeat to enjoy with soups, salads, pastas, dips & more.
If you think that homemade breadsticks are time consuming, really complicated and not worth a bother then think again.
They really are "easy does it" and even though there is some waiting time involved as dough needs to prove, you can still enjoy them in less than two hours from start to finish.
I think that's a fair time considering the amount of bread joy they'll bring to your life and some serious enhancement to your meals, although there is a risk you'll devour them as they come out of the oven.
Jump to:
✔️ Why you'll love this recipe
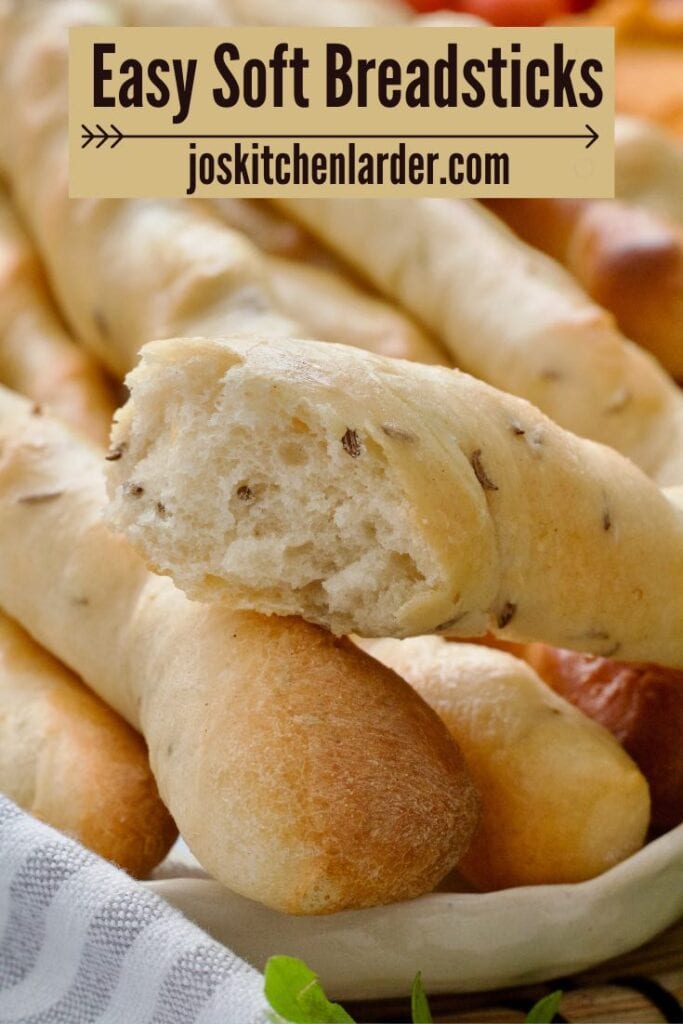
- Delicious, soft and fluffy breadsticks (with an option to make them crispy if that's what you prefer).
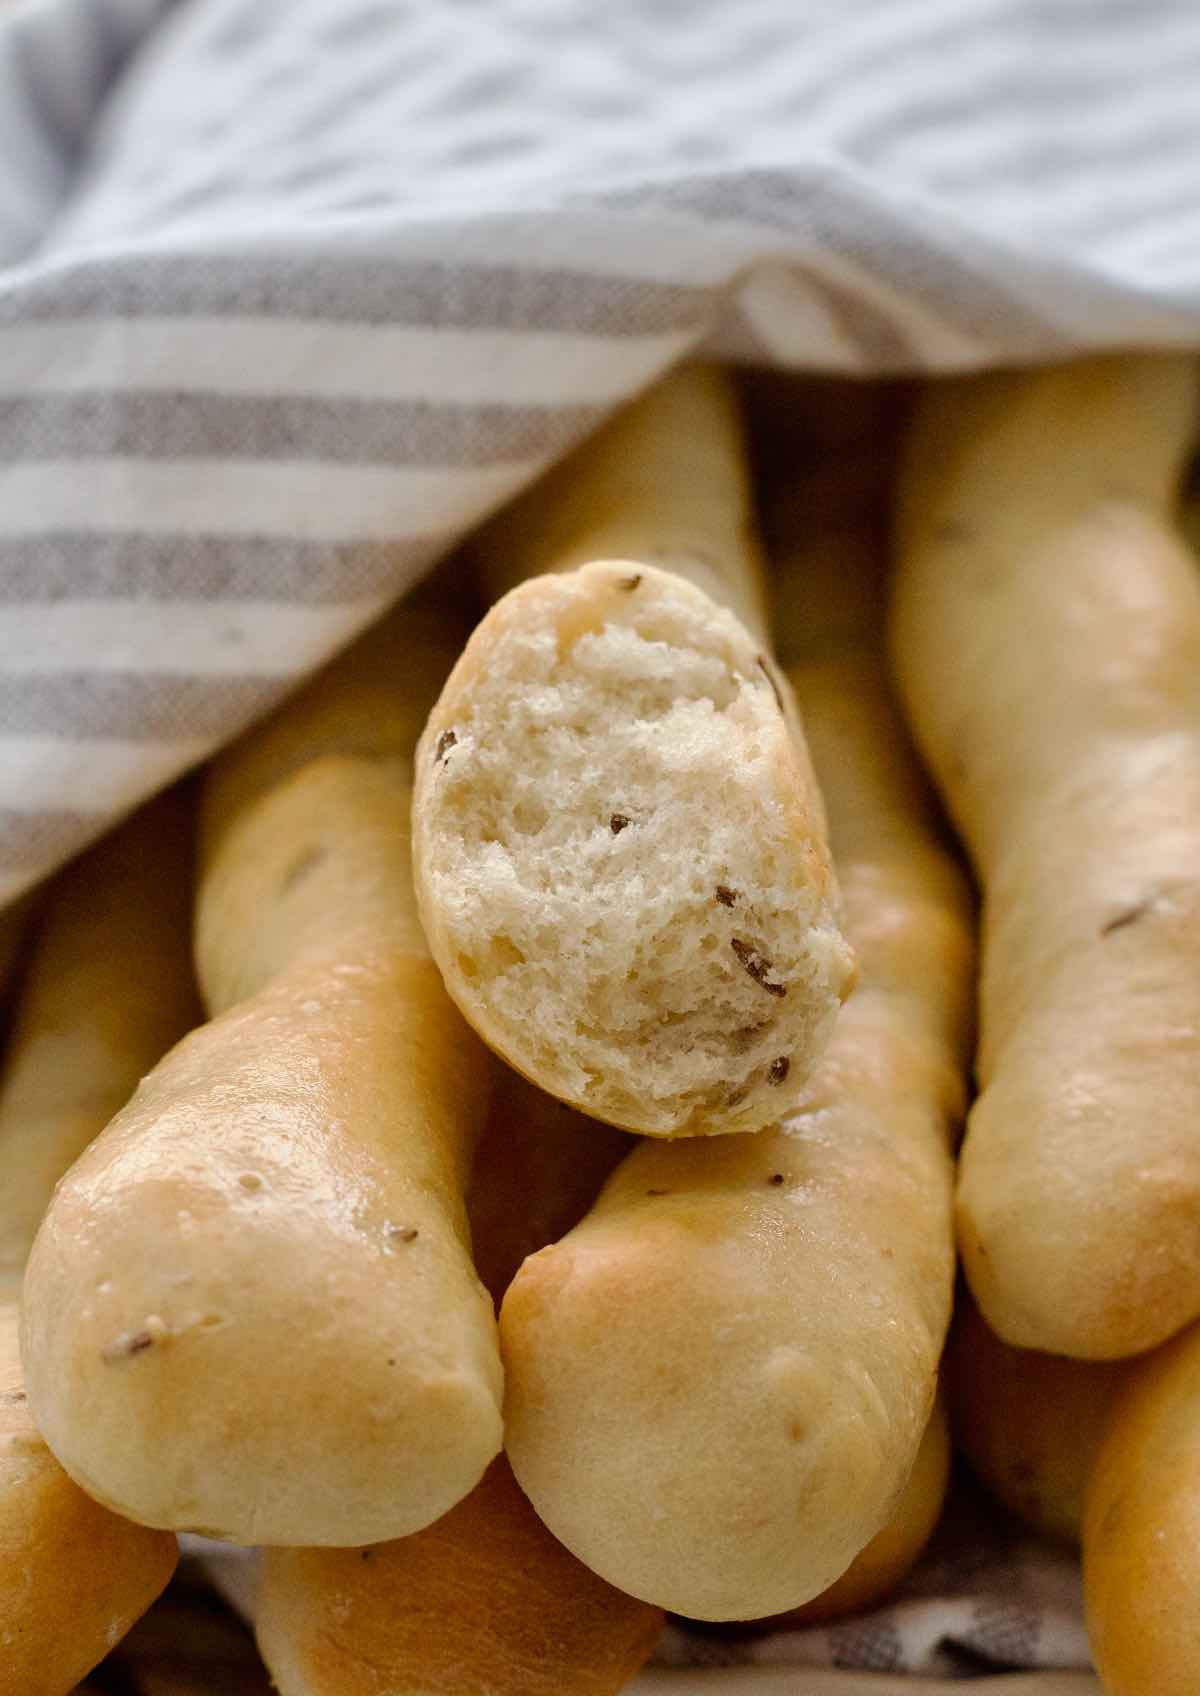
- One simple recipe, lots of possible flavour variations. I love making mine with caraway seeds but there are lots of to her options too - see Variations below.
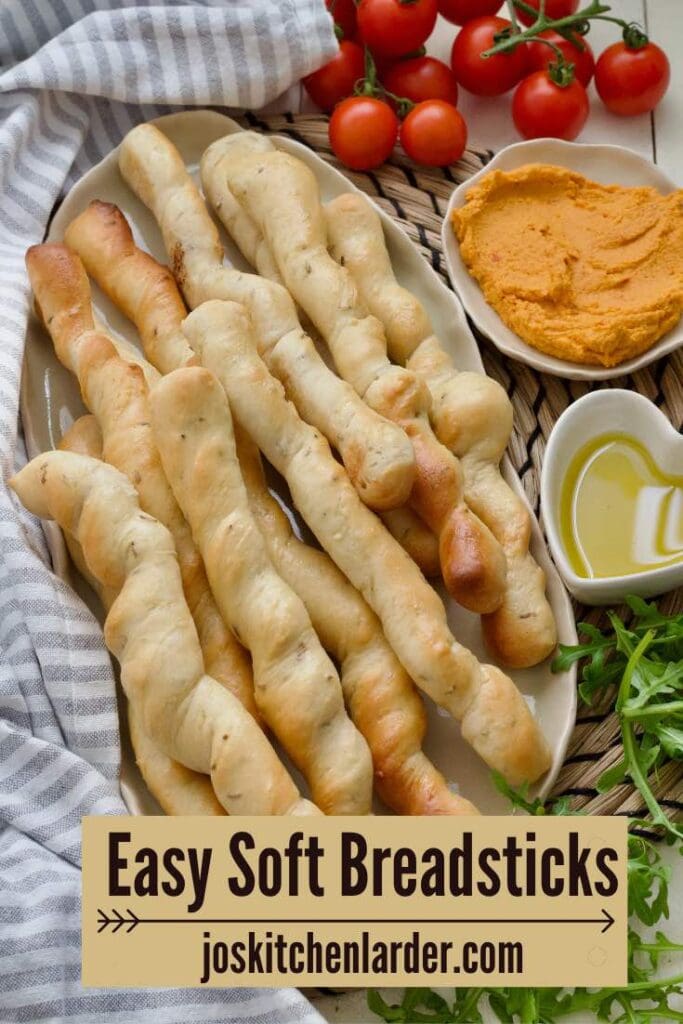
- Perfect little bread side dish/accompaniment to the whole array of meals.
- Fantastic party snack when served with dips.
- Super portable, perfect picnic food and kids friendly too.
- Naturally dairy and egg free (vegan friendly).
📝 Ingredients
Here's what you will need to make my Easy Breadsticks:
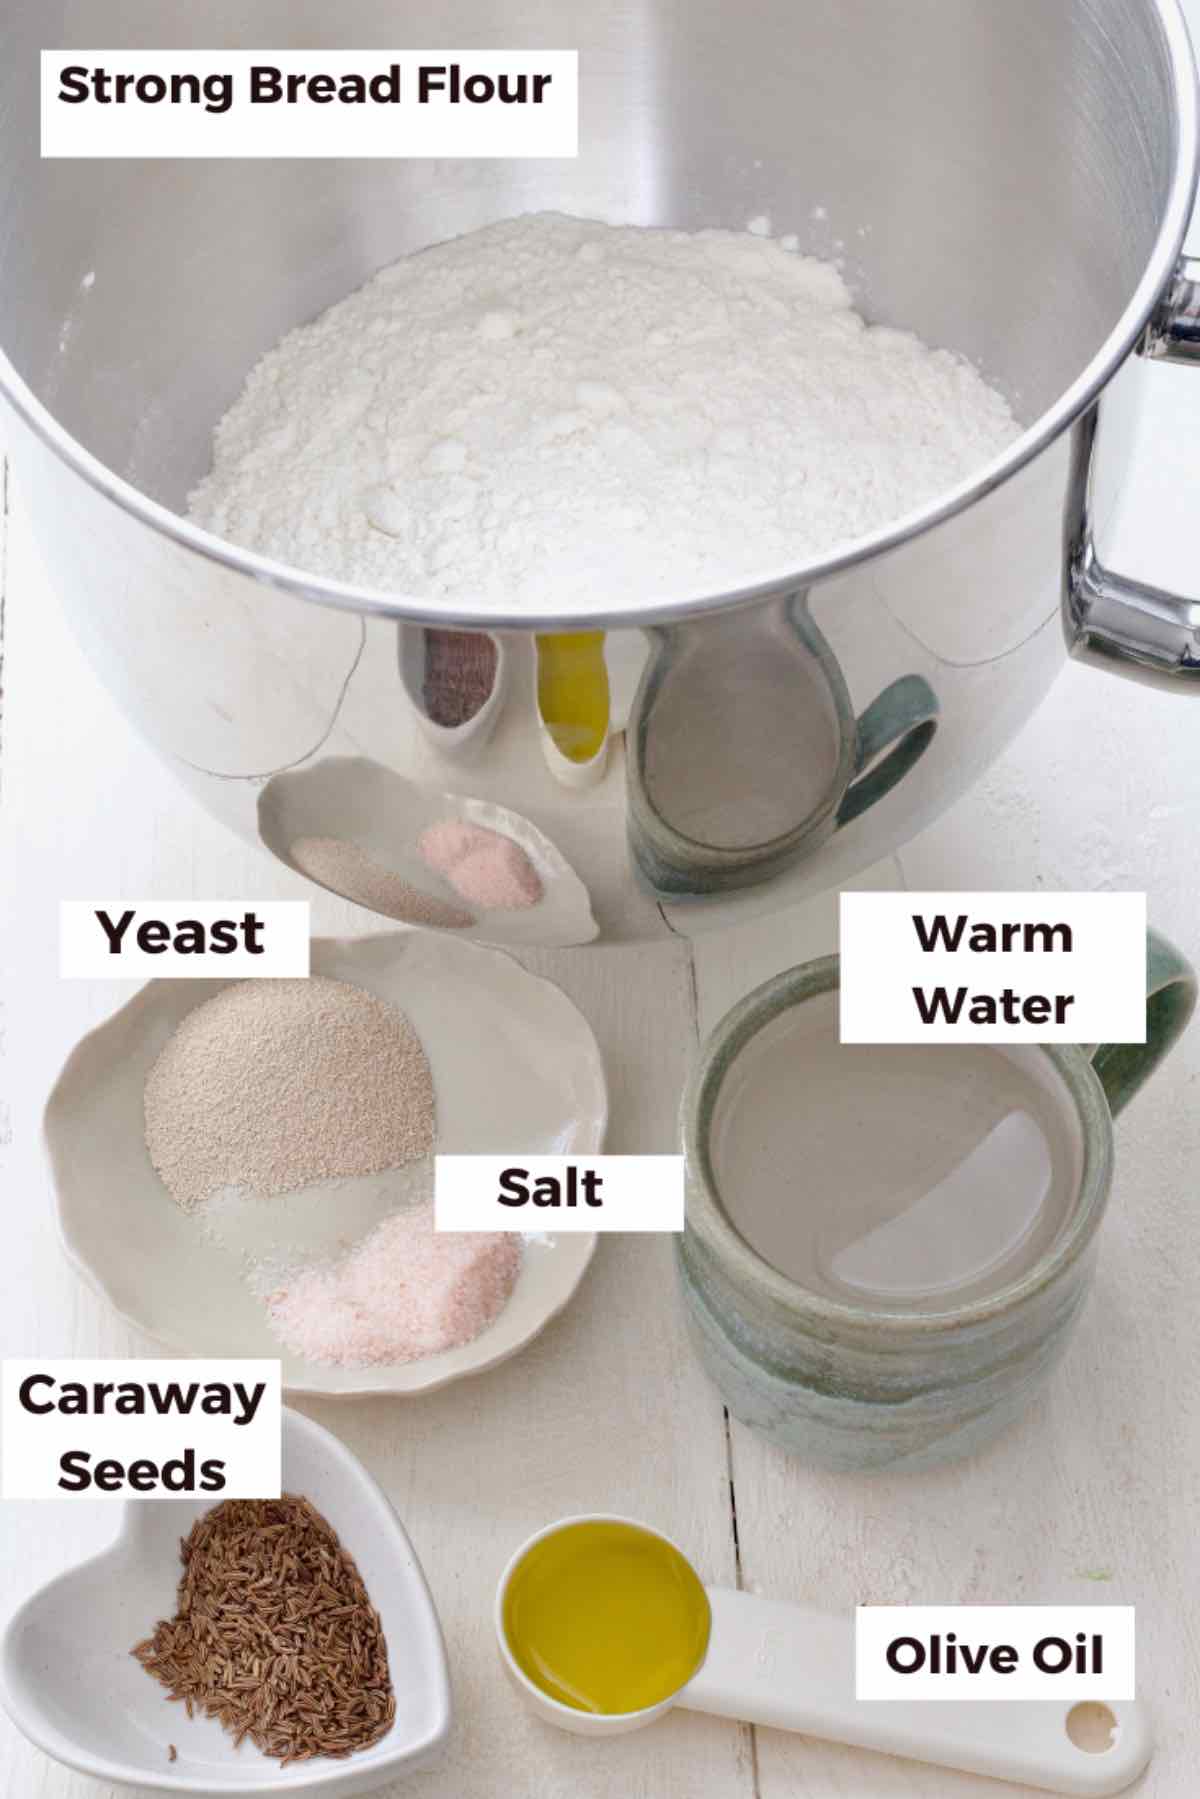
Strong White Bread Flour - These are best made with bread flour but if plain (all-purpose) flour is all you've got you can use it too.
Quick or Instant or Easy Bake Yeast - This is my go to type of yeast and one I would recommend you use here as it doesn't require activating and you add it directly to your flour.
Fine Salt - I use fine pink Himalayan salt but fine sea salt is great too.
Extra Virgin Olive Oil - Adds to the flavour but also softens the dough.
Lukewarm Water - You want your water at around 37°C/100°F which is perfect to get the yeast going but not too hot to kill it.
Flavourings - That's where you can make these breadsticks your own. I used some caraway seeds in mine but you can go for poppy seeds, sesame seeds, mixed herbs, chopped olives or sun-dried tomatoes. You can even turn these into garlic bread style breadsticks if you want.
🔪 Instructions
Ingredient quantities & detailed instructions to be found in recipe card at the bottom of the post.
Put the flour, salt and yeast in a large mixing bowl or bowl of your stand mixer. Give it gentle mix to incorporate the two into the flour. Ensure that when you add both salt and yeast into the bowl you keep them on separate sides.
Add olive oil and lukewarm water and start mixing it in either with your hand or dough hook attachment (if using stand mixer) and start bringing the dough together.
If kneading by hand, tip the dough out onto lightly floured counter and knead for approximately 10 minutes. When using dough hook and stand mixer, knead the dough on the low speed for approximately 5 minutes until dough feels smooth and elastic.
If dough feels dry and you've still got lots of loose crumbs at the bottom of the bowl, add tiny bit more water, drop at a time. For wet and sticky dough add a sprinkle of flour instead.
Towards the end of kneading, add caraway seeds or other add-ons and knead them into the dough to distribute evenly. Be gentle if adding something different than seeds like chopped olives or sun-dried tomatoes.
***Quick Tip*** To check whether your dough has been kneaded enough and is ready for proving press it gently with your finger. If it springs back slightly it's ready, if it doesn't knead for a bit longer.
Once your dough is ready, put it back in lightly oiled bowl, cover and place in a warm and draught free place until doubled in size (1-2 hrs).
***Quick Tip*** I like to put mine next to the radiator or inside the airing cupboard and more often than not it's doubled in size within an hour or so. However, it will all depend on temperature of the surroundings so yours might take longer.
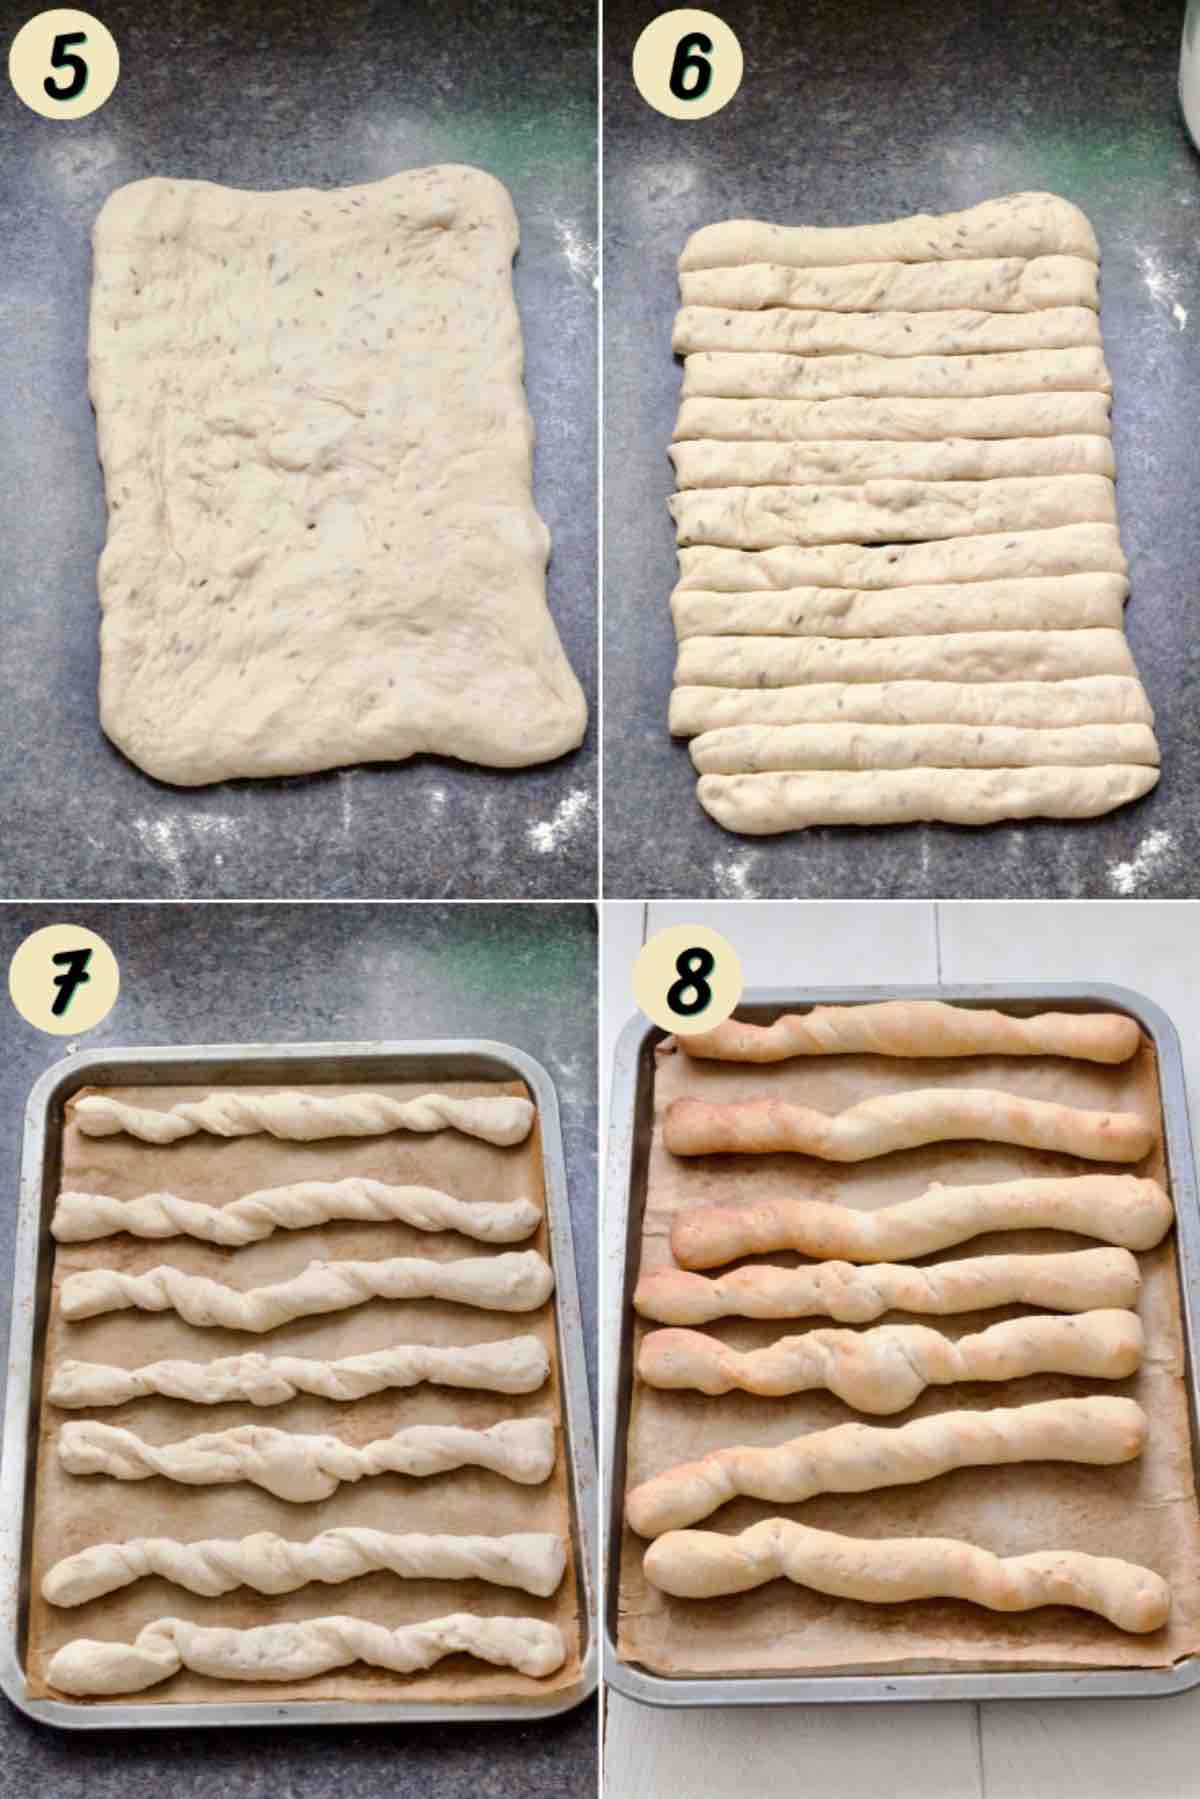
Once dough is ready, turn it out gently onto floured countertop without deflating it first. We're trying to keep as much air in as possible. Flour your hands gently too.

Stretch the dough gently into a rectangle approximately 16 x 34cm/6 x 13in (it doesn't have to be exact).
Using a sharp knife, cut the dough into approximately 12 strips (I got 13). You want them to be about 2.5cm/1in wide.
Take each strip of dough, twist it and place on the baking tray lined with baking paper. I used two trays 35x25cm/10x13in. Make sure to leave some space between them.
***Quick Tip*** You will find the dough to be quite soft and stretchy as you pick it up. I would recommend having your prepared baking trays close by so that you don't need to carry pieces of dough far as they might stretch a bit too much. If it happens, simply re-shape them into the rough shape of a breadstick and so that they fit on your tray. You can see below that mine weren't perfect but more rustic in their appearance.
Cover the trays with clean tea towels and let shaped breadsticks rest and puff up. In the meantime, preheat the oven to 200°C(Fan)/400°F/Gas Mark 6.
Bake your breadsticks in preheated oven for approximately 12 minutes until golden. If you prefer crispy breadsticks, continue baking for another 4-5 minutes.
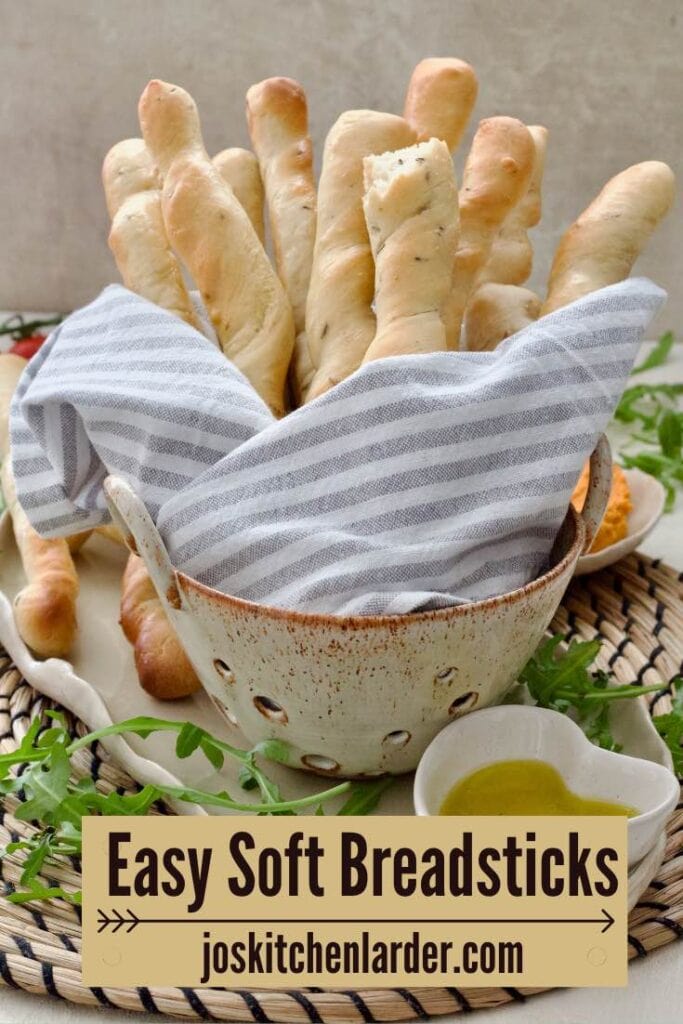
Once out of the oven brush them with extra virgin olive oil whilst still warm. It's optional but gives them lovely shine, softens the crust further and ads to the flavour.
Move breadsticks onto wire rack to cool slightly and enjoy!

🥡 Storing
Store: These lovely breadsticks are best on the day they're baked or the following day. You can store them somewhere dry, in a linen/cotton bread bag or even ziplock style, reusable plastic bag for up to 3 days.
Freeze: They freeze really well so if you know you are not going to eat them, feel free to free some for up to 3 months. They will defrost on the kitchen counter in an hour or so.
Reheat: You can always refresh your breadsticks for few seconds in a microwave or in the oven preheated to 150°C/300°F for about 5 minutes.
💭 Pro Tips
For best results, always use digital scale to weigh out the ingredients. It's particularly important when baking.
When heating up water make sure you heat it up to lukewarm temperature of roughly 37°C/100°F (digital food thermometer comes handy here). You should be able to dip your little finger in the liquid and just feel warmth. Warm liquid will help to activate the yeast. If you get it too hot, wait until it cools down as hot water will have an opposite effect on the yeast.
I find the amount of liquid to be pretty spot on. However, we all use different flours therefore you might need to add either drop more water or flour when kneading depending whether the dough is too dry or too sticky.
We love these breadsticks soft and fluffy but you can bake them 4-5 minutes longer to make them crunchy instead.
Depending on your oven you might want to turn your baking tray after around 8 minutes for even baking.
📖 Variations
I use caraway seeds as a flavour addition in my breadsticks but you can leave them plain or use poppy seeds or sesame seeds instead. Alternatively, some dried mixed herbs or oregano would work nicely too.
Turn them into cheesy breadsticks by adding a small handful of your favourite (vegan) cheese into the dough. Alternatively, a tablespoon of my vegan parmesan sprinkle will add lovely flavour and a bit of crunch too.
Some pitted green or black olives or sun-dried tomatoes (about 100-125g) would make lovely addition.
You could also turn these into garlic breadsticks by brushing them with some garlic butter instead of olive oil. Do is as soon as they're out of the oven.
🍴 Serving suggestions
These breadsticks are super versatile and make fantastic little side dish.
Try them on the side of your favourite soup, salad, risotto or pasta dish.
I love them with my classic carrot and coriander soup, butternut squash and red lentil soup with sage, easy Brussels sprout soup or frugal broccoli stalk soup.
Try them with my hummus and purple sprouting broccoli pasta, super simple roasted tomatoes and basil pasta or vegan beetroot risotto.
They make perfect party nibble with your favourite dip like this vibrant and delicious beetroot hummus.
❓ FAQ
Yes of course. You might need some sort of "glue" to make them stick though. I would suggest brushing them with a little bit of olive oil, aquafaba (chickpea water) or beaten egg (if not vegan) which will help the seeds stick to the breadsticks.
You could although I would recommend using half and half wholemeal and white flours if you want your breadsticks to be light and fluffy and not dense. You might have to adjust the amount of water as wholemeal flours tend to be a bit more "thirsty" than white ones.
Have you tried my Easy Breadsticks recipe?
Please consider giving it ⭐️⭐️⭐️⭐️⭐️ rating in recipe card below and share your views or tips in the comments.
😋 More bread recipes
Easy White Sandwich Bread
Cinnamon and Raisin Bagels
Vegan Soda Bread (No Buttermilk)
Easy Wholemeal Bread Recipe (No Knead)
📋 Recipe
Easy Breadsticks
Ingredients
- 300 g strong white bread flour see notes
- 2 tsp (7g) sachet quick/instant/easy bake yeast
- 1 tsp fine salt
- 200 ml lukewarm water
- 2 tbsp extra virgin olive oil
- ½ tablespoon caraway seeds see notes
- more olive oil for brushing
Instructions
- Put the flour, salt and yeast in a large mixing bowl or bowl of your stand mixer and give it gentle mix to incorporate the two into the flour. Ensure that when you add both salt and yeast into the bowl you keep them on separate sides.300 g strong white bread flour, 2 tsp (7g) sachet quick/instant/easy bake yeast, 1 tsp fine salt
- Add olive oil and lukewarm water and start mixing it in either with your hand or dough hook attachment (if using stand mixer) and start bringing the dough together. If kneading by hand, tip the dough out onto lightly floured counter and knead for approximately 10 minutes. When using dough hook and stand mixer knead the dough on the low speed for approximately 5 minutes until dough feels smooth and elastic. If dough feels dry and you've still got lots of loose crumbs at the bottom of the bowl then add tiny bit more water, drop at a time. For wet and sticky dough add a sprinkle of flour instead.200 ml lukewarm water, 2 tbsp extra virgin olive oil
- Towards the end of kneading, add caraway seeds or other add-ons and knead them into the dough to distribute evenly. Be gentle if adding something different than seeds like chopped olives or sun-dried tomatoes.***Quick Tip*** To check whether your dough has been kneaded enough and is ready for proving press it gently with your finger. If it springs back slightly it's ready, if it doesn't knead for a bit longer.½ tbsp caraway seeds
- Once your dough is ready, put it back in lightly oiled bowl, cover and place in a warm and draught free place until doubled in size (1-2 hrs).***Quick Tip*** I like to put mine next to the radiator or inside the airing cupboard and more often than not it's doubled in size within an hour or so. However, it will all depend on temperature of the surroundings so yours might take longer.
- Once dough is ready, turn it out gently onto floured countertop without deflating it first as we're trying to keep as much air in as possible. Flour your hands gently too.
- Stretch the dough gently into a rectangle approximately 16 x 34cm/6 x 13in (it doesn't have to be exact). Using a sharp knife, cut the dough into approximately 12 strips (I got 13). You want them to be about 2.5cm/1in wide. Take each strip of dough, twist it and place on the baking tray lined with baking paper. Make sure to leave some space between them.***Quick Tip*** You will find the dough to be quite soft and stretchy as you pick it up. I would recommend having your prepared baking trays close by so that you don't need to carry pieces of dough far as they might stretch a bit too much. If it happens, simply re-shape them into the rough shape of a breadstick and so that they fit on your tray. You can see below that mine weren't perfect but more rustic in their appearance.
- Cover the trays with clean tea towels and let shaped breadsticks rest as you preheat the oven to 200°C(Fan)/400°F/Gas Mark 6.Bake your breadsticks in preheated oven for approximately 12 minutes until golden. If you prefer crispy breadsticks, continue baking for another 4-5 minutes. Once out of the oven brush them with extra virgin olive oil whilst still warm. It's optional but gives them lovely shine, softens the crust further and ads to the flavour.Move breadsticks onto wire rack to cool slightly and enjoy!more olive oil for brushing
Notes
- Nutritional information is approximate, per breadstick (based on 12 breadsticks) and should be treated as a rough guideline only.
- If you don't have strong flour, you can use plain (all-purpose) flour instead.
- See Variations paragraph for some ideas on alternative add-ons.
- Best eaten on the day but can be stored in a dry place in cotton bread bag or plastic ziplock style bag for up to 3 days or frozen for up to 3 months.

Sue Haskayne says
Fantastic easy bread recipe, and makes lovely toast, I am impressed!!! Thank you
joskitchenlarder says
Thank you Sue! 😊