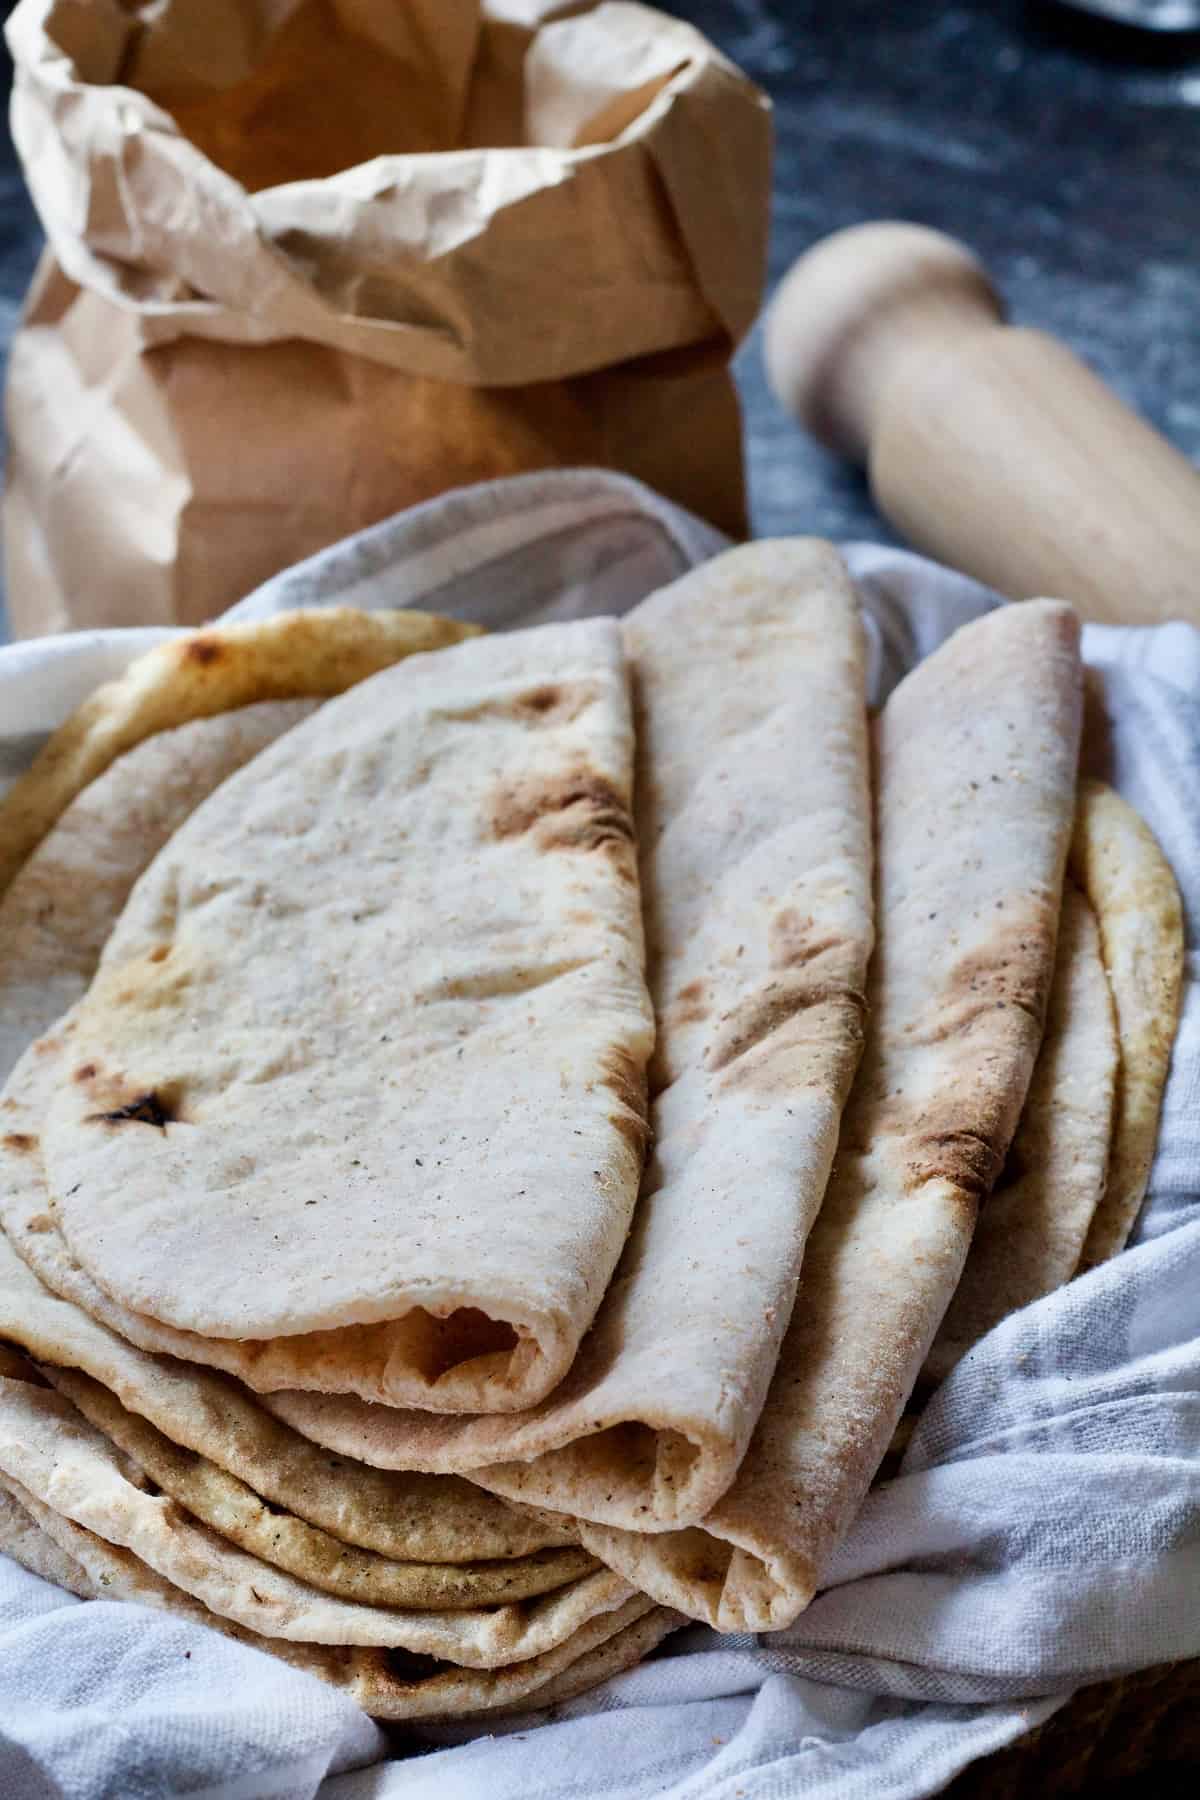
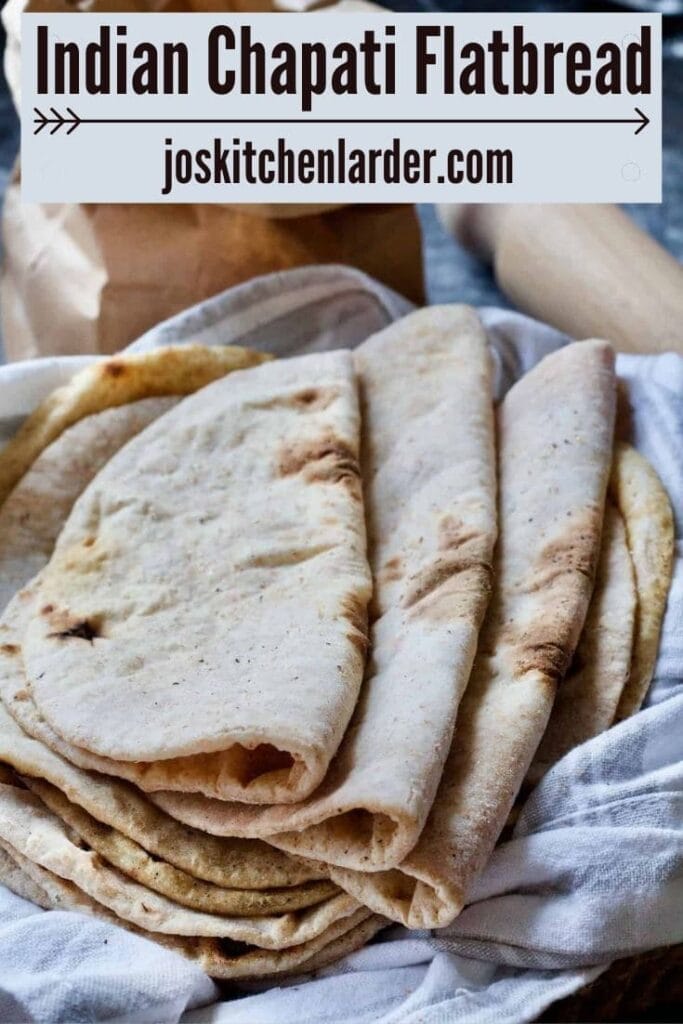
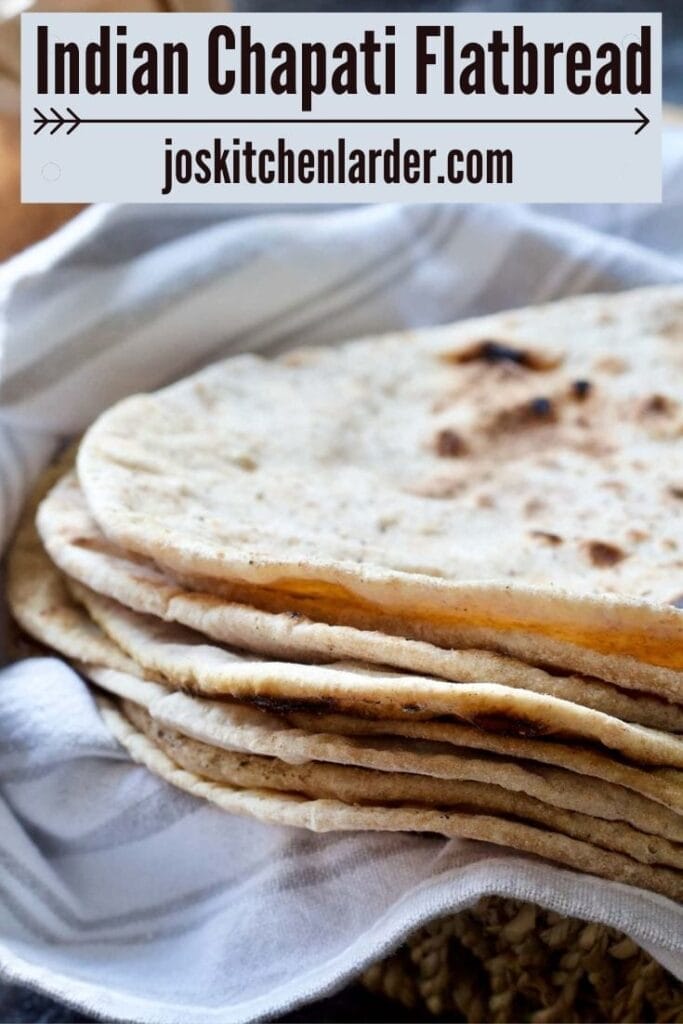
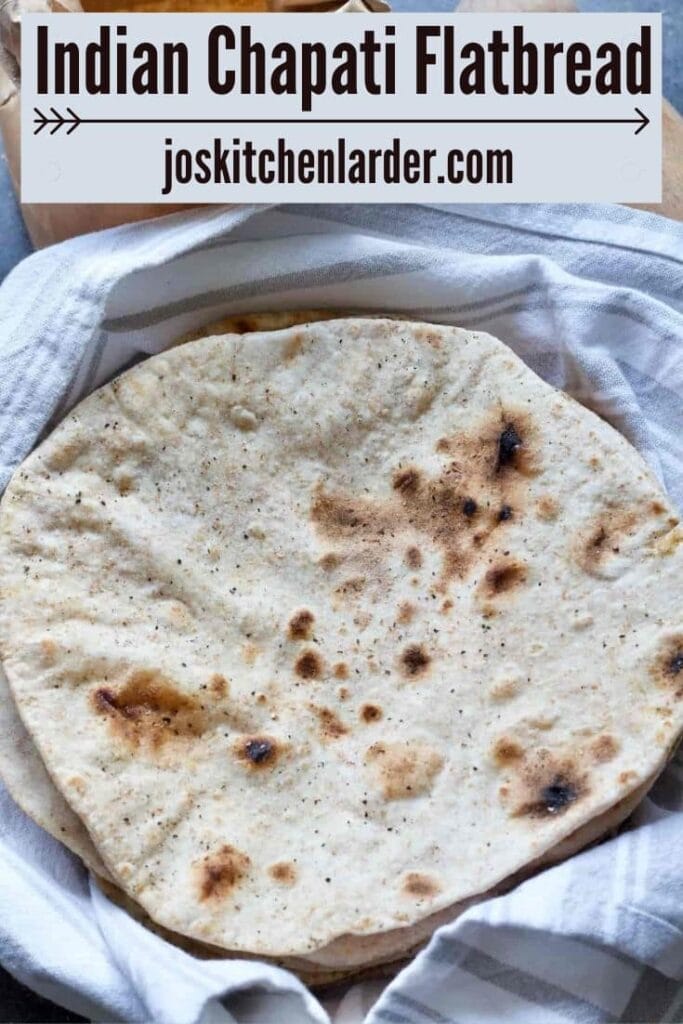
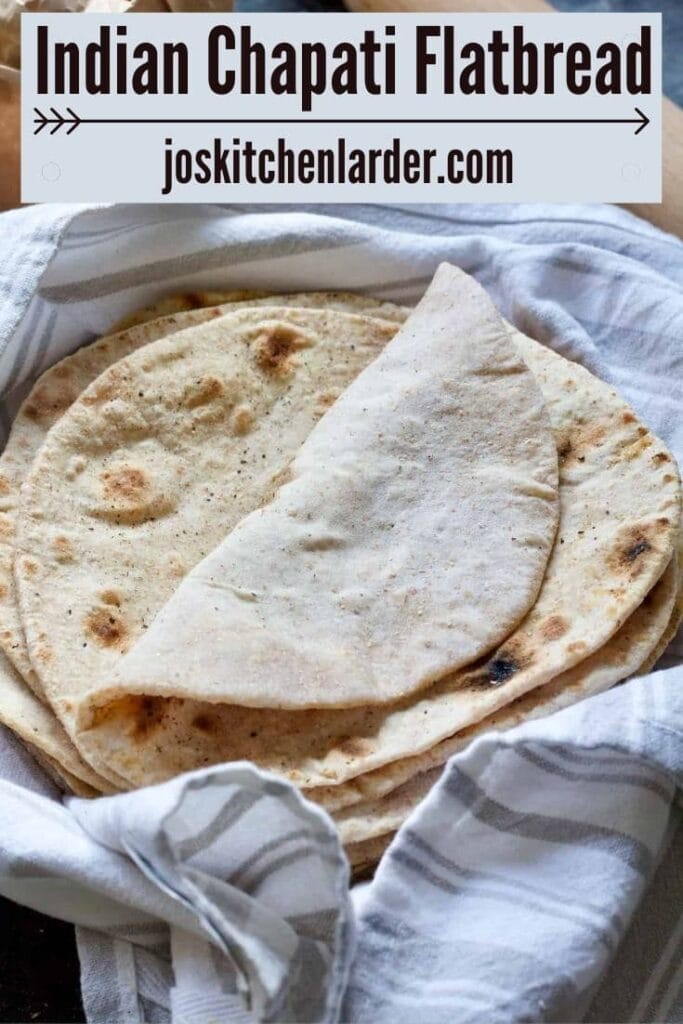
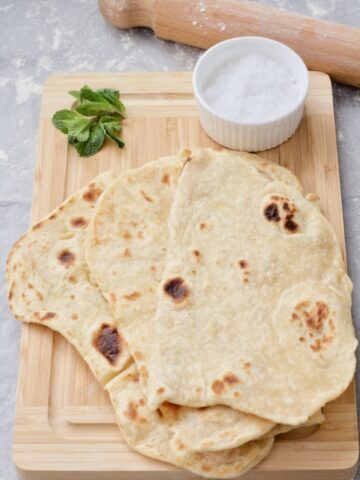
This quick & easy Indian chapati recipe uses only 2 ingredients (flour and water) to make the most delicious and versatile flatbread. Super soft & pliable too!
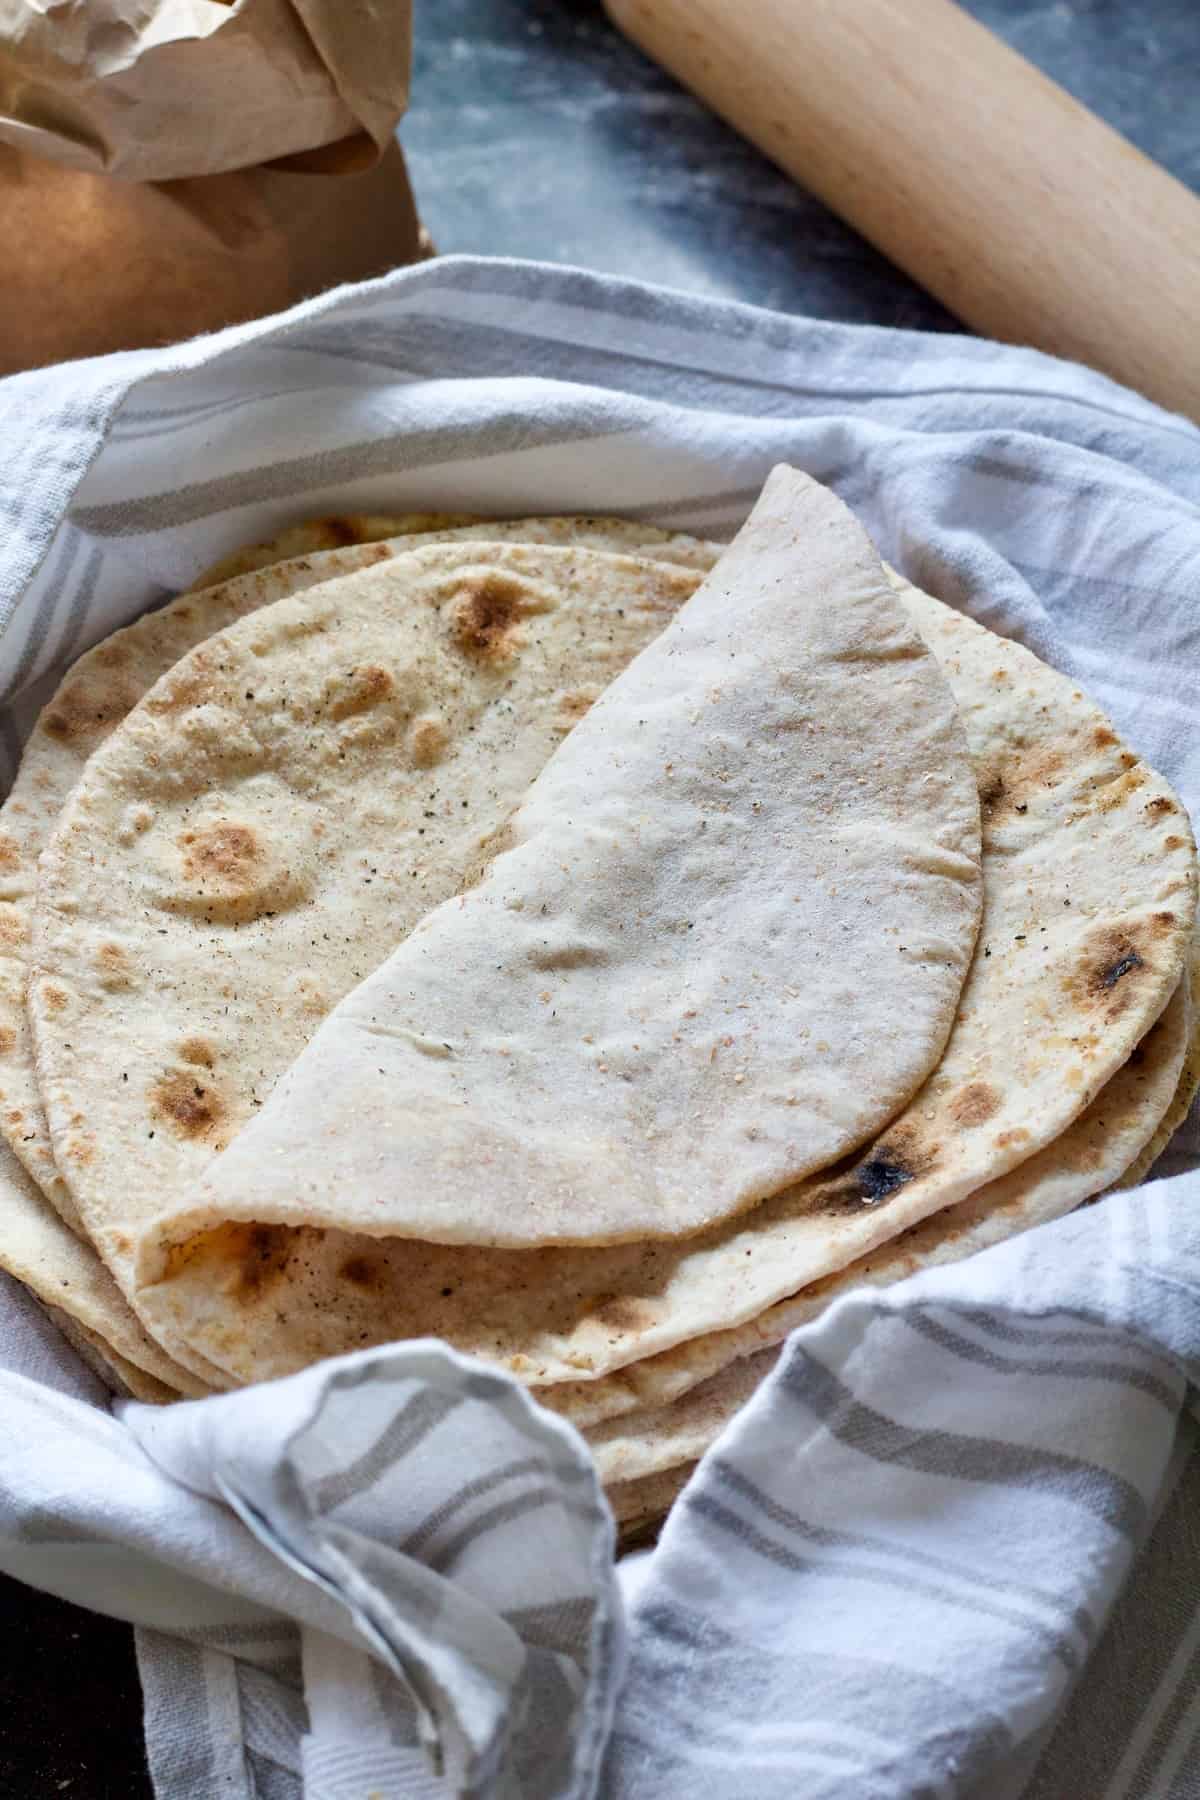
Simply put, chapati (also known as chapatti or roti) is an unleavened (without yeast or other raising agents) flatbread that originated from the Indian subcontinent where it's considered an everyday food staple. [source: Wikipedia]
I've been making flatbreads of some sort for years now as they are by far the quickest and easiest bread to make in a hurry (especially if you're a fan of curries, stews and wraps).
This particular recipe has evolved quite considerably overtime. Today I'm sharing with you my tried, tested and thoroughly experimented with, best and final version which I hope becomes your go-to chapati recipe.
For more easy flatbread recipes check out my Easy No-Yeast Naan Bread as well as Easy No-Yeast Flatbreads. Both great little staples!
Jump to:
📝 Ingredients & substitutions
Here's what you'll need to make Indian chapatis:
- Flour - Chapatis are originally made with atta flour which is a special wholemeal (wholewheat) flour which is slightly less course.
Atta flour is widely available in supermarkets here in the UK (look in the world food isle rather than flour isle). You can also order it online.
If you don't have special chapati flour available, you can still make these flatbreads with one third plain and two thirds wholemeal flour.
- Water - As simple as that. I usually use filtered water but tap water is fine too. One important thing to remember is that water should be slightly warm (lukewarm) as cold water will make chapatis hard. Aim for temperature between 36.5-40.5C (98-105F). I use my handy probe thermometer to ensure the temperature is just high but you can simply gauge it with your finger. Water should feel just nice and warm to the touch.
- Salt - Optional but personally I cannot imagine making any bread without salt. I use 1 teaspoon of fine Himalayan pink salt in this recipe but any good quality salt will do (make sure it's fine and not course though as you want it to be evenly distributed. )
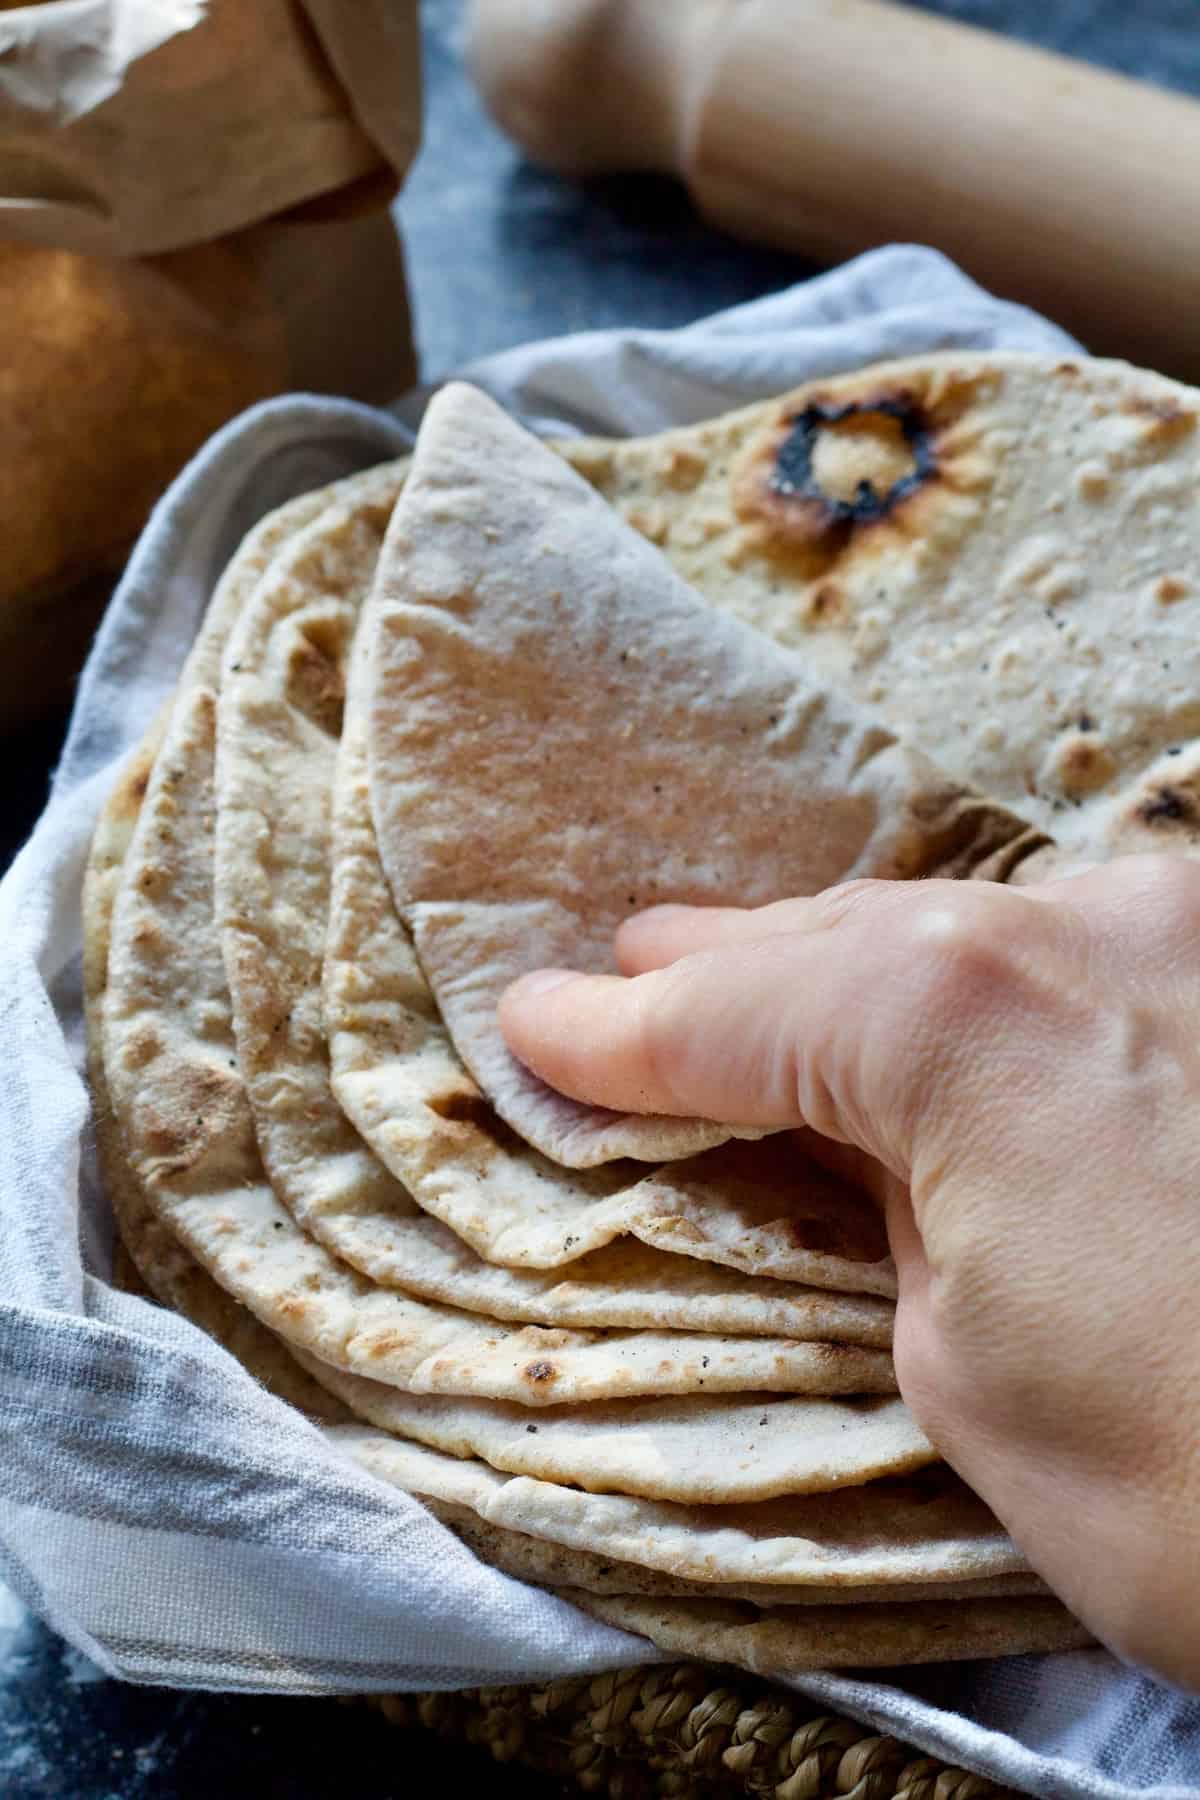
🔪 How to make chapati
Ingredient quantities & detailed instructions to be found in recipe card at the bottom of the post.
Put flour and salt (if using) in a large bowl and give them a whisk or alternatively use a fine sieve to sift them through into a bowl. If you do the latter ensure to add all the bran that stayed on the sieve back to the bowl.
Start adding lukewarm water and bringing dough together with your hand until there is no flour left at the bottom of the bowl.
Depending on the flour you use, you might need more or less water so always add it slowly and never all at once.
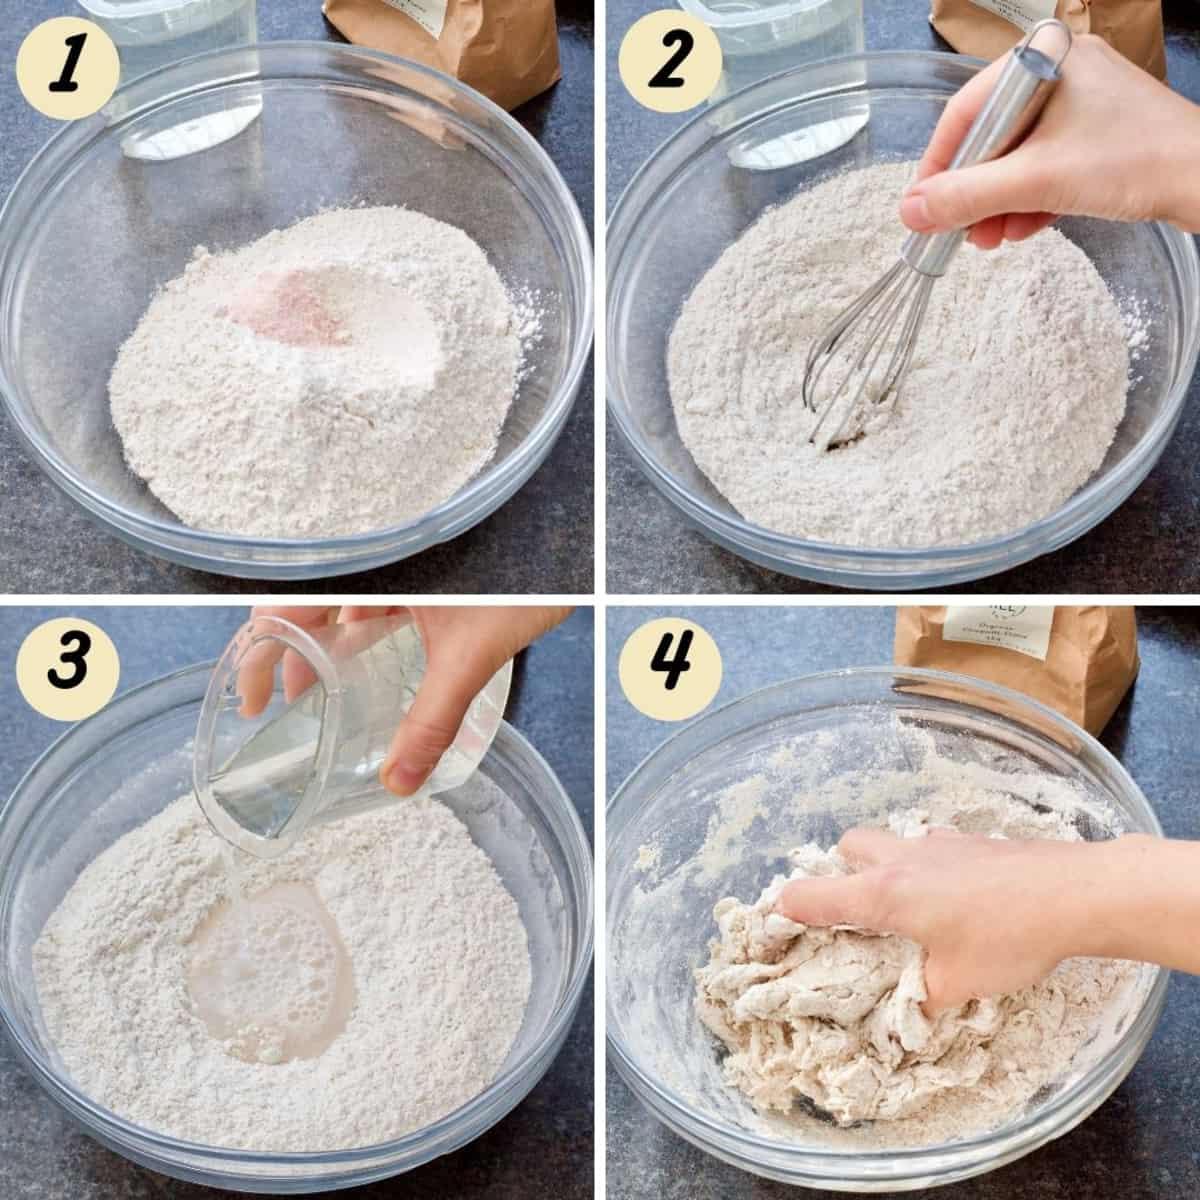
You will end up with quite shaggy looking ball of dough. It shouldn't be either too dry or too sticky.
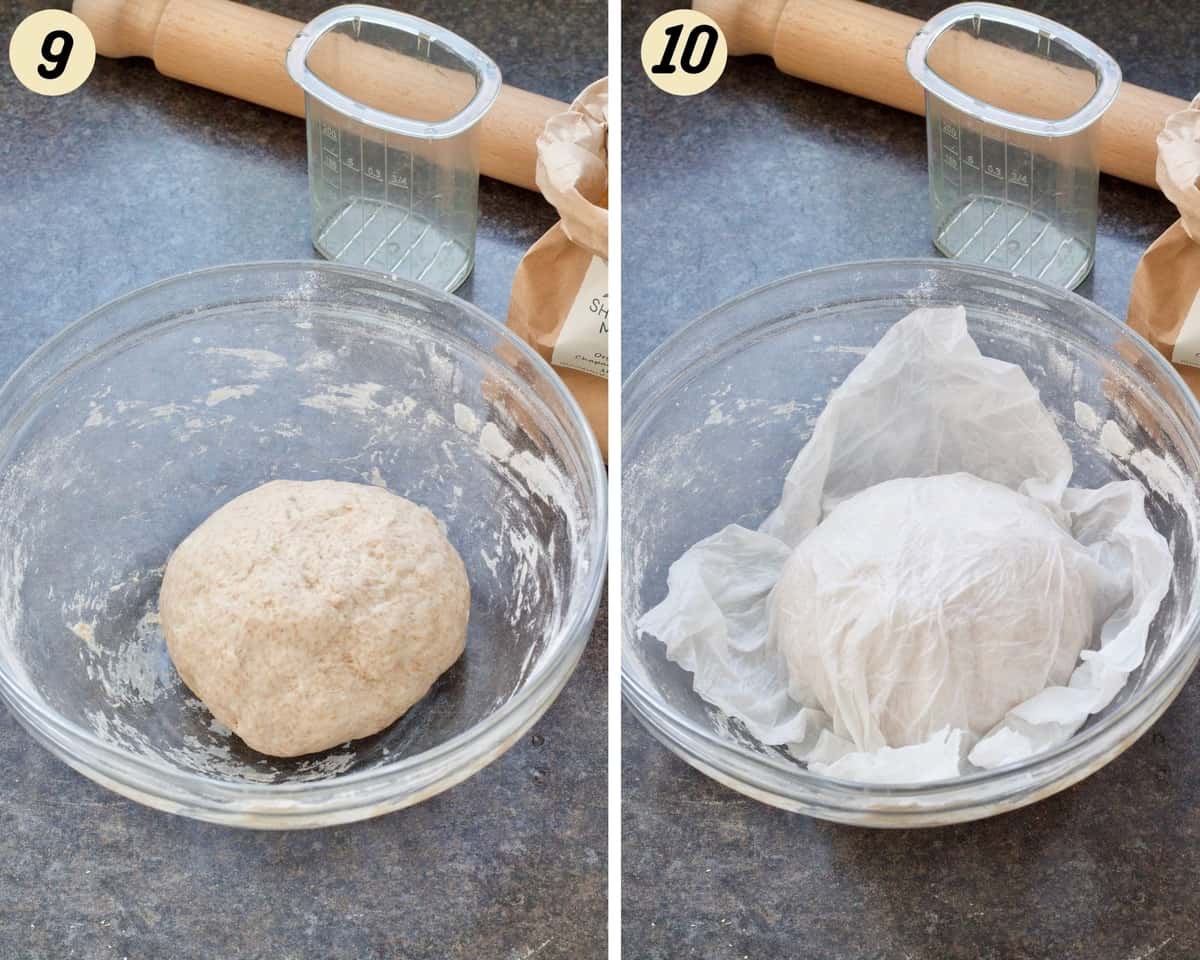
Take the dough out onto the kitchen counter generously dusted with some flour and start kneading with your hands until the dough is looking smooth, soft and springs back when you poke it with your finger (5-8 minutes).
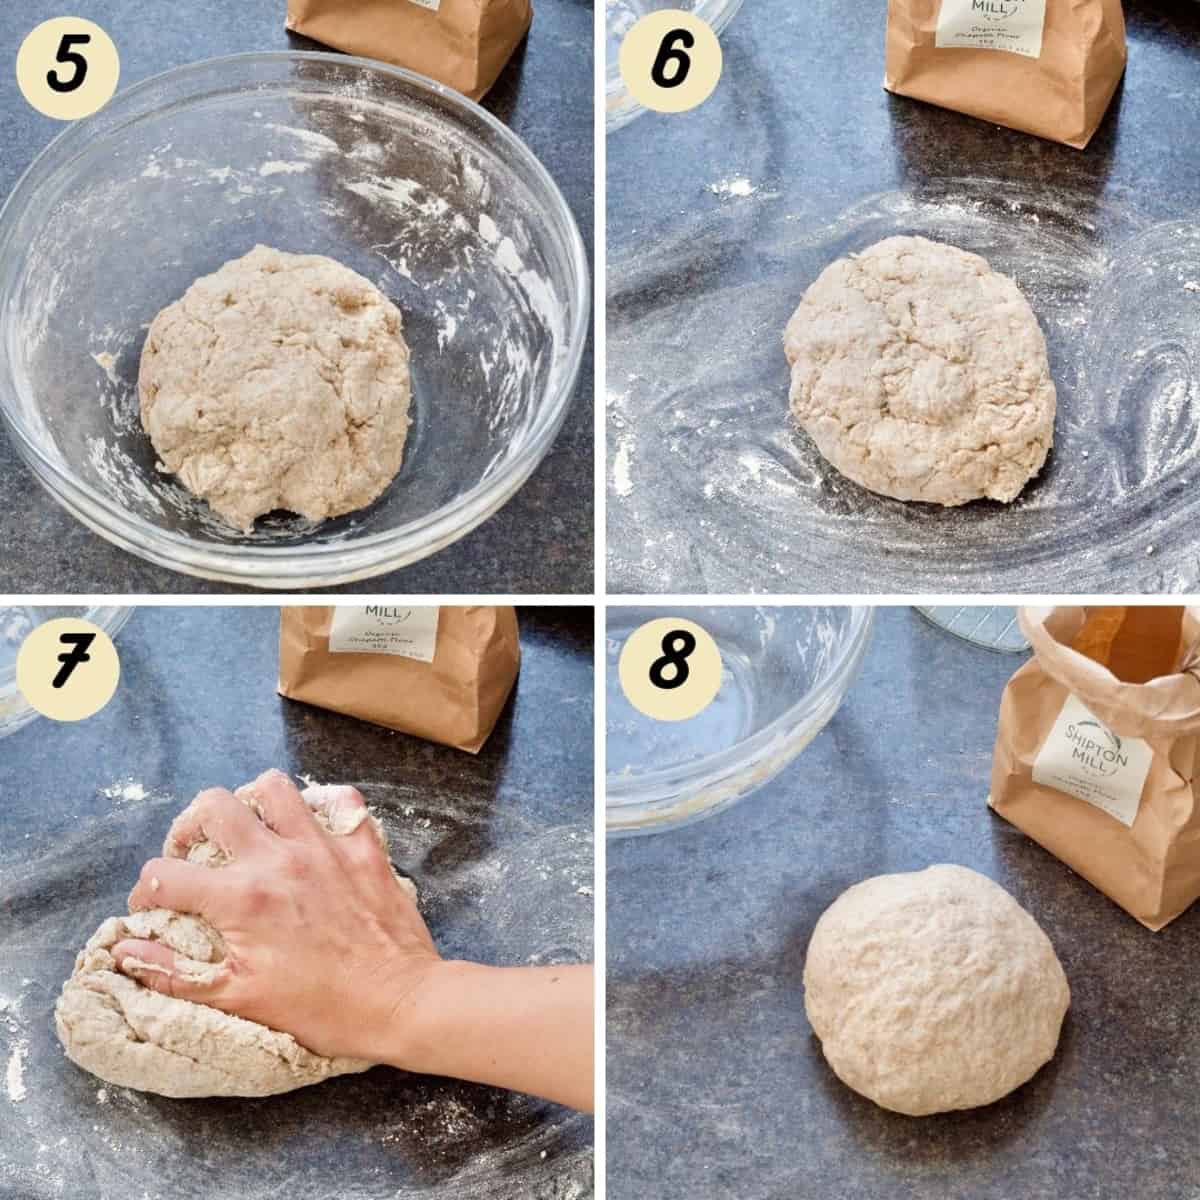
Return dough to a bowl, cover it lightly with damp paper towel and let it rest for 30 minutes.
After 30 minutes resting time, divide the dough into 8 roughly equal balls. I like to weigh my dough out using kitchen scales.
Cup each dough ball with your hand and gently roll around until nice, smooth and uniform looking.
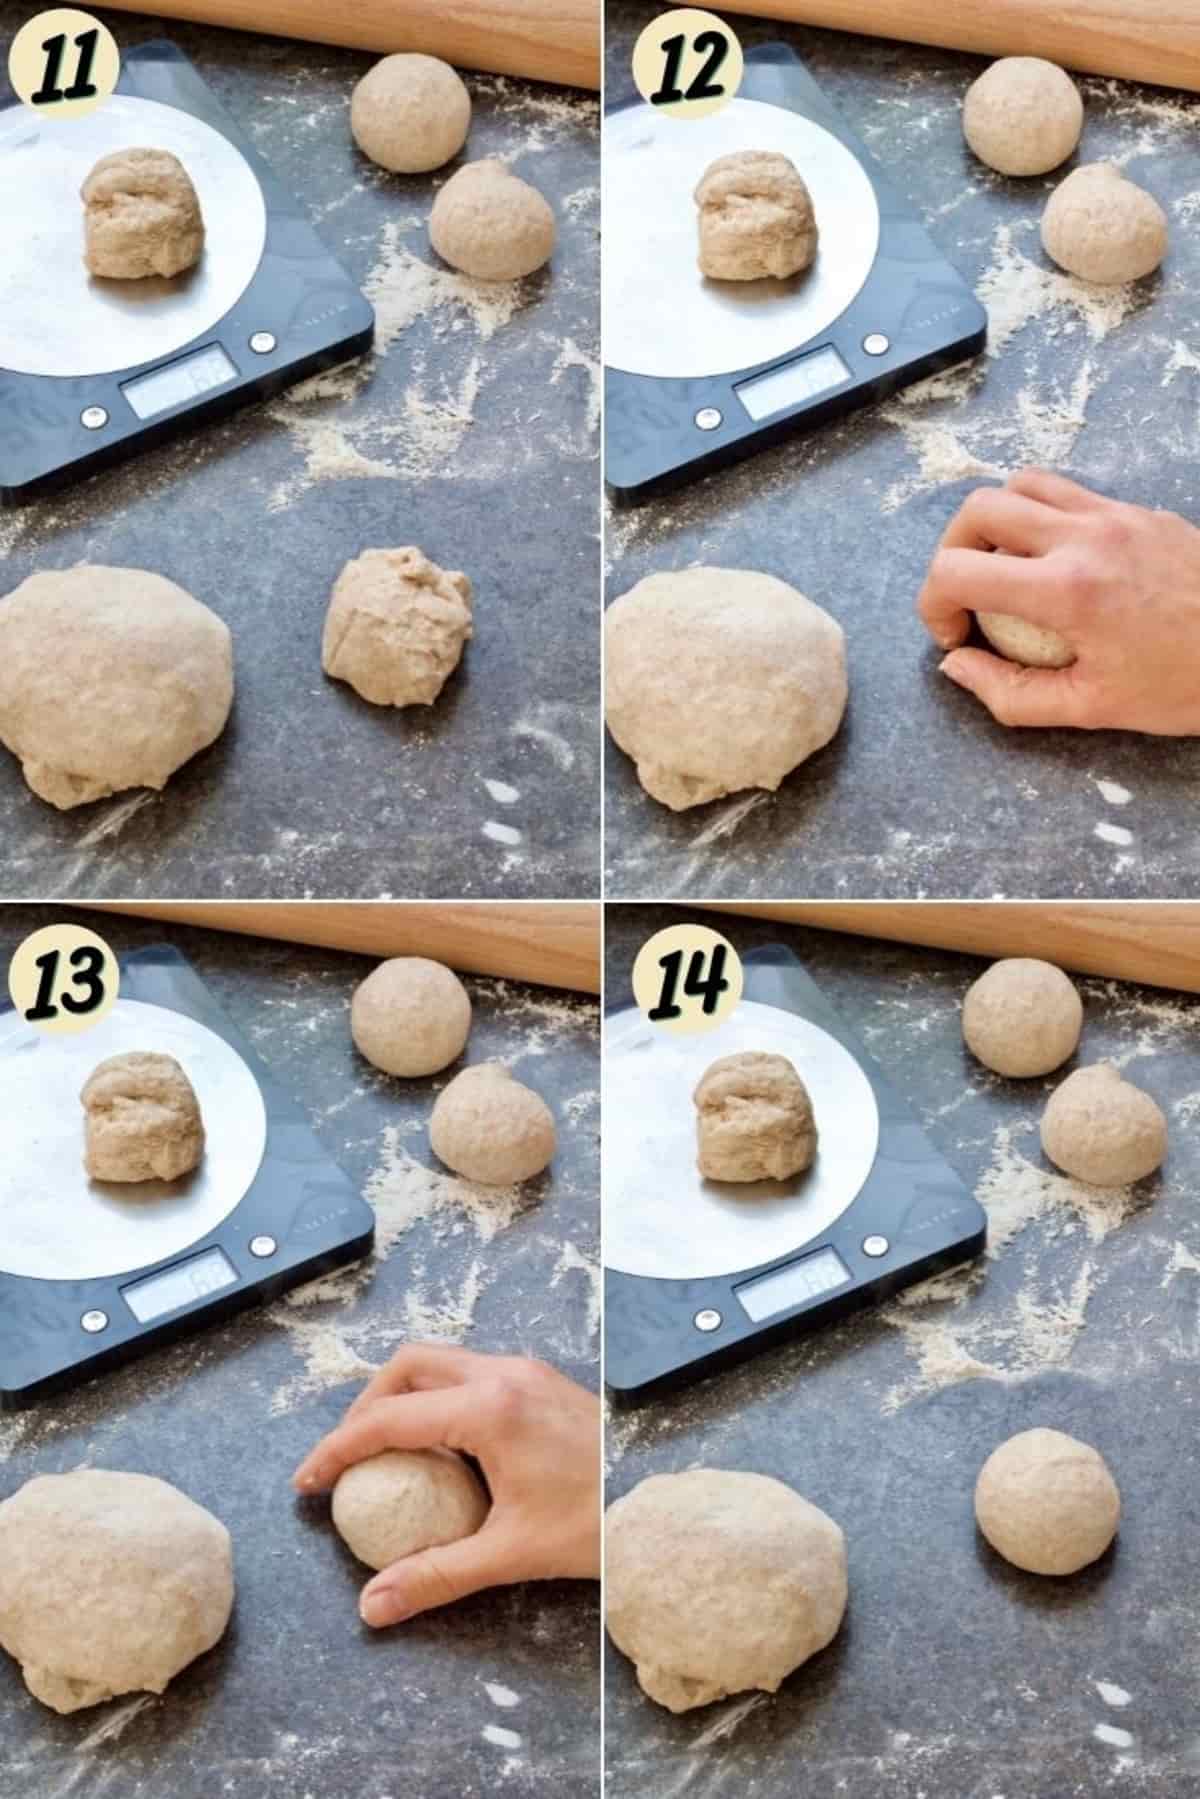
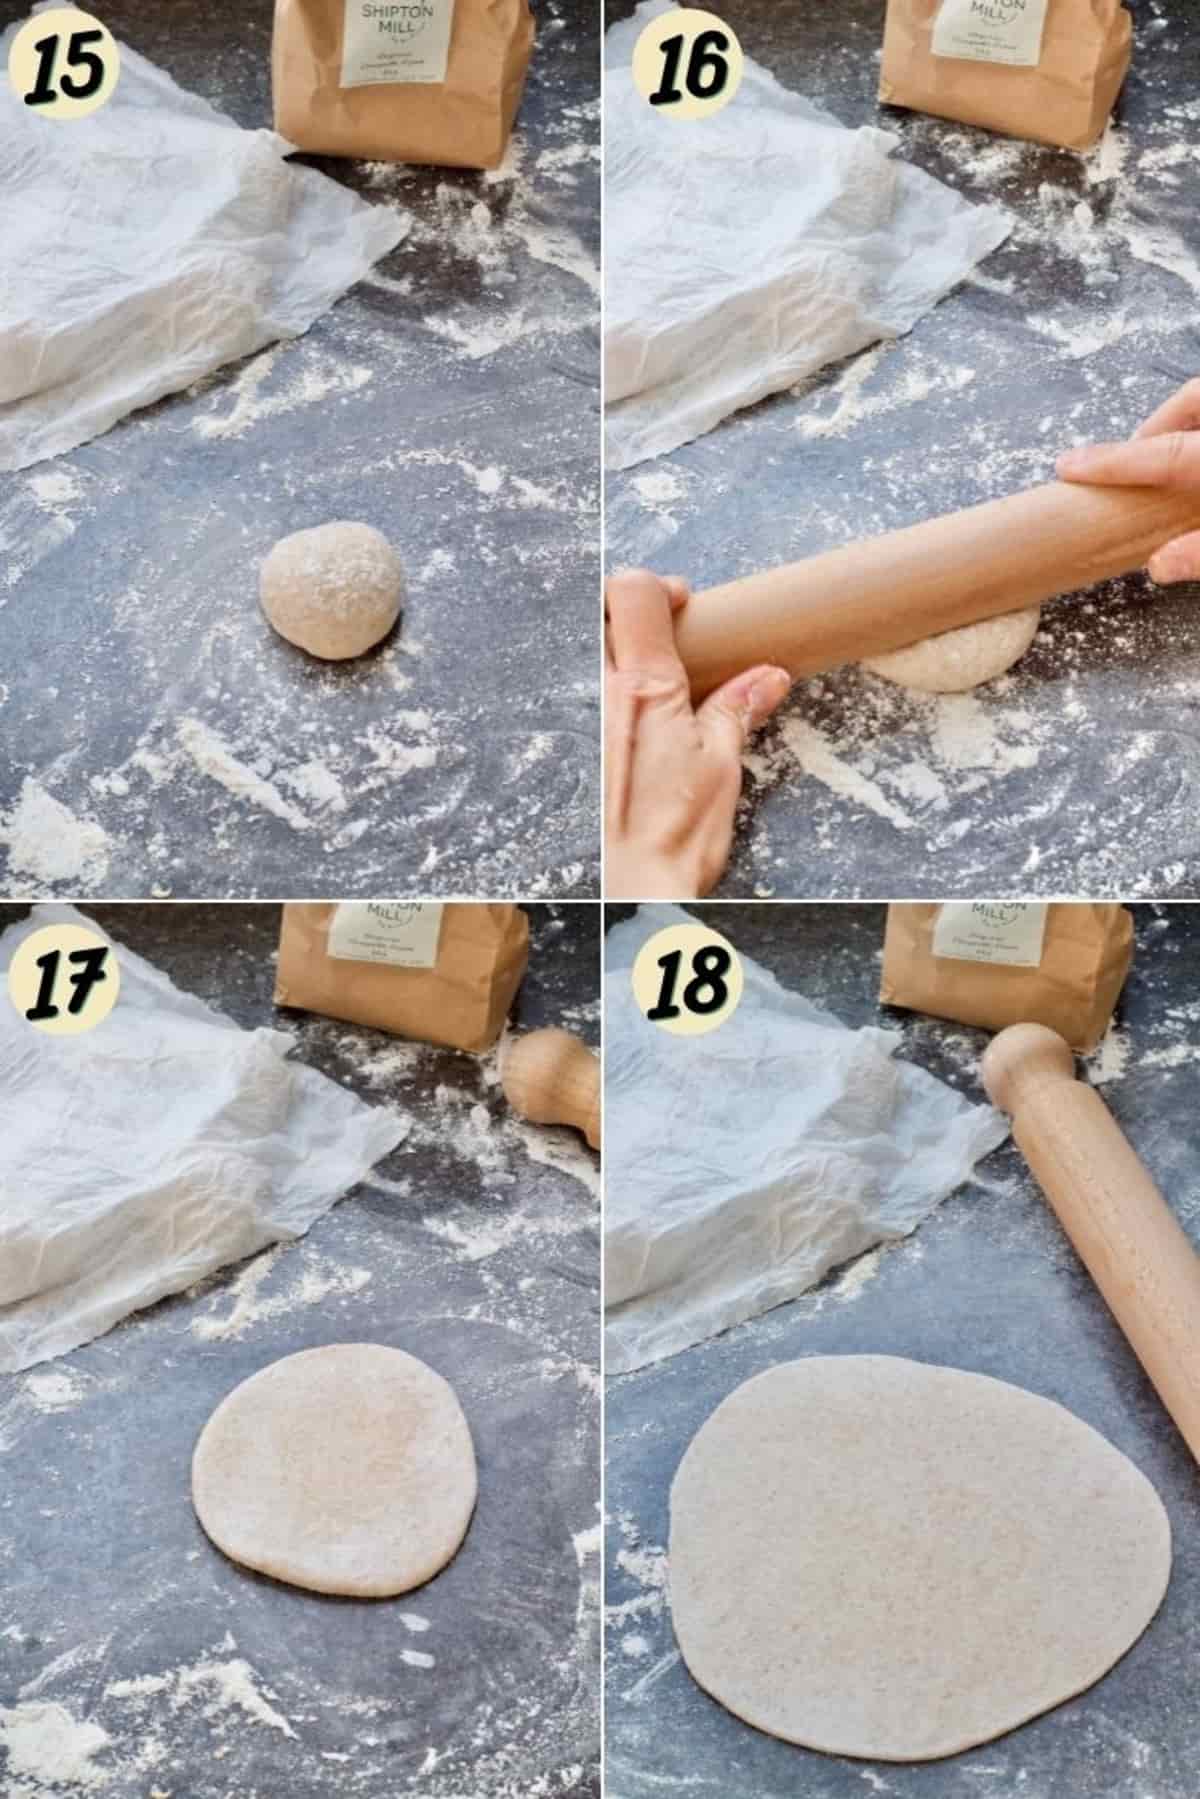
As you start rolling out your chapatis, keep the other dough balls covered with damp paper towel to prevent them from drying out.
Dust the kitchen counter and rolling pin generously with flour and roll the dough ball out into a rough circle about 2mm thick.
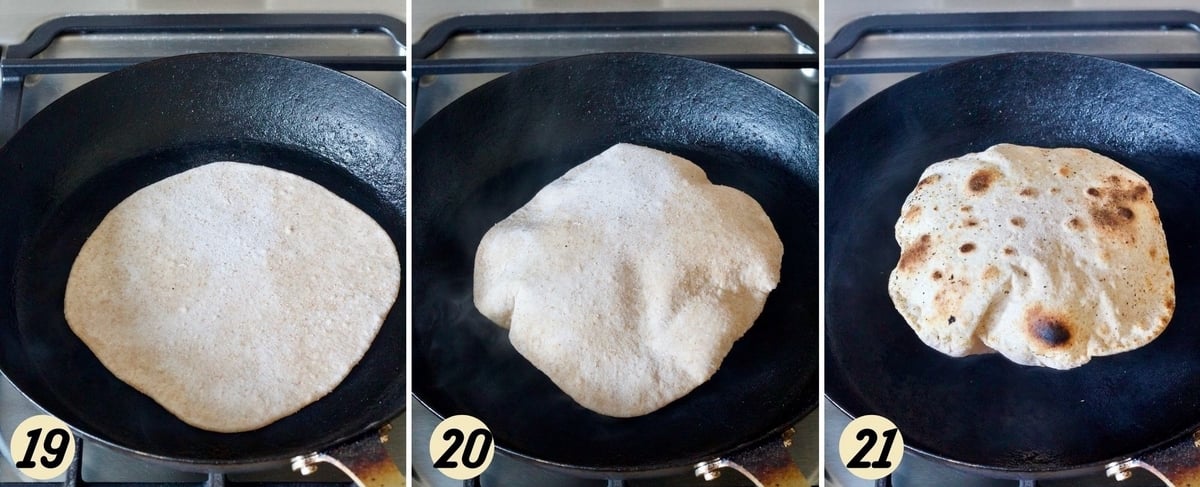
Next, heat up the non-stick pan, griddle or skillet until hot.
Dust excess flour off the chapatti and gently place it in a hot pan.
Let it cook until you notice bubbles appear and/or your chapatti starts puffing up slowly (it won't always happen) . Take a look underneath and if you see nice brown coloured spots, it's time to flip. First side might take anything from 30 seconds to almost 2 minutes.
Once flipped, let your chapatti cook for another 30 seconds or so (again check underneath for a bit of colour). It might be puffing up nicely but it might not. It will be tasty nevertheless so don't be put off.
Once done, keep your chapati covered with clean kitchen towel which will help keeping it warm and moist as you repeat the process with the remaining dough.
🍽 Equipment
The great thing about this recipe is that it doesn't require any special equipment although rolling pin (or you could use a bottle) is necessary and I would suggest using good quality non-stick skillet, griddle or pan.
I swear by my carbon steel heavy-duty pan (not sponsored) which is perfect for making chapatis. It came pre-seasoned and doesn't require any extra oil when cooking on it as long as you maintain it correctly.
🥡 Storing and freezing
Chapatis are best served fresh but can also be stored, wrapped well in aluminium foil or in a sealed bag for up to 2 days on the counter or up to 4 days in the fridge.
To reheat, sprinkle them very gently with some water and microwave for approximately 30 seconds.
You could also toast them gently (folded in half) or reheat in the oven for 10 minutes at 150C/300F wrapped tightly in aluminium foil.
They're freezer friendly for up to three months.
If freezing few of them together, make sure to separate them with a layer of baking paper to prevent them from sticking.
Defrost on the kitchen counter and reheat as above.
💭 Helpful tips
Always use lukewarm water to make your chapatis. Cold water will make them hard.
Knead chapati dough for good 5-8 minutes. It should be nice and smooth and spring back when touched. The longer you knead it, the softer the chapatis.
Be generous with the flour on the rolling surface as well as the rolling pin. The excess flour will be dusted off before cooking but it's important for chapatis not to stick as you're rolling them.
Roll and cook one chapati at a time, keeping remaining dough balls under damp paper towel.
Don't roll your dough too thin and ensure even thickness. Pound coin thickness (2mm) is about right, otherwise you are making crackers not chapatis.
Don't skip resting time. It really is essential if you want nice and soft chapatis.
Make sure your pan is really hot before cooking chapatis.
Wrap cooked chapatis in a clean kitchen towel to keep them warm and soft.
🍴Serving suggestions
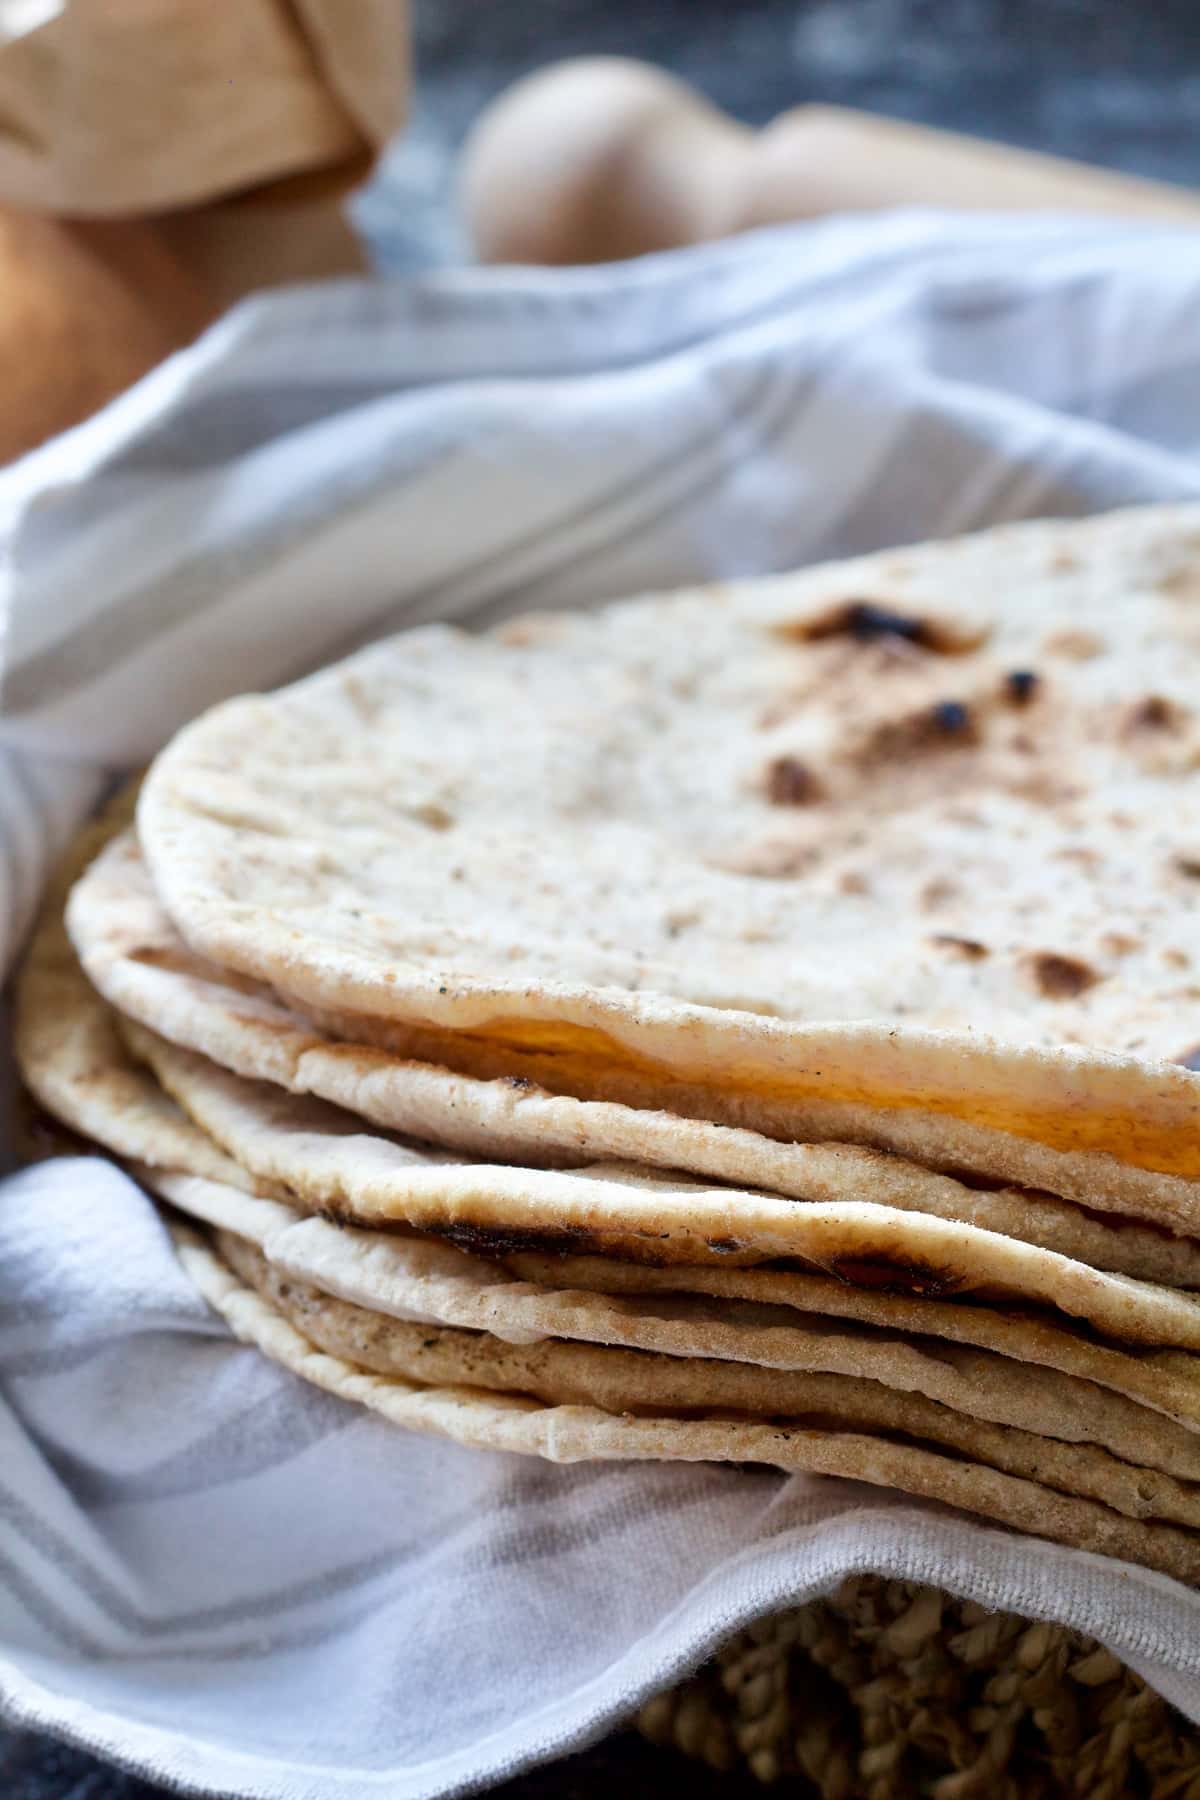
These naturally vegan chapatis are simply perfect as they are, still warm and served as a side with your favourite curry or stew.
You can also brush them with some melted vegan butter if you're feeling indulgent.
Delicious vegan curries to serve with your chapatis:
Celeriac and Chard Vegetable Curry
They work great as wraps too! Try them with:
Chickpea & Carrot Falafel Burgers
For super simple and kid friendly dinner turn them into 5-minute chapati pizzas by spreading over some tomato sauce and sprinkling some vegan cheese and toppings of their choice. Quick blast under the grill and there you have it!
❓ FAQs
You shouldn't have to if you are using really good, heavy duty non-stick pan. However, you could wipe your pan with a paper towel dipped in oil as you would when frying pancakes to help with sticking.
It would be atta flour also known as chapati flour. These days they are readily available in the supermarkets. You can also use one third plain (all-purpose) and two thirds wholemeal (wholewheat) flour.
Chapati is a type of roti and the name can be used interchangeably.
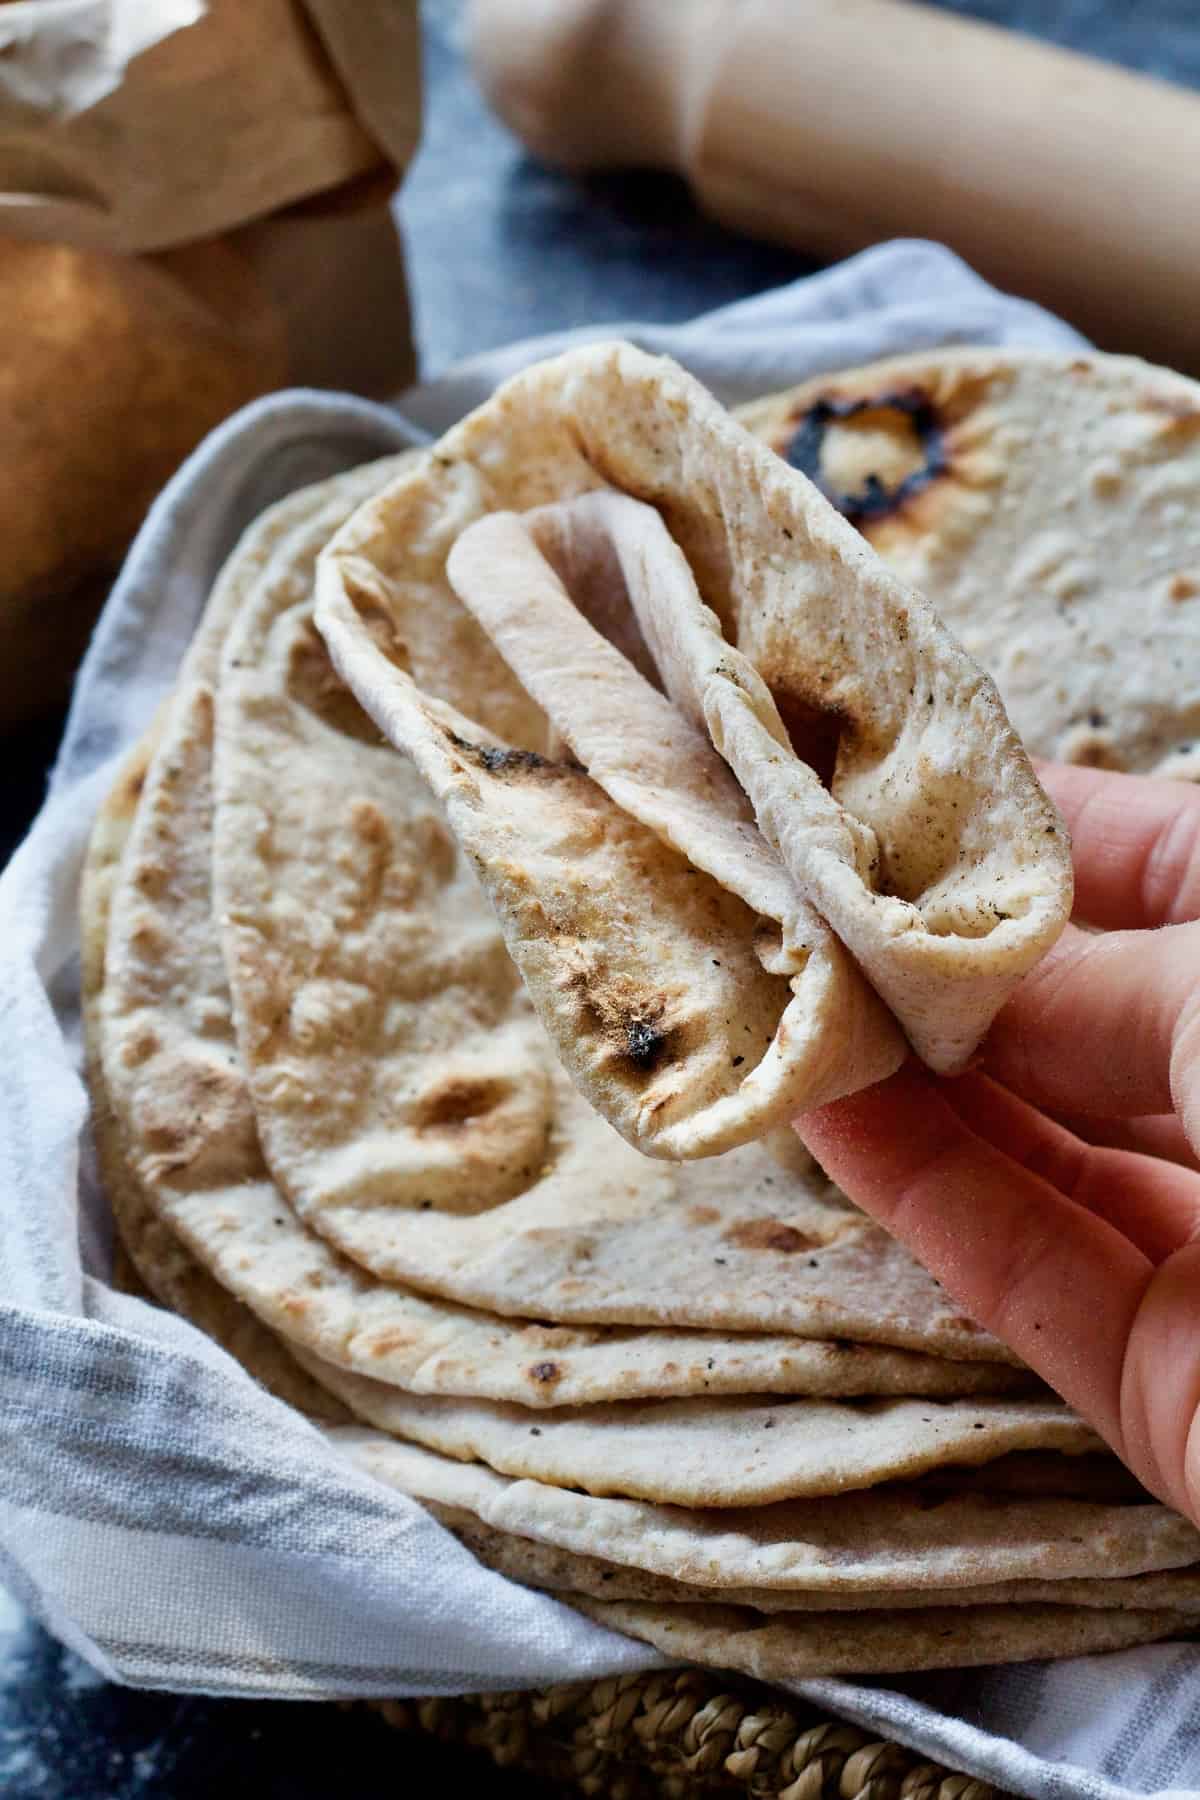
First of all, chapatis don't always puff up but even if they don't they still taste great so don't worry too much about it. However, if you'd like to increase the chance for it to puff up make sure you let the dough rest, roll it evenly and with plenty of flour, don't roll it too thin and finally shake as much of excess flour off from the chapati as possible before cooking.
Have you tried my Easy Indian Chapati?
Please consider giving it ⭐️⭐️⭐️⭐️⭐️ rating in recipe card below and share your views or tips in the comments.
😋 More easy bread recipes
📋 Recipe
Easy Indian Chapati
Equipment
Ingredients
- 300 g atta (chapati) flour see notes for substitution
- 1 teaspoon fine salt optional
- 200 ml lukewarm water you might need a bit less or a bit more water depending on your flour
- extra flour for dusting
Instructions
- Put flour and salt (if using) in a large bowl and give them a whisk or alternatively use a fine sieve to sift them through into a bowl. If you do the latter ensure to add all the bran that stayed on the sieve back to the bowl.
- Start adding lukewarm water and bringing dough together with your hand until there is no flour left at the bottom of the bowl.
- Depending on the flour you use, you might need more or less water so always add it slowly and never all at once.
- You will end up with quite shaggy looking ball of dough. It shouldn't be either too dry or too sticky.
- Take the dough out onto the kitchen counter generously dusted with some flour and start kneading with your hands until the dough is looking smooth, soft and springs back when you poke it with your finger (5-8 minutes).
- Return dough to the bowl, cover it lightly with damp paper towel and let it rest for 30 minutes.
- After 30 minutes resting time, divide the dough into 8 roughly equal balls. I like to weigh my dough out using kitchen scales.
- Cup each dough ball with your hand and gently roll around until nice, smooth and uniform looking.
- As you start rolling out your chapatis, keep the other dough balls covered with damp paper towel to prevent them from drying out.
- Dust the kitchen counter and rolling pin generously with flour and roll the dough ball out into a rough circle about 2 mm thick.
- Heat up the non-stick pan, griddle or skillet until hot.
- Dust excess flour off the chapatti and gently place it in a hot pan.
- Let it cook until you notice bubbles appear and/or your chapatti starts puffing up slowly (it won't always happen). Take a look underneath and if you see nice brown coloured spots, it's time to flip. First side might take anything from 30 seconds to almost 2 minutes.
- Once flipped, let your chapati cook for another 30 seconds or so (again check underneath for a bit of colour). It might be puffing up nicely but it might not. It will be tasty nevertheless so don't be put off.
- Once done, keep your chapati wrapped in clean kitchen towel which will help keeping it warm and soft.
- Repeat the process with remaining dough balls and serve!
Notes
- Nutritional information is per 1 chapati based on 8 serving and should be treated as a rough guideline only.
- Atta flour can be substituted with one third (100g/3.5oz) plain (all-purpose) flour and two thirds (200g/7oz) wholemeal (wholewheat) flour.
- Well wrapped leftover chapatis will keep for up to 2 days on the counter or 4 days in the fridge.
- Freezer friendly.
- Always use lukewarm water to make your chapatis. Cold water will make them hard.
- Knead chapati dough for good 5-8 minutes. It should be nice and smooth and springs back when touched. The longer you knead, the softer the chapatis.
- Be generous with the flour on the rolling surface as well as the rolling pin.The excess flour will be dusted off before cooking but it's important for chapatis not to stick as you're rolling them.
- Roll and cook one chapati at a time, keeping remaining dough balls under damp towel.
- Don't roll your dough too thin and ensure even thickness. Pound coin thickness (2mm) is about right, otherwise you are making crackers not chapatis.
- Don't skip resting time. It really is essential if you want nice and soft chapati.
- Make sure your pan is really hot before cooking chapati.
- Wrap cooked chapatis in a clean kitchen towel to keep them warm and soft.

Hello says
I made them for my family and they are delicious- everyone was sad when they had been finished!
joskitchenlarder says
So great to hear they've been so popular with your family! 😊
Adela says
Recipe looks easy good tips
joskitchenlarder says
Thank you so much Adela!😊
Ana says
I love how soft they are. So easy to make too, thank you!
joskitchenlarder says
Thank you Ana! So glad you like it! 🙂