
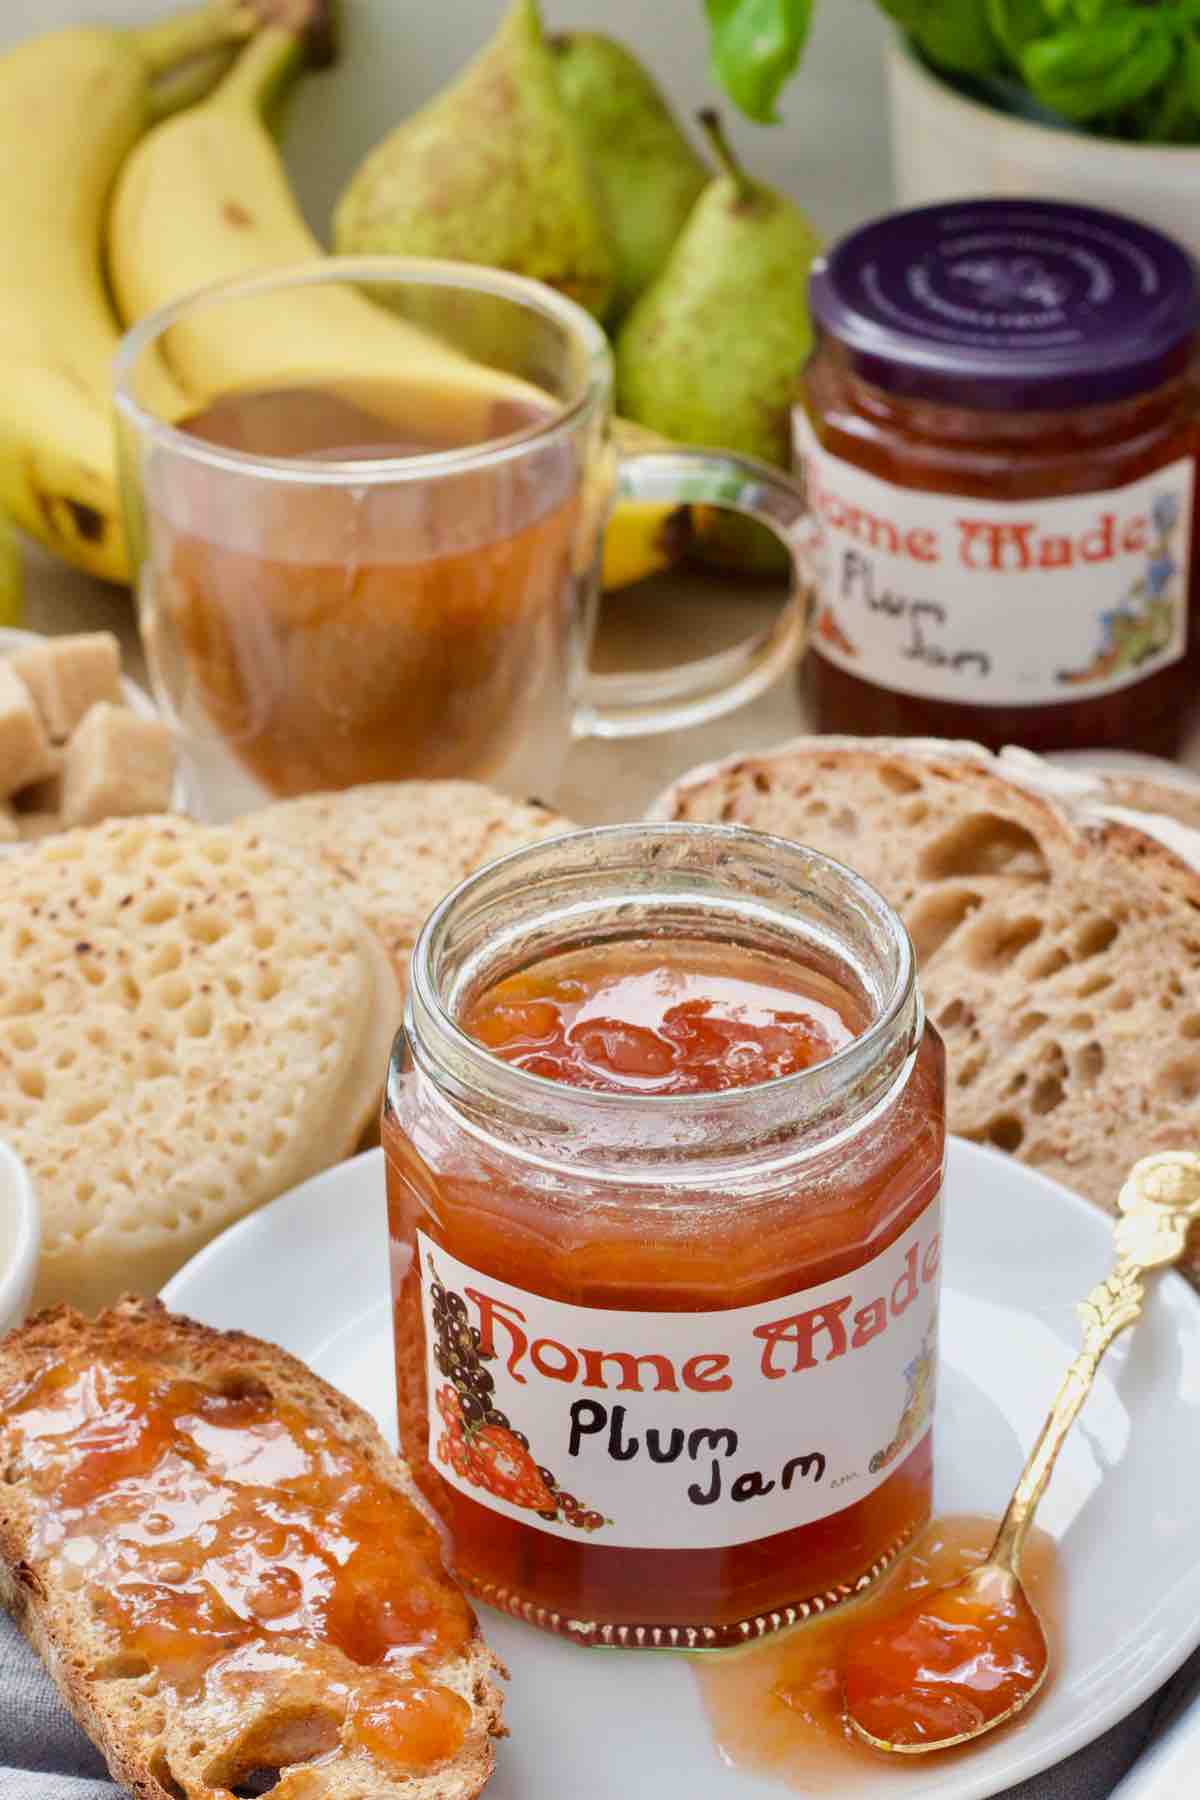
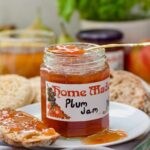
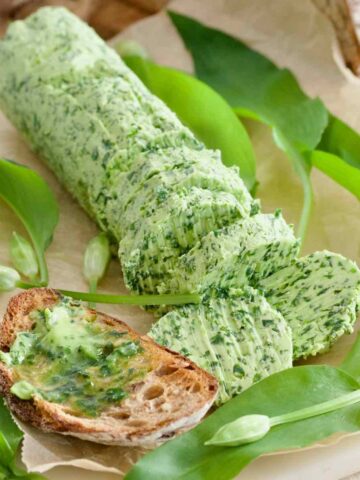
Preserve the season with my quick, cheap and easy plum jam recipe. Perfect for jam making beginners, it's one of the easiest jams to make, 3 ingredients and no added pectin!
If you have never made homemade jam before this easy plum jam recipe is the one for you!
With high amount of natural pectin, plums make great fruit to start "jamming" with. No pectin powder, no specialist sugars, just 3 simple ingredients.
You will not only gain a skill but will also end up with jars full of delicious homemade preserve. It is so much better than what you can buy from the shops
I will show you how to make plum jam step-by-step so that you feel confident to get into the kitchen and make some yourself.
Jump to:
✔️ Why you'll love this recipe
- Simple, seasonal, frugal and of course delicious plum jam recipe.
- Great recipe for novice jam makers.
- Requires only 3 ingredients and you know exactly what's in it.
- Perfect way of using up surplus plums.
- Makes lovely homemade gift for family and friends.
- Super easy to adapt with extra flavours if you fancy.
- It works with any type of plums.
📝 Ingredients
Here's what you will need to make my Easy Plum Jam recipe:
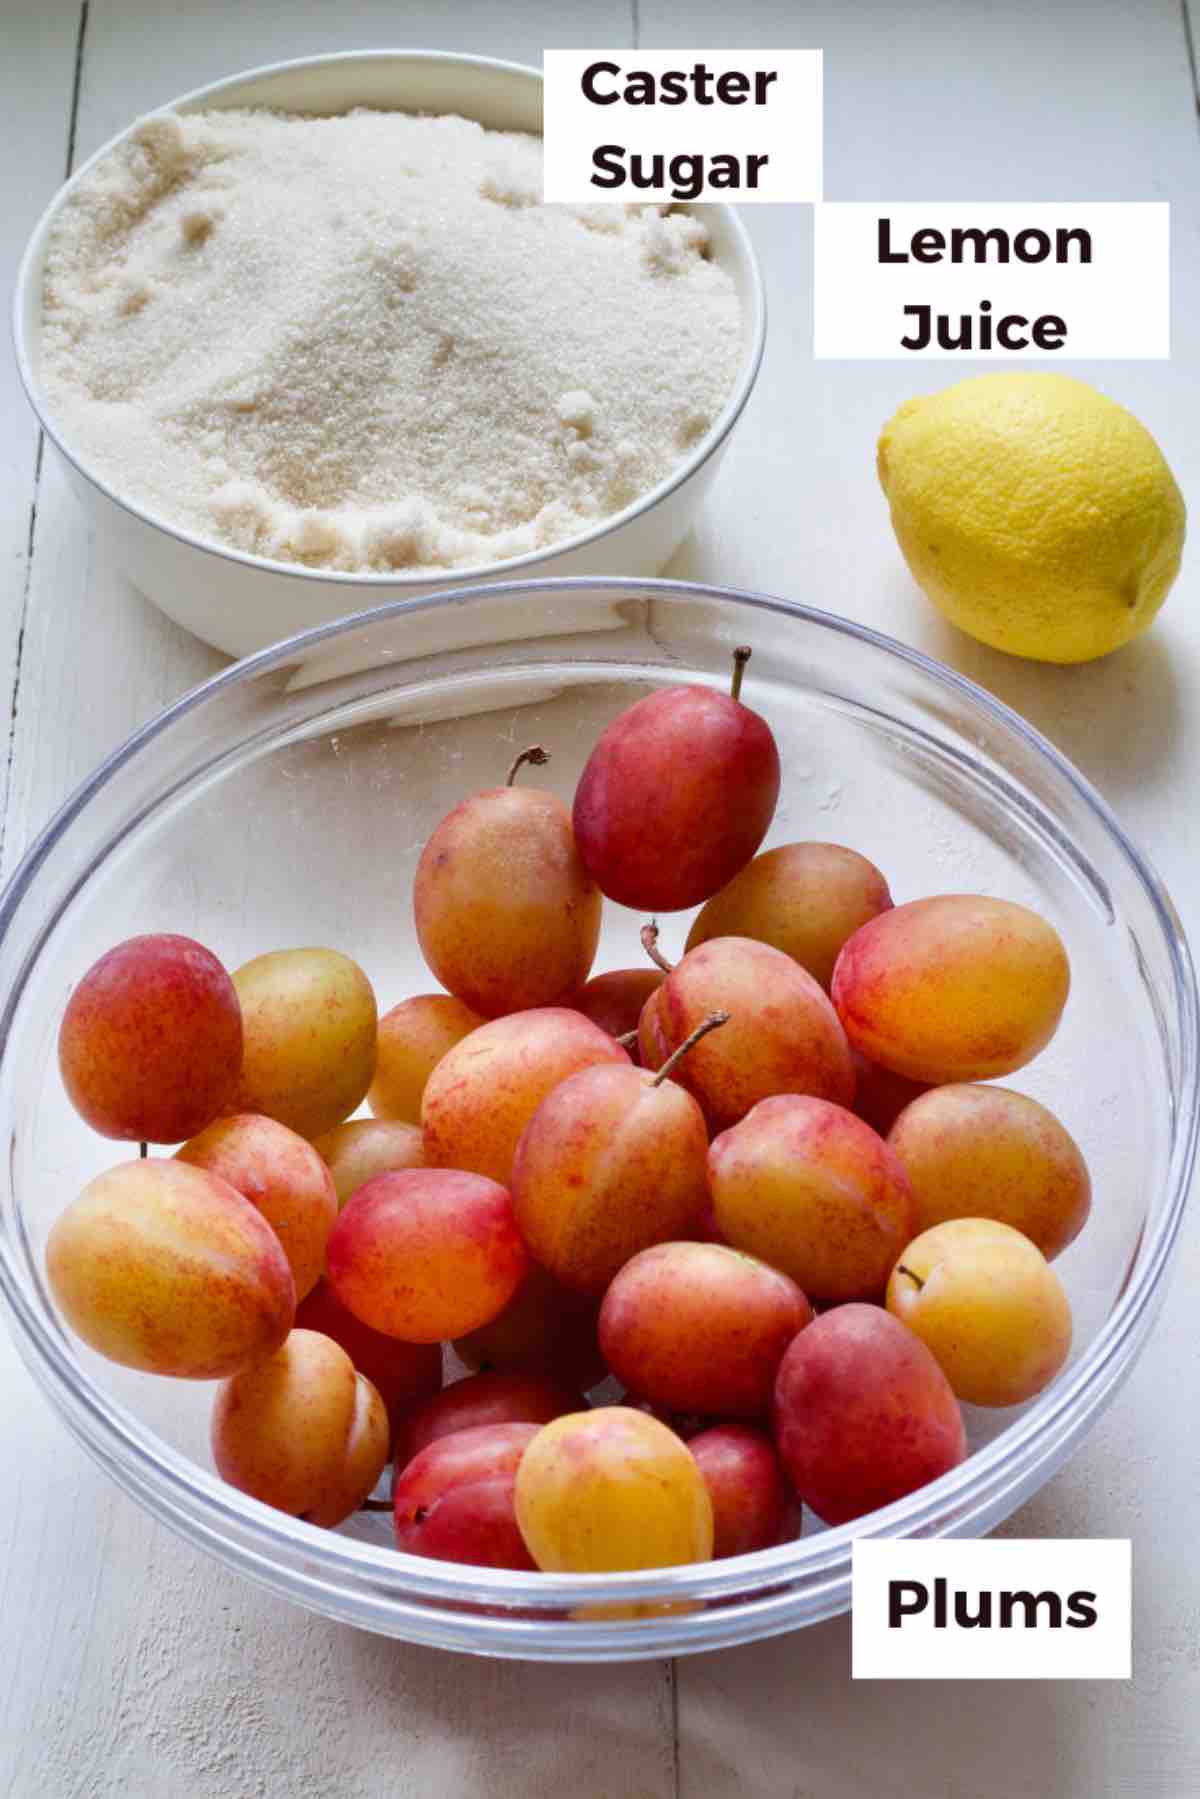
Plums - Any type of plums will work here. However, colour and level of sweetness of your jam will depend on variety of plums used.
I used cooking Victoria plums in my jam. They were quite tart despite being ripe yet they turned into super tasty and sweet (but not overly so) jam.
If using sweet, dessert plums, your jam might be a bit sweeter.
***Quick Tip*** You can adjust the amount of sugar depending on the sweetness of your plums, see Pro Tips below for details.
Sugar - I used golden caster sugar. Regular caster or simple granulated sugar will be good too.
If you have preserving sugar you can absolutely use it too but DO NOT use jam sugar as it contains added pectin which is not needed here. It would make your jam really stiff and jelly like.
Lemon Juice - A little bit of lemon juice boosts natural pectin already found in plums and adds some acidity.
🔪 Instructions
Ingredient quantities & detailed instructions to be found in recipe card at the bottom of the post.
Place two small plates or saucers in the freezer. You will need them for "wrinkle (cold plate) test" (checking whether your jam has reached setting point).
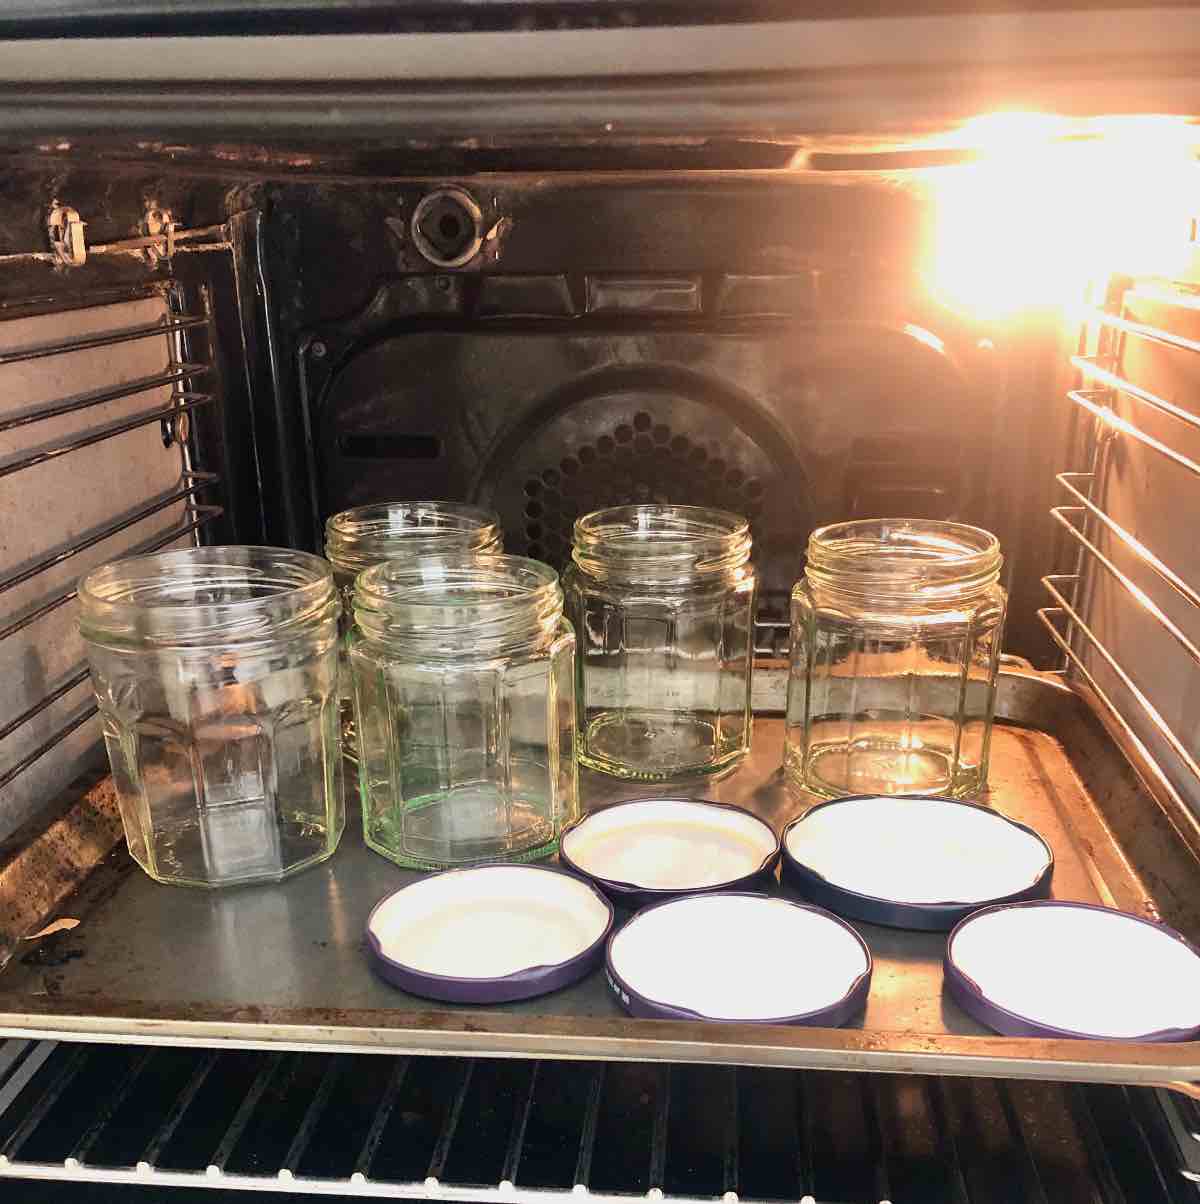
Sterilise the jars. For details see - Sterilising Jars (below).
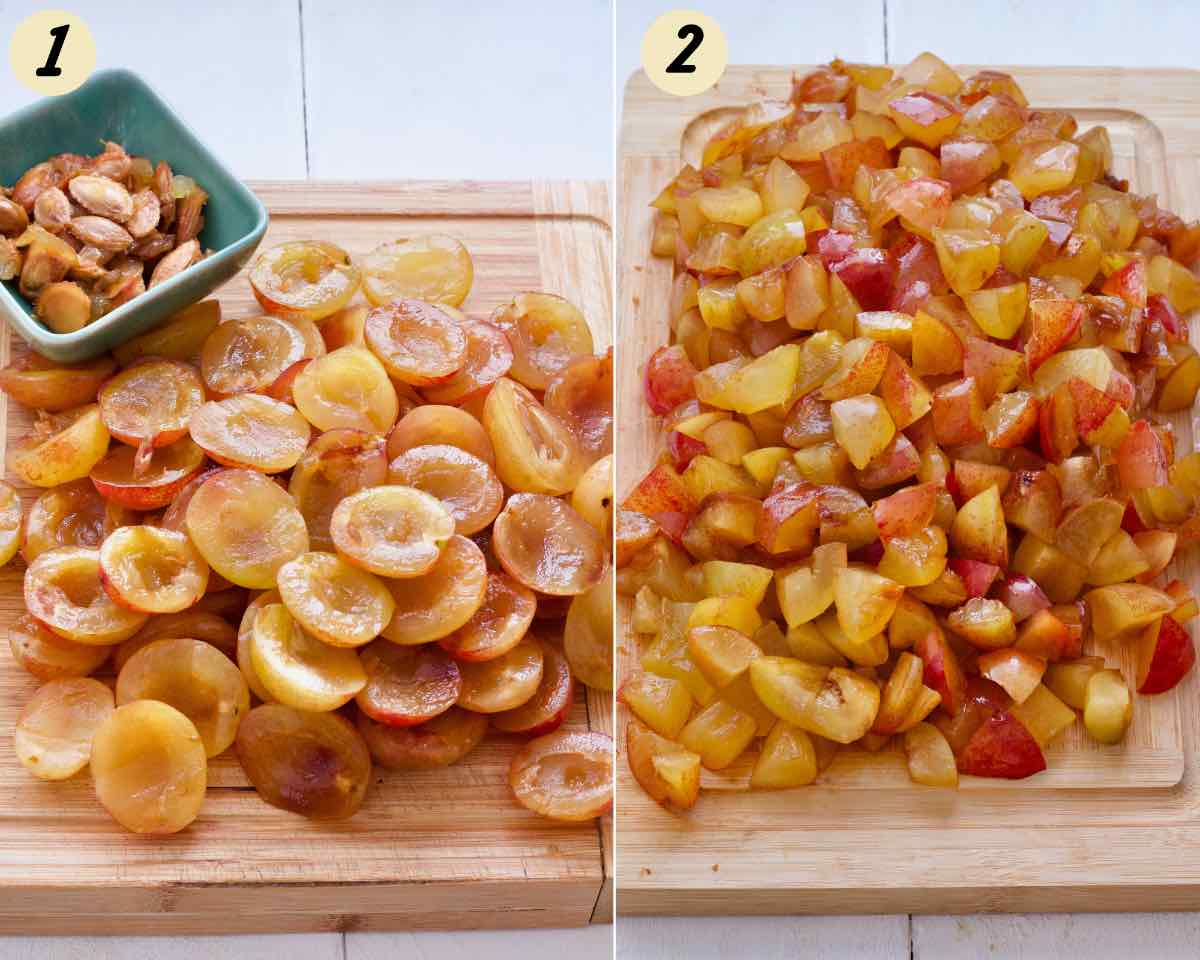
Wash, halve and de-stone the plums.
Cut each half into small chunks and put them into large pan/saucepan or preserving pan.
Place the pan on a low heat and let the plums release their natural juices and simmer gently until softened (15-20 minutes) stirring frequently to prevent them from catching.
***Quick Tip*** Plums release enough natural juices so there is no need to add any water to get them going.
Next, add sugar and lemon juice and give it all a good stir. If adding any spices/flavourings now is the time to do that too. See Variations below for ideas.
Keep the pan on low heat stirring the mixture until all the sugar dissolves (approximately 5 minutes).
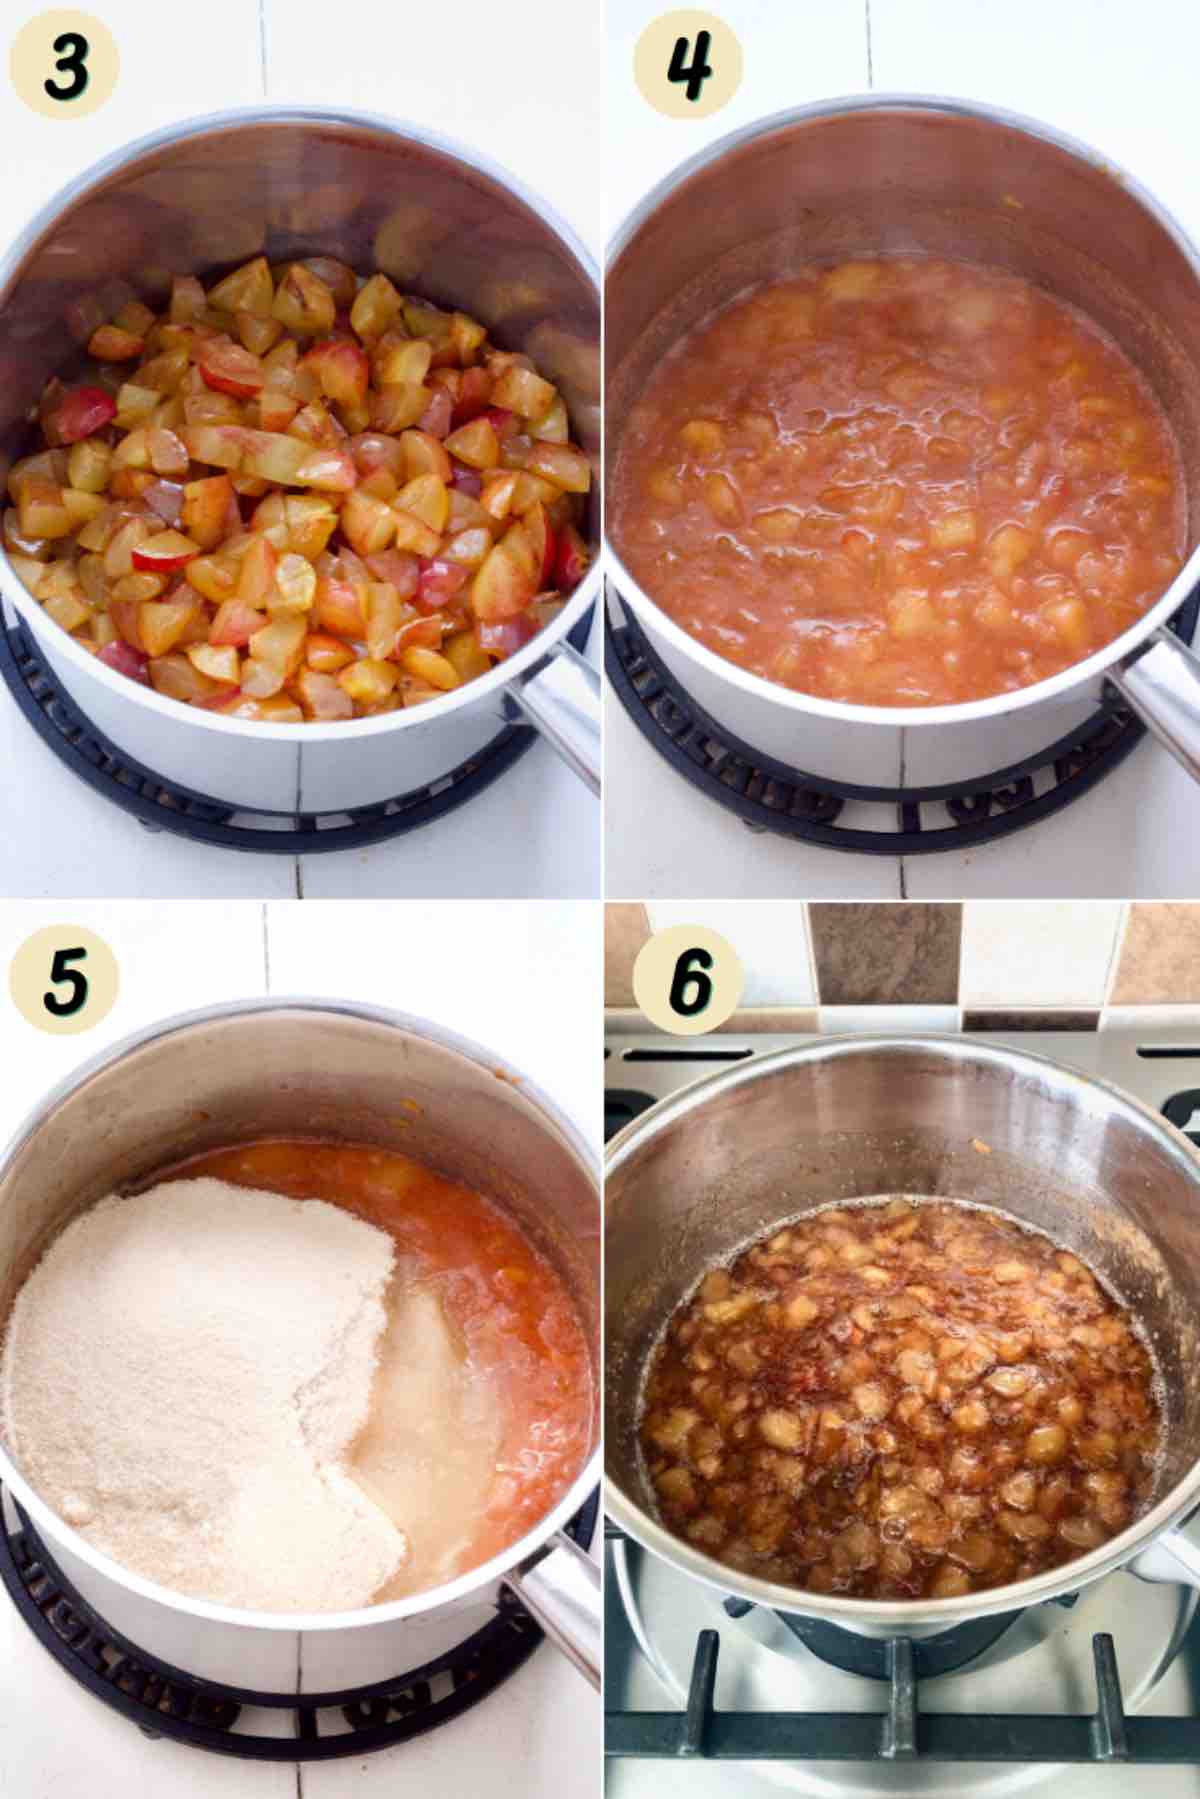
Increase the heat to medium and bring mixture to rolling boil. Continue boiling for 5 minutes.
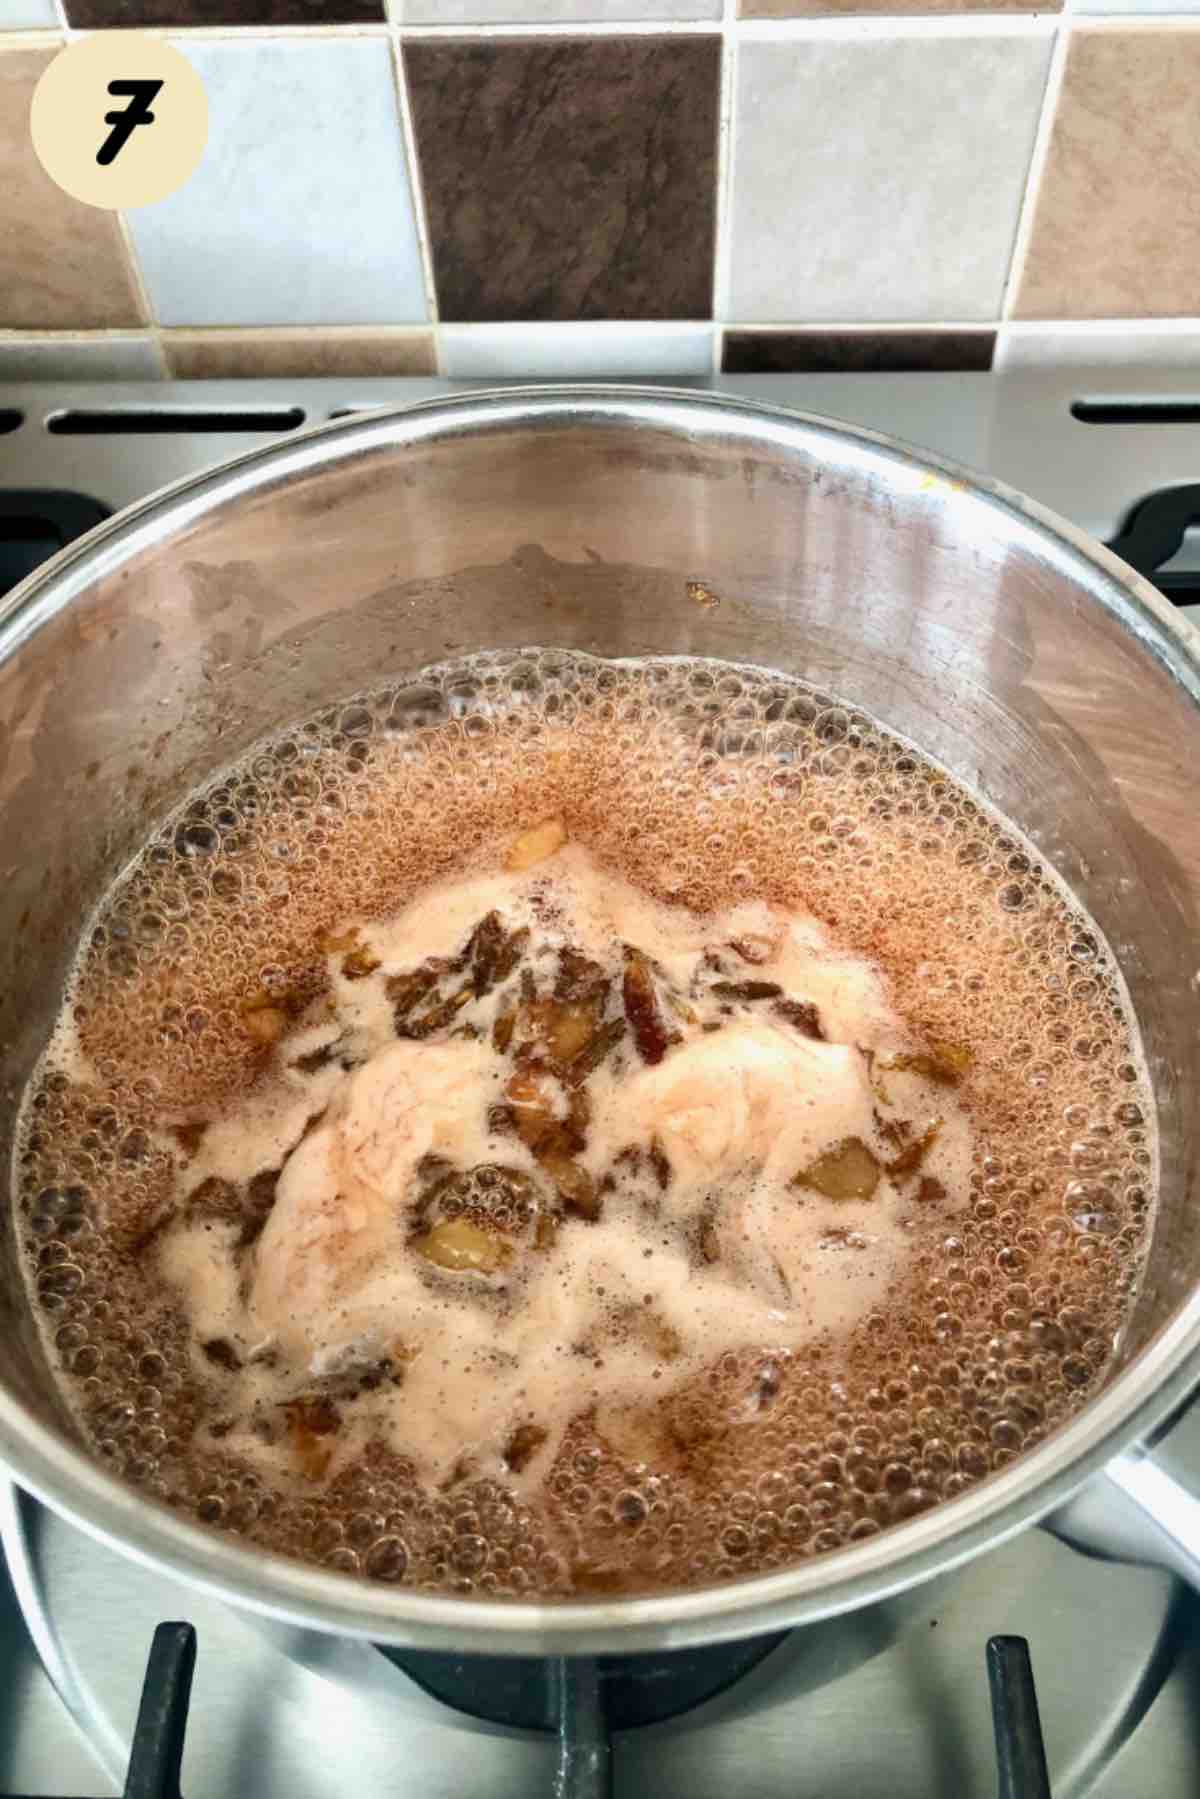
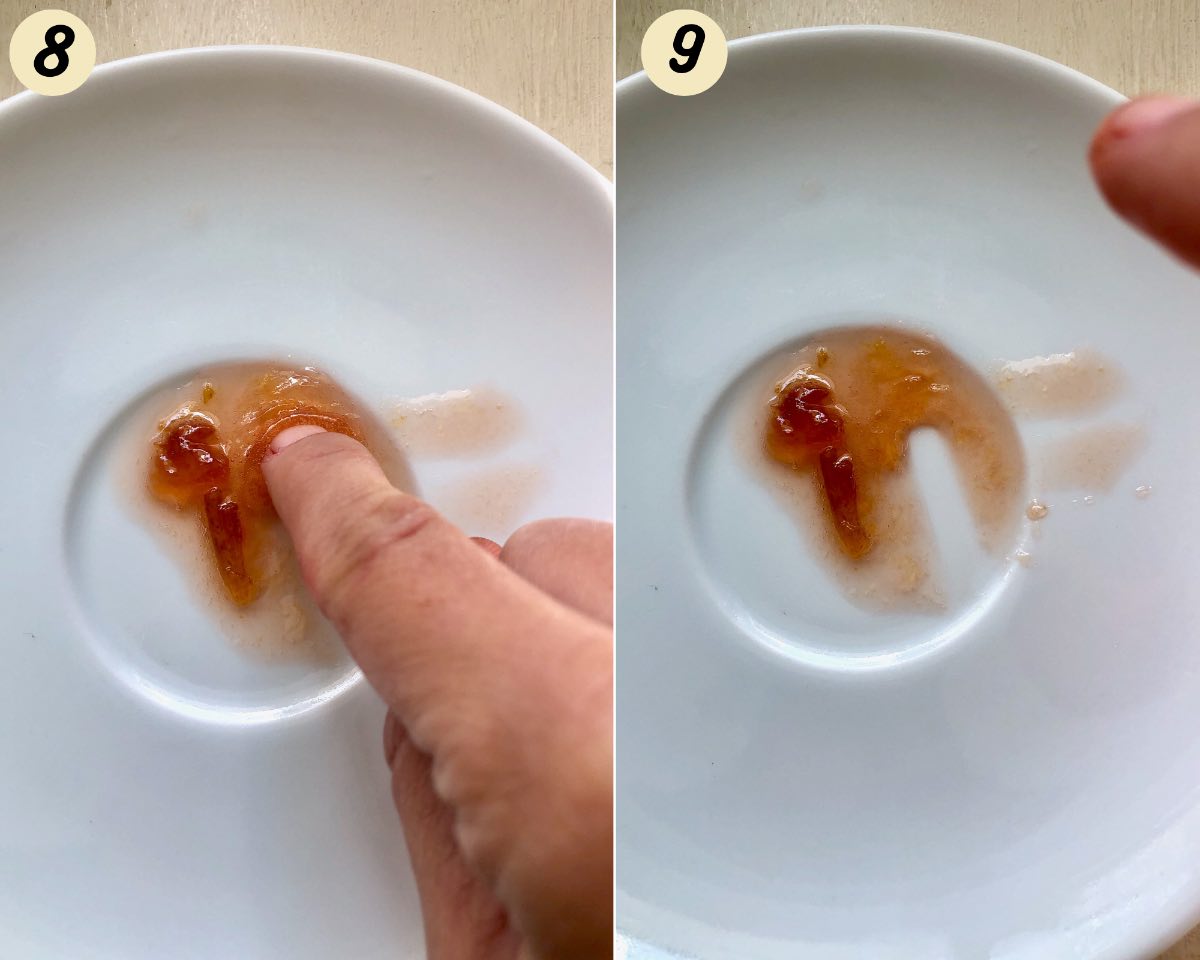
After 5 minutes of continuous boiling, take the pan off the heat and test if your jam has reached its setting point by placing a small amount of mixture on the saucer straight out of the freezer.
Put that plate in the fridge for 1-2 minutes, take it out and push the jam gently with your finger. If it wrinkles and stays in place it’s ready, if it doesn’t, put your mixture back onto boil and check again after 2-3 minutes repeating the process until you get the set.
If you own jam thermometer or one of the digital ones, your jam will have reached setting point at 105°C/221°F. Personally, I like using my digital thermometer together with cold plate test, just to make sure.
***Quick Tip*** I got the set after initial 5 minutes of rolling boil + extra 2 minutes.
Once your jam is ready, now is the time to remove any frothy scum that might have formed on top and to remove any flavourings.
***Quick Tip*** Removing the froth is not necessary. It will give you clearer jam but if you are not bothered you can simply skip this step.
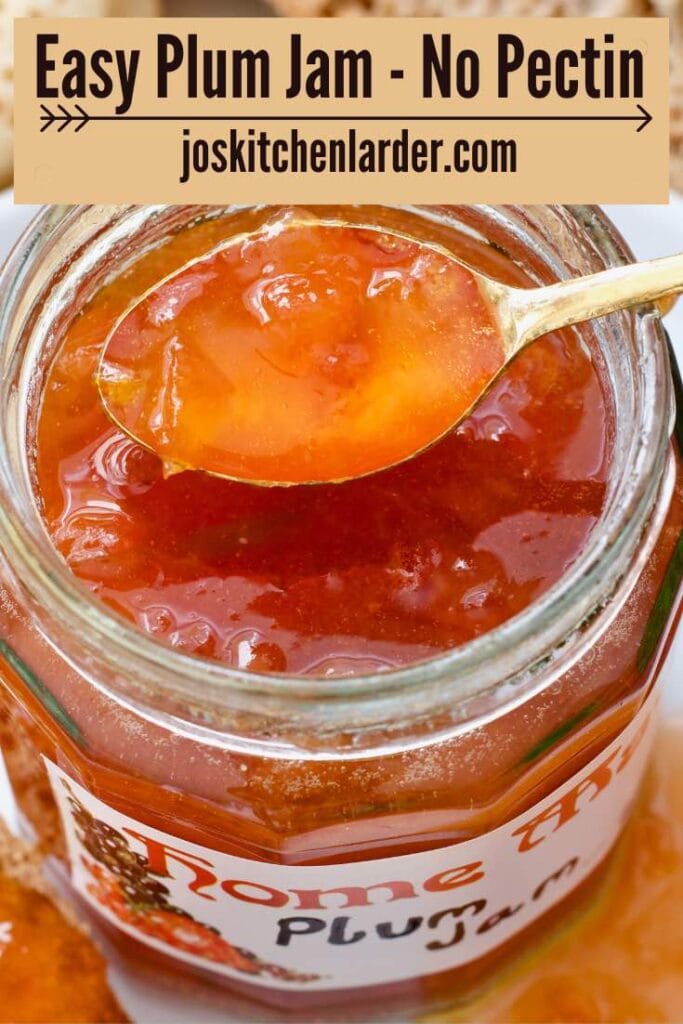
Allow your jam to rest for couple of minutes and then pour it into prepared, sterilised jars almost all the way to the top, put on and tighten the lids and leave to cool.
You will hear the clicking noise as jam cools down and jars seal and there will be no bubble in the lid as you press down on it. It may take some time for it to happen from the moment you put the lids on so don't worry if it doesn't happen straight away.
Let the jars cool completely at which point you can apply your labels and store the jars away in a cool and dark place.
♨️ Sterilising jars and lids
If you want your plum jam to store well, you need to sterilise your jars and lids.
To do this, simply wash glass jars in hot soapy water and dry them stood up on a clean baking tray in the oven preheated to 140-150°C/284-300°F for 10-15 min. The jars should be straight from the oven when you pour in your hot jam.
Jar lids can be sterilised in the same way as long as they don't contain any plastic components which could melt in the oven. When in doubt, sterilise them in a pan of boiling water for 10 minutes and allow to air dry.
If your jars have rubber seals, they will need to be sterilised by boiling as oven drying will make them brittle.
Try and time your sterilisation right but if your jam is not ready by the time your jars are, turn your oven off and keep the jars and lids in the warm oven until needed.
***Quick Tip*** DO NOT pour hot jam into cold jars as temperature difference will make them shatter.
Alternative method of sterilising glass jars, lids and rubber seals would be to wash them in a dishwasher. Make sure you time it right so that they’re ready at the same time as your jam.
***Quick Tip*** Always sterilise more jars than you think you will need in case of accidents or simply underestimating the amount of jam you thought you would get.
💭 Pro Tips
Use wide and large enough pan to make jam. This will help with reaching jam setting point as there will be enough surface area for extra liquid to evaporate and enough height to reach that rolling boil without mixture boiling over.
If reusing metal lids for your jars make sure they have no signs of rust.
Cutting de-stoned plums into small pieces will help them break up and release their juices.
Sugar should only be added once plums have had a chance to soften. If added too early it will make skins go hard.
Make sure your sugar is fully dissolved. This will prevent it from crystallising later as your jam cools down.
You can adjust the amount of sugar depending on the sweetness of your plums and according with your taste. However, don't go below 1:¾ ratio (1 kilo plums, de-stoned weight, to 750g of sugar) as sugar is not just for sweetness here. It's also a preservative that will keep jam from spoiling.
My plums were really tart and weighed 870g after de-stoning. I used 700g sugar to achieve that sweet yet not overly so flavour I like so slightly more than minimum of 650g for that weight of plums.
If the plums you're using are very sweet you can use minimum amount of sugar advised which is ¾ of weight of de-stoned plums.
Take the pan off the heat when checking for set so that you don't overcook the jam.
Plum jam will take time to fully set in jars and it is completely normal for it to be runny, almost liquid like as you're pouring it into jars so don't panic. However, it is a soft set jam so bear that in mind.
🍽 Equipment
You don't need any specialist equipment to make this jam. There are, however, some helpful gadgets which you could find useful if you are thinking of venturing into the world of preserves.
Large pan or preserving pan – I must say I still don't own a preserving pan and have been using my old trusty stock pot or one of my larger saucepans for making my jams (depending on quantities).
Having said that, ensure you always use pan that is big enough for the batch you're making and for larger quantities preserving pan might be a way to go.
Jam Thermometer – Super simple gadget for jam makers who don't want a fuss that comes with freezing saucers and the "wrinkle test".
Personally, I use my trusty digital thermometer together with cold saucer "wrinkle" test just in case.
Jam Funnel - Something I still don't own that is highly recommend by seasoned preserve makers as it allows for much cleaner transfer of your jam from pan to jars.
Wooden Spoon - Long, wooden spoon is perfect for stirring.
Skimmer Spoon - To remove frothy scum from the top of the jam.
🥡 Storing
As long as you keep your plum jam in well sterilised jars that created that vacuum effect (you hear a little click noise few moments after tightening your lid on a jar), it should last good few months, even up to a year.
Make sure to store it away from direct sunlight and in a cooler and (if possible) darker place. I keep mine at the back of one of my kitchen cupboards.
Once opened, make sure you keep your jam in the fridge and use within a month or so.
***Quick Tip*** Use clean spoon every time you take some jam out of the jar. This will prevent contamination which would reduce its shelf-life.
📖 Variations
My no-fuss, easy plum jam is very basic and doesn't contain any spices or extra flavourings except lemon juice for acidity and to add a bit of extra natural pectin.
You can, however, make this jam your own by adding some extras like star anise, cinnamon stick or few cardamom pods.
If you don't have whole spices you can add ground ones just be careful with quantities.
For a bit of a kick you could add some fresh ginger (either grated or few small chunks that can be easily removed).
Some vanilla extract, touch of brandy or perhaps orange rind would work well too.
Mixing plums with other seasonal fruits like apples or blackberries will work really nicely. Make sure to adjust the sugar according with the overall weight of used fruit.

🍴 Serving suggestions
There are so many wonderful ways of serving this easy plum jam.
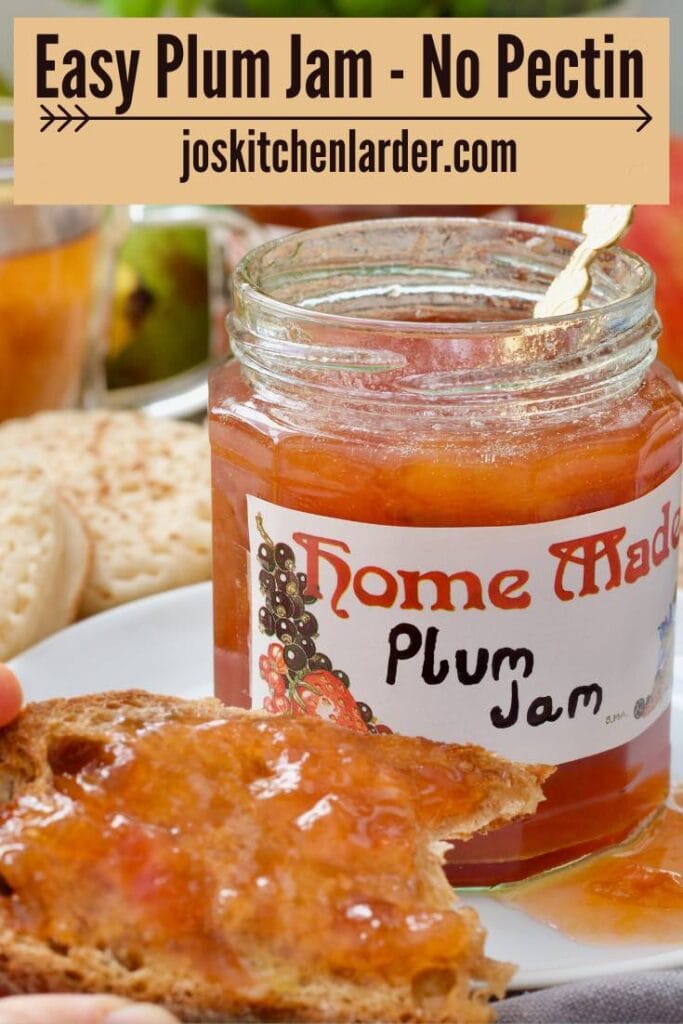
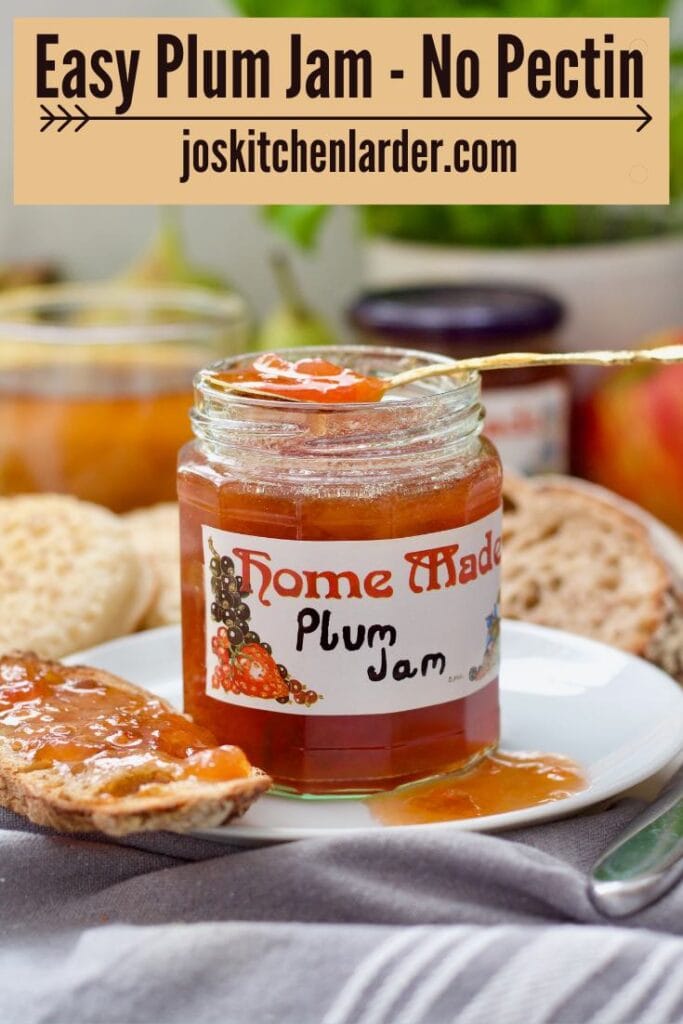
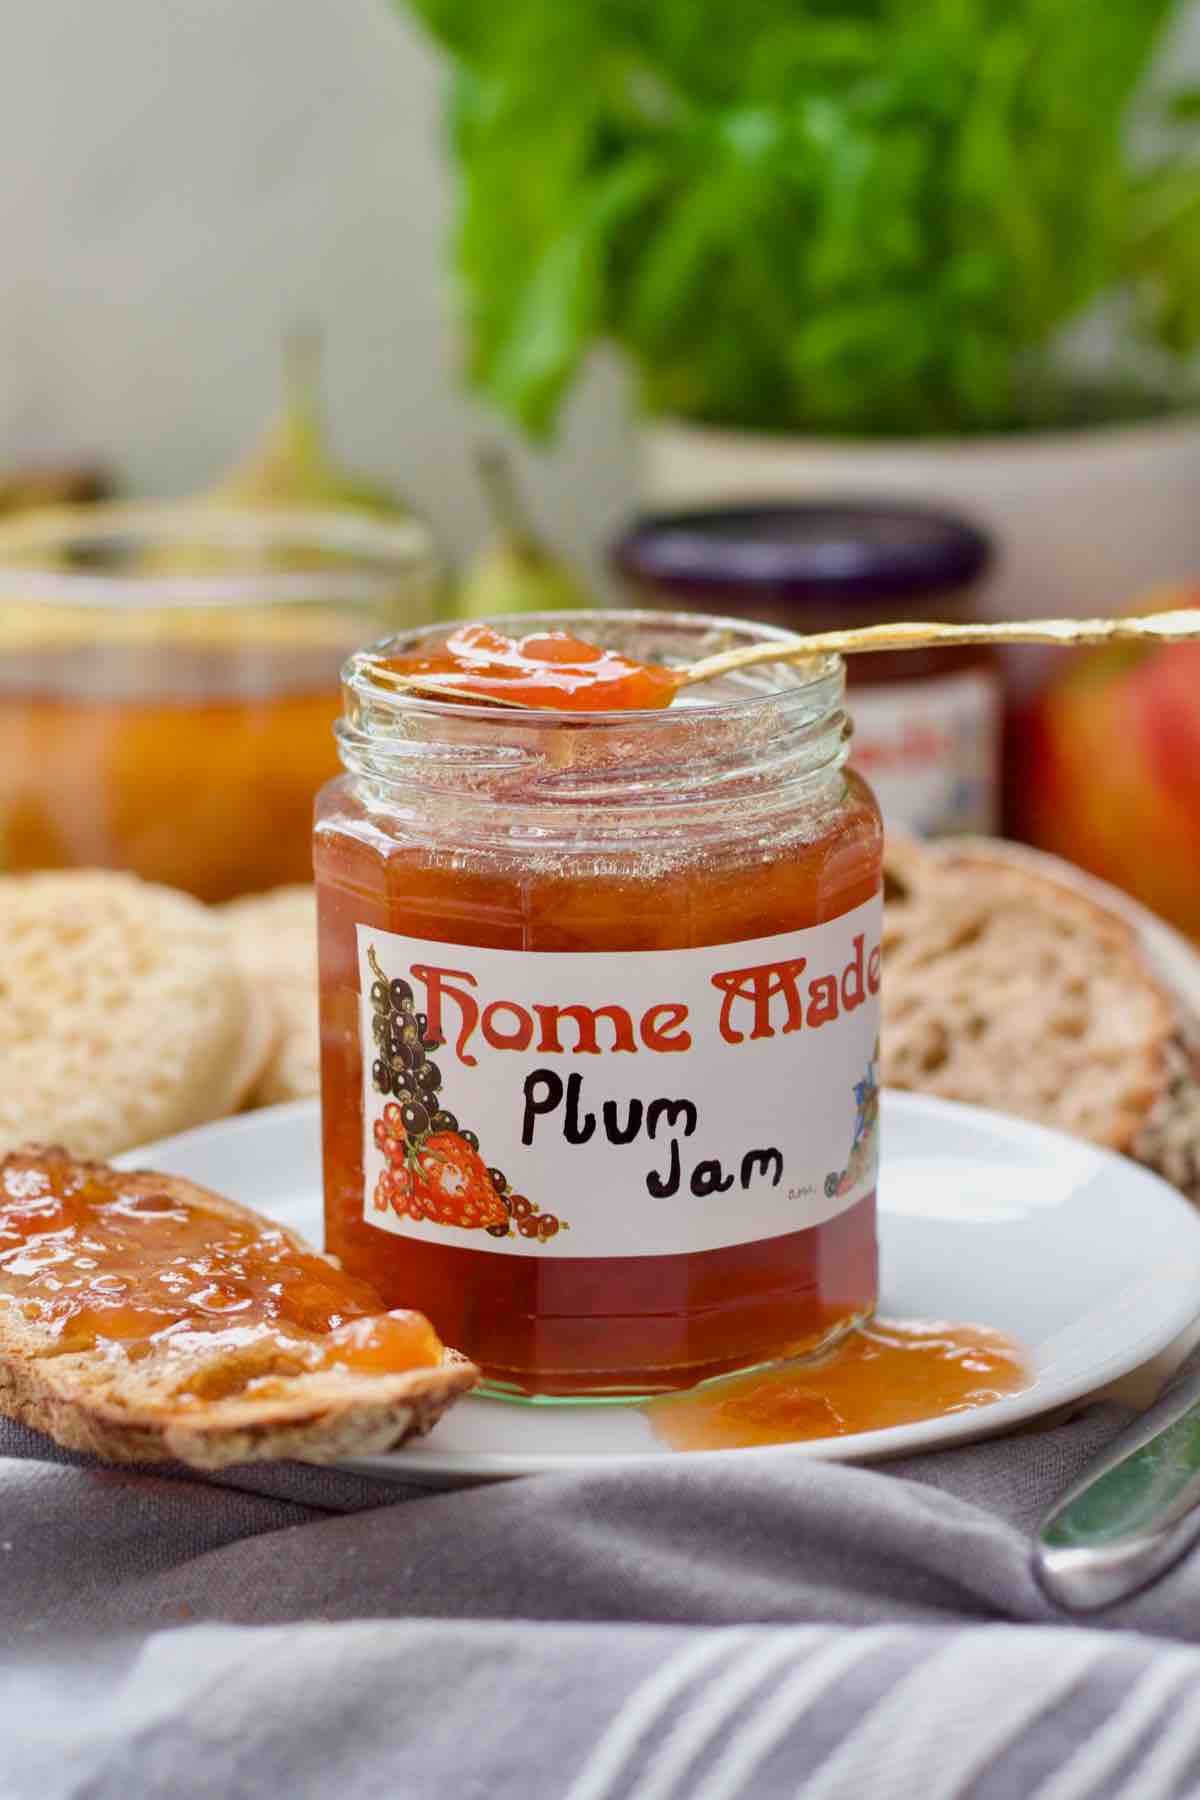
You cannot beat simple toast and in our house it's most likely our homemade sourdough or no-knead wholemeal bread. It works beautifully on crumpets too.
A nice dollop stirred through your porridge on a chilly morning will go down a treat or spooned over some lovely fluffy pancakes or delicious crepes, yum!
But think beyond breakfast and you can use it as a filling in homemade cakes, jam tarts and of course on scones with your afternoon tea!
Also, if you've seen my recipe for Polish Faworki (deep fried pastry ribbons), we love them with just a little bit of plum jam spooned over the ends.
❓ FAQ
Lemon juice adds some natural pectin to help with jam setting and its acidity helps balance the sugar.
Yes, this recipe is naturally vegan and also gluten-free.
That might happen sometimes in which case simply keep this particular jar in the fridge. There is nothing wrong with jam but as seal wasn't created it should be kept in the fridge and eaten within a month or so.
There is absolutely no need to do that. Plum skins will soften nicely and are not unpleasant at all plus they contain lots of goodness and natural pectin that will make the jam set.
Yes you can. If they were frozen already de-stoned/pitted and cut into chunks you can start jam process from frozen by simmering them them in the pan until they are ready for the sugar.
If they were frozen whole, simply defrost them first and then proceed with recipe.
Have you tried my Easy Plum Jam recipe?
Please consider giving it ⭐️⭐️⭐️⭐️⭐️ rating in recipe card below and share your views or tips in the comments.
😋 More fruity recipes you might like
Easy Strawberry Coulis (Strawberry Sauce)
Stewed Pears with Cinnamon and Vanilla
📋 Recipe
Easy Plum Jam (No Pectin)
Equipment
- 4 350ml (12 oz) jars with lids
- small plates/saucers
Ingredients
- 1 kg plums any variety, see notes
- 700 g caster sugar see notes
- 2 tablespoon lemon juice see notes
Instructions
- Place two small plates or saucers in the freezer. You will need them for "wrinkle (cold plate) test" (checking whether your jam has reached setting point).Sterilise the jars. For details see - Sterilising Jars paragraph above.Wash, halve and de-stone the plums. Cut each half into small chunks and put them into large pan/saucepan or preserving pan.1 kg plums
- Place the pan on a low heat and let the plums release their natural juices and simmer gently until softened (15-20 minutes) stirring frequently to prevent them from catching. ***Quick Tip*** Plums release enough natural juices so there is no need to add any water to get them going.1 kg plums
- Next, add sugar and lemon juice and give it all a good stir. If adding any spices/flavourings now is the time to do that too. Keep the pan on low heat stirring the mixture until all the sugar dissolves (approximately 5 minutes).700 g caster sugar, 2 tablespoon lemon juice
- Increase the heat to medium and bring mixture to rolling boil. Continue boiling for 5 minutes.
- After 5 minutes of continuous boiling, take the pan off the heat and test if your jam has reached its setting point by placing a small amount of mixture on the plate/saucer straight out of the freezer. Put that plate in the fridge for 1-2 minutes, take it out and push the jam gently with your finger. If it wrinkles and stays in place it’s ready, if it doesn’t, put your mixture back onto boil and check again after 2-3 minutes repeating the process until you get the set.If you own jam thermometer or one of the digital ones, your jam will have reached setting point at 105°C/221°F. Personally, I like using my digital thermometer together with cold plate test, just to make sure.***Quick Tip*** I got the set after initial 5 minutes of rolling boil + extra 2 minutes.
- Once your jam is ready, now is the time to remove any frothy scum that might have formed on top and to remove any flavourings. ***Quick Tip*** Removing the froth is not necessary. It will give you clearer jam but if you are not bothered you can simply skip this step.Allow your jam to rest for couple of minutes and then pour it into prepared, sterilised jars almost all the way to the top, put on and tighten the lids and leave to cool.
- You will hear the clicking noise as jam cools down and jars seal and there will be no bubble in the lid as you press down on it. It may take some time for it to happen from the moment you put the lids on so don't worry if it doesn't happen straight away. Let the jars cool completely at which point you can apply your labels and store the jars away in a cool and dark place.
Notes
- Nutritional information is per jar based on 4 x 350ml (12oz jars), is approximate and should be treated as a rough guideline only.
- Any type of plums will work here. However, colour and level of sweetness of your jam will depend on variety of plums used. The weight of plums is before de-stoning. After removing stones I was left with 870g (30.6oz) of plums.
- I used golden caster sugar but regular caster or simple granulated sugar will be good too.If you have preserving sugar you can absolutely use it too but DO NOT use jam sugar as it contains added pectin which is not needed here. It would make your jam really stiff and jelly like.
- If using different amount of fruit make sure to adjust the amount of lemon juice accordingly.
Nicki says
First time making jam! Super easy, but getting to the set point took a really long time, hopefully it'll be set when we come to use them! One question, how long can you keep jam made like this (ie. not canned)? Do the jars need to be kept in the fridge? Once opened, how long can I keep them in the fridge? Thanks so much, it was fun to try. I still have a bucket load of plums to get through, so think I may need to freeze them. Can I make jam with frozen plums?
joskitchenlarder says
Hi Nicki, Happy to hear you found the recipe easy. Timings for reaching the set point definitely differ but glad to hear you got there in the end. Answers to all your questions are in the blog post but here goes 😊: As long as your jars were sterilised and sealed properly you can keep them in a cool, dark place/cupboard/larder for a long time, even up to a year (I've kept mine even longer). Once opened keep them in the fridge and use within a month. As for frozen plums you can definitely use them to make this jam, see Frequently Asked Questions for details. 😊
Nicki says
That's great, thank you for taking the time to reply. I have now checked the blog too! About to start batch 2 as the first batch has been consumed already! 🙂
joskitchenlarder says
Second batch already, that's amazing Nicki. Enjoy! 😊
Traci says
Can I use frozen plums?
joskitchenlarder says
Yes you can. Take a look at Frequently Asked Questions for details.😊
Christine Kent says
My neighbour gave me some plums yesterday from his garden. I have made plum jam before many years ago but decided to google and found your recipe. I loved the simple step by step instructions so easy to follow. I am going on holiday to the Lake District tomorrow with family, a jar of my jam will be going with me.
joskitchenlarder says
Thank you so much Christine for such a lovely feedback! Enjoy your holiday and your jam.😊
Gill says
First time jam maker and your detailed guidance - with a picture of the wrinkle test - was invaluable. I will be making this jam again for definite. Looking forward to sharing my produce with friends and family.
joskitchenlarder says
So pleased to hear Gill and thank you for the lovely feedback.😊
Cheryl says
I made your jam recipe tonight with the very last of the plums from our tree. I will leave a review once we have eaten some. I'm writing to ask if you might know why my jars didn't seal? I made sure there was no jam anywhere on the rim or the area where the ring goes. None of my jars sealed and I followed your instructions to the letter. Thank you for your time and thank you for sharing your recipe. I can't wait to try the jam!
joskitchenlarder says
Hi Cheryl,
There might be different reasons as to why jars didn't seal. I assume the jam was hot and the jars were freshly sterilised and at least warm? Sometimes when the lids are being reused they might not seal properly or slight damage to the rim of the jar might prevent it from sealing properly as well so it's good to check them thoroughly before using. Also it takes quite a while and you might hear the lids pop even several hours after closing the jars with the vacuum being created as your jam cools down. I hope this helps a bit and you enjoy the jam. 😊
Rhumi says
Great recipe. Wondering why you skipped the instructions for water bath canning before storage. ? If you don't can it with boiling water or pressure, you have to put it in the fridge, right?
joskitchenlarder says
Hello Rhumi, I haven't skipped the instructions for water bath, I just don't use this method myself when making preserves. In the UK we usually pot hot jam into hot sterilised jars and with sugar acting as natural preservative this method has always worked for me. Of course you need to make sure that each jar has sealed properly (there is information on that in the method of the recipe itself and in the "storage" section as well). I usually keep my preserves at the back of the cool(ish) cupboard and in the fridge only once opened. Jam lasts for months and I have never had any issues. This is of course the way I do things but feel free to water bath your jam as added precaution, I know it's quite a thing in the US. I hope that helps.
Colleen says
I just made this with some yellow plums a friend gave me. Very easy and delicious.
joskitchenlarder says
So great to hear, thanks Colleen!☺️